If you’ve seen projectors installed in modern living rooms, you’ll notice they’re often placed either on a ceiling mount or a sturdy shelf that’s centered with the viewing area, ensuring a clear line of sight to the screen. You should consider factors like throw distance—which is the space needed between the projector and your screen—along with easy access to power outlets and minimizing interference from ambient light. Before choosing your setup, it’s essential to assess your room’s layout, furniture placement, and potential obstructions, since each decision affects image quality and room function.
Key Takeaways
- Place the projector centrally aligned with your screen, at the appropriate throw distance for optimal image size and clarity.
- Mount the projector on the ceiling or a high shelf to maximize space and keep hardware discreetly out of sight.
- Avoid positioning near direct light sources or windows to minimize glare and enhance image contrast.
- Use cable management solutions and concealment (cabinets, decorative boxes) to maintain a tidy, integrated look with your room decor.
- Ensure the projector is well-ventilated and easily accessible for maintenance, while not obstructing pathways or seating areas.
Choosing the Perfect Spot for Your Projector
When deciding where to put a projector in your living room, it’s important to contemplate several technical factors that will affect both image quality and room aesthetics. First, assess your room’s size to determine the optimal throw distance, guaranteeing the projector provides a crisp image without distortion. Proper speaker placement is vital; position your speakers so they don’t obstruct the projector’s line of sight, and maintain balanced audio distribution. Many Hisense models include advanced Dolby Atmos sound that enhances immersive experiences when properly positioned. Avoid direct light sources to minimize glare, and select a spot where the projector lens aligns centrally with your screen. You should also focus on cable management—use shelves, cabinets, or discreet channels to keep wires organized and out of view, supporting both safety and a clutter-free appearance. Finally, guarantee easy access for maintenance and power supply needs. For the best experience, make sure to use a projector screen or a smooth, neutral-colored wall, as this will significantly enhance brightness, contrast, and color accuracy compared to projecting onto textured or colored surfaces.
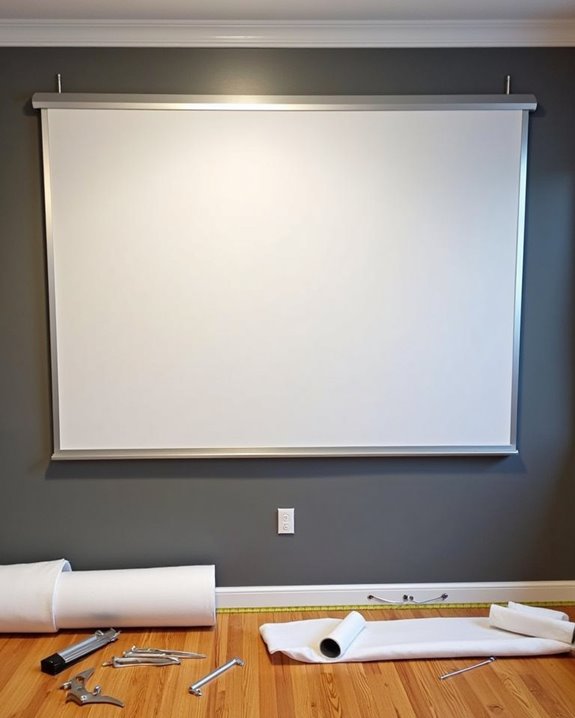
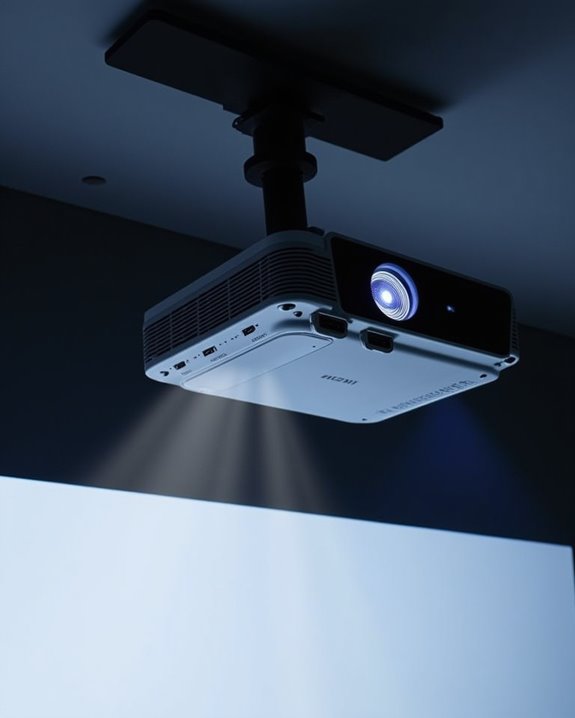
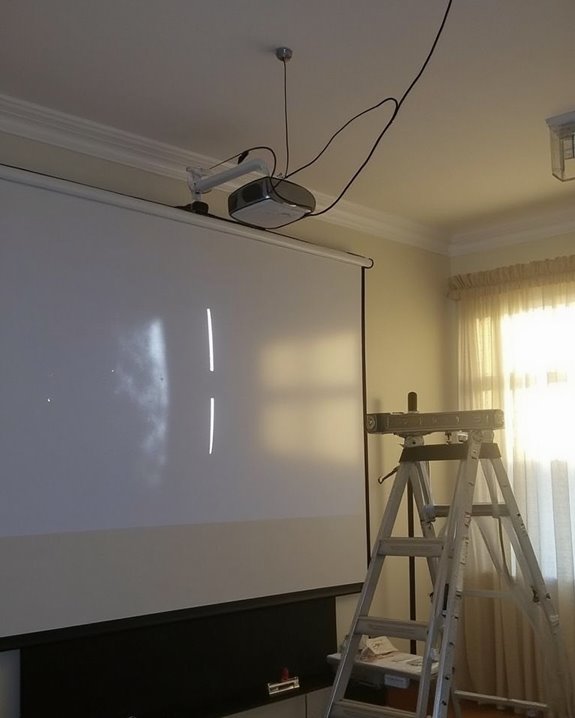
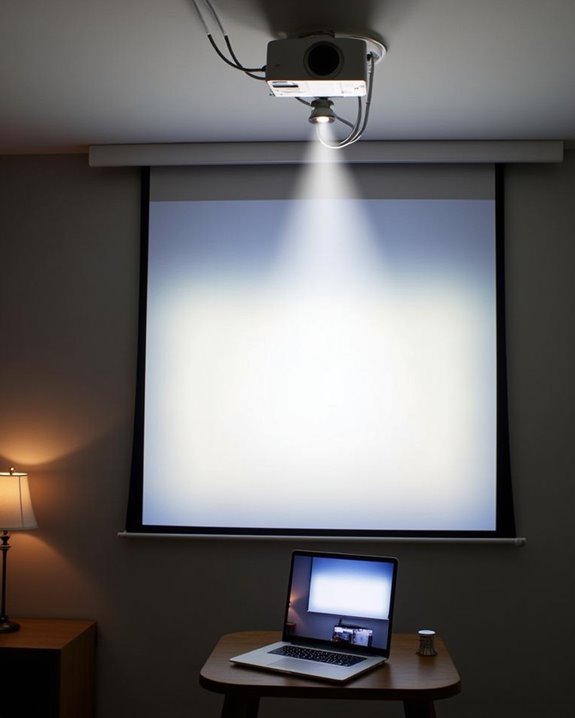
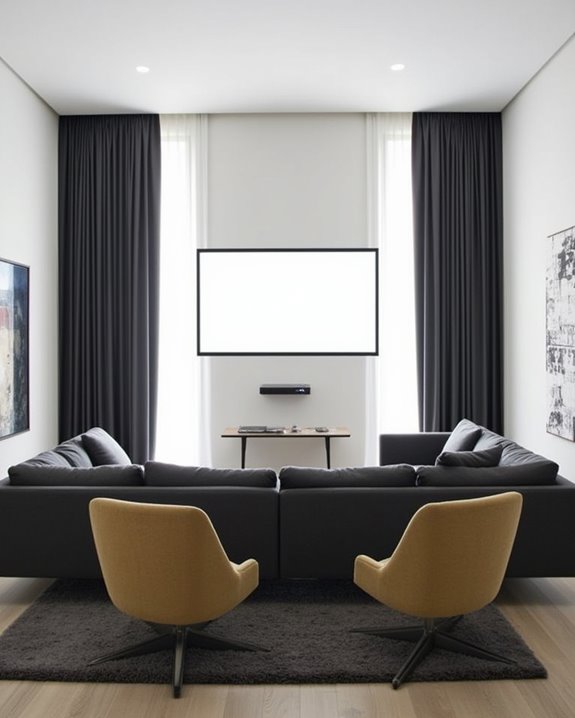
Ceiling Mount Solutions for Modern Living Rooms
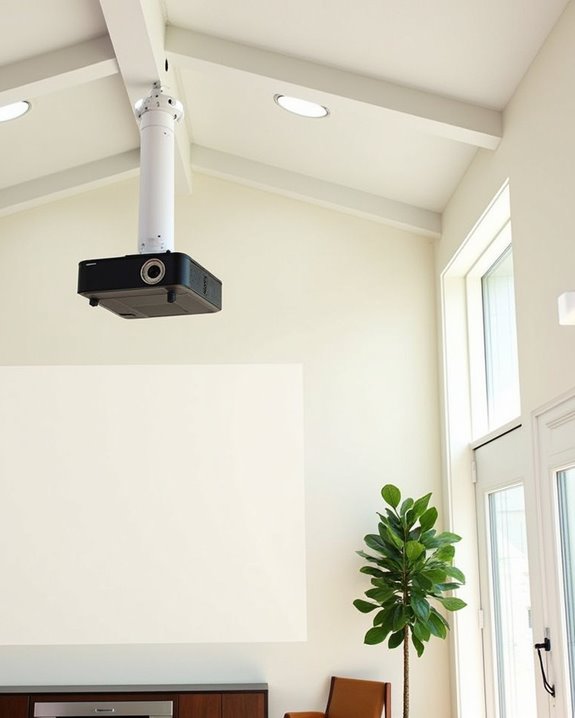
Selecting a ceiling mount for your living room projector lets you maximize both space and visual quality, especially in modern layouts where clean lines and open areas are valued. Ceiling mounts provide stable projector placement, freeing up floor and surface space while guaranteeing the image aligns precisely with your screen. To assure a secure and functional setup, you’ll need to evaluate your ceiling’s structural type and choose a mount compatible with your projector’s specifications. Look for mounts with tilt, swivel, and extension arms for ideal adjustment, and consider quick-release features for easy maintenance. For an efficient installation, focus on these four key aspects:
- Confirm mount compatibility with projector weight and model.
- Anchor mounts into ceiling studs for maximum stability.
- Guarantee proper power and cable access.
- Fine-tune projector alignment using adjustable mount features.
Many modern projectors also feature auto keystone correction which can simplify image alignment once the projector is mounted. When selecting a ceiling mount, remember that projector noise levels can be a factor—especially if the projector is positioned directly above seating, where the fan noise might be distracting during quiet scenes.
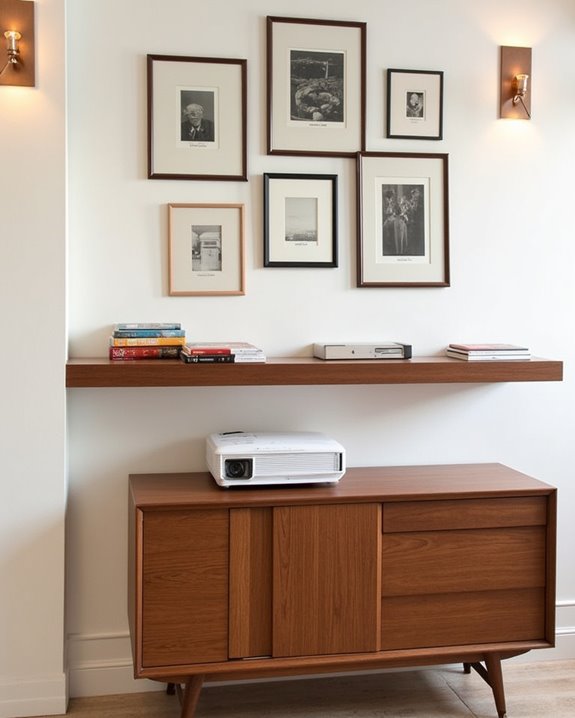
Utilizing Shelves and Cabinets for Flexible Placement
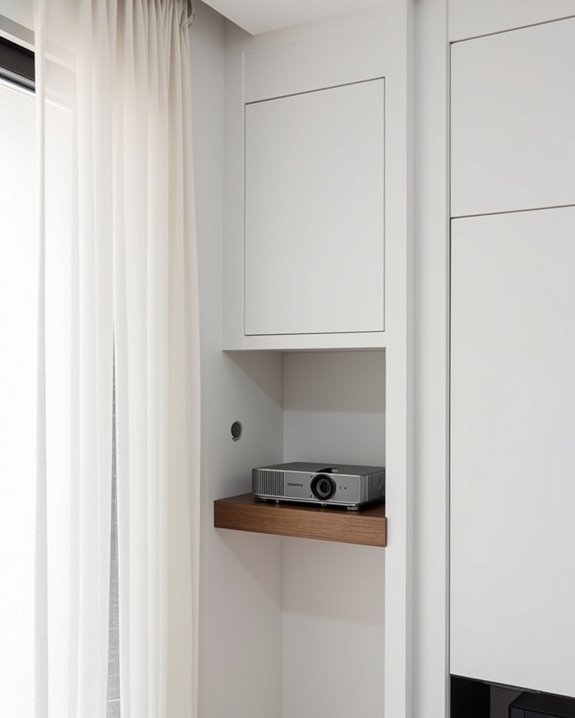
If you’re seeking a versatile and cost-effective way to position your projector, shelves and cabinets offer flexible placement options that can easily adapt to your living room’s layout. Unlike projector wall mounts, shelves are simple to install, often requiring minimal modification, and can be placed near power outlets to streamline setup. Cabinets provide the added benefit of concealment and protection from dust or accidental knocks, while also reducing projector fan noise—a key acoustic consideration. Whether you opt for a minimalist floating shelf, a repurposed bookshelf, or a custom-built cabinet, ensure proper ventilation to prevent overheating and place units away from direct light sources to avoid glare. For optimal results, consider that hidden projector mounts and shelves help conceal projectors when not in use, maintaining both functionality and a clean aesthetic. Select designs that integrate with your décor and allow for future upgrades without obstructing your room’s flow. Also, choosing placement options compatible with ultra-short throw projectors can maximize image size while minimizing space usage.
Mobile Stands and Temporary Setups

Although permanent installations are popular, mobile stands and temporary projector setups offer unmatched flexibility for living rooms where needs and layouts often change. With portable stands, you can easily reposition your projector, accommodating various activities like movie nights or presentations. These stands commonly provide height adjustment, stability, and sometimes even double as functional furniture. Wireless connectivity simplifies moving your projector without worrying about cable management, while sound integration options, such as built-in speaker shelves, enhance the audio experience without cluttering the space.
Proper distance and angle are essential for optimal image quality with mobile setups, as positioning the projector incorrectly can reduce clarity and viewing comfort.
When choosing a mobile stand or temporary setup, consider the following:
- Height adjustment for precise screen alignment.
- Sturdy construction and anti-slip surfaces for stability.
- Wheels or lightweight design for easy portability.
- Space for sound integration and wireless connectivity components.
These features ensure practical, high-quality projection in any living room arrangement.
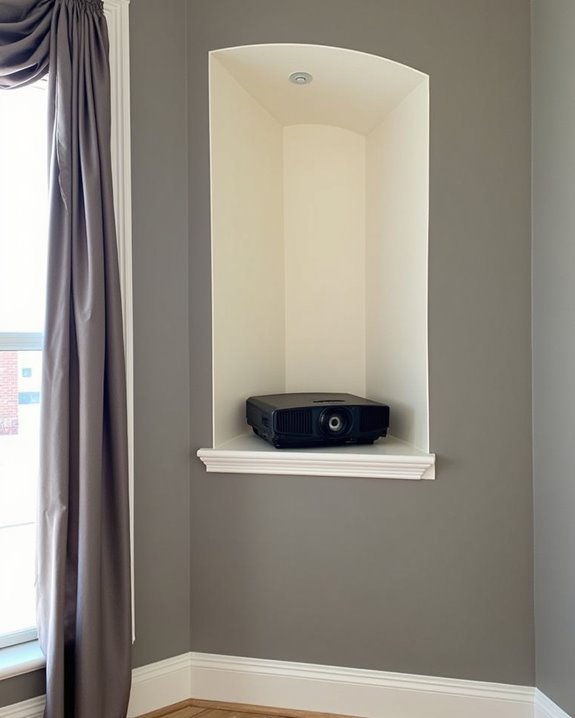
Hiding Your Projector for a Seamless Look
When you want your projector setup to blend seamlessly with your living room, concealing both the projector unit and its supporting components becomes a priority. Begin by installing the projector above furniture or near the ceiling, which keeps it out of direct sightlines and reduces the risk of obstruction. For decorative concealment, use baskets, plants, or art pieces strategically to obscure both the projector and supporting hardware, maintaining aesthetic consistency. Cable integration is critical—use cord covers or conduits along baseboards, employ cable ties to manage length, and consider routing cables through walls or under floors when possible. Decorative boxes or storage units can hide small equipment, while power strips placed under tables minimize visible clutter. In many updated homes, discreet tech solutions like hidden projector cartridges or professionally mounted equipment help maintain a clean, unobtrusive look without sacrificing functionality. Always ensure accessibility for operation and maintenance.
Managing Lighting for Optimal Image Quality
Managing lighting in your living room is critical for achieving ideal projector image quality, as both ambient and direct light can markedly affect brightness, contrast, and clarity. Effective lighting control and room darkening strategies will help you get the most out of your projector, especially in multipurpose living spaces with high ambient light. Projectors with higher lumen ratings—typically between 2,500 and 5,000 lumens—are best for brighter rooms, while darker wall and ceiling colors help minimize unwanted reflections. For peak performance, consider the following:
- Use blackout shades or heavy curtains to block natural light.
- Choose dimmable or switchable artificial lighting.
- Paint walls and ceilings in medium to dark colors to reduce reflections.
- Avoid placing your projector near direct light sources to minimize glare.
When selecting a projector for your living room, be aware that all lumens are not equal in effectiveness, and ANSI lumens provide a more accurate measure of usable brightness than generic lumen ratings.
These steps ensure clear, vibrant images.
Ensuring Proper Throw Distance and Screen Alignment

Once you’ve controlled the lighting in your living room, it’s important to focus on the projector’s throw distance and screen alignment to achieve sharp, properly sized images. Begin by calculating the throw distance using your projector’s throw ratio, which is the lens-to-screen distance divided by the image width. For example, a throw ratio of 2.0 means the projector should be placed 2 feet away for every 1 foot of image width. Use online projection calibration tools or throw distance calculators to determine the ideal placement, considering both minimum and maximum throw distances. When setting up, align the projector lens with the screen’s centerline both horizontally and vertically, keeping the lens perpendicular to the screen, and utilize lens shift features to fine-tune alignment without moving the projector. Short throw projectors are ideal for setups where there is limited space between the projector and the screen, allowing you to achieve a large image even when the projector is positioned just a few feet away.
Integrating the Projector With Room Decor
Though a projector can quickly become the focal point of your living room, integrating it seamlessly with your room’s decor requires a strategic balance of placement, aesthetics, and practicality. To achieve a visually cohesive setup, prioritize wall color coordination by selecting neutral tones that minimize glare and enhance projected images. Consider using artwork display techniques, such as projecting digital art when the projector isn’t in use, to blend technology with decor. Concealed installations, like ceiling mounts or hidden cabinets, help maintain a clutter-free environment. For ideal integration, follow these guidelines:
- Match projector and furniture colors for a unified look.
- Use cable management systems to hide wires and maintain tidiness. Cable management solutions such as sleeves, clips, or ceiling raceways can keep cords organized and out of sight, contributing to a polished appearance.
- Arrange lighting to prevent screen glare while preserving ambiance.
- Incorporate multi-functional furniture to maximize space efficiency.
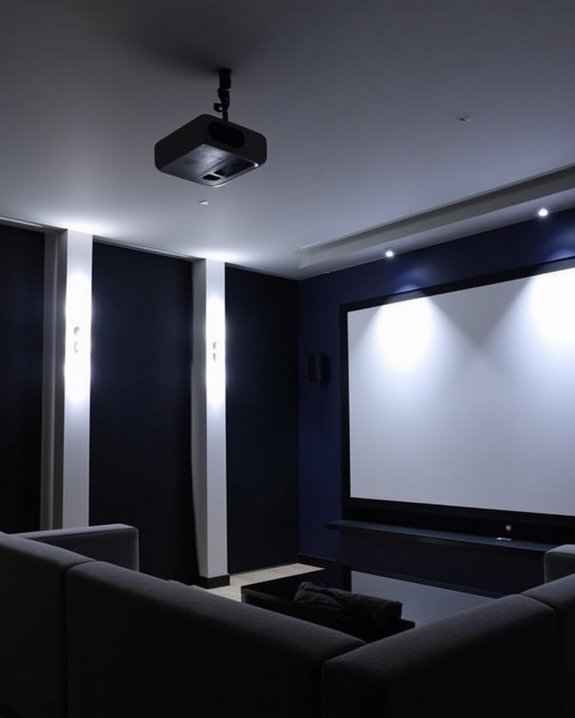
Optimizing Seating and Viewing Angles
When you’re optimizing seating and viewing angles for your living room projector setup, it is essential to prioritize both comfort and image quality by carefully considering screen height, viewing distance, and the orientation of your seating arrangement. Position the center of the screen at eye level to minimize neck strain, ensuring a vertical viewing angle near 35 degrees for comfort. Calculate your seating distance using the formula Distance x 0.84 = Screen Size, aligning with the recommended maximum viewing angle of 36 degrees. Set up seats so everyone maintains a horizontal viewing angle of about 40 degrees for immersive visuals. Proper projector alignment—using leveling tools and keystone correction—avoids image distortion. Placing the projector lens centrally with the screen is a best practice for optimal alignment and image quality. Integrate soundproofing strategies and acoustic treatment options to enhance audio clarity, complementing the optimized visual experience.
Maintenance Tips for Long-Lasting Performance
After arranging your living room seating and ensuring proper viewing angles, it’s just as important to focus on projector maintenance to keep performance at its peak over time. Effective cleaning tips include using a soft, dry cloth for the lens and exterior, avoiding harsh chemicals that might damage sensitive surfaces, and employing compressed air to clear dust from vents. For ventilation strategies, ensure at least 6 inches of clearance around the projector and never block the cooling vents, allowing built-in fans to function efficiently. A clean air filter prevents dust from accumulating inside the projector, which helps avoid overheating and maintains long-term reliability. Always operate your projector in a clean, smoke-free environment, and use a stable power source to prevent electrical issues. Follow the user manual for model-specific maintenance, and consider these essentials:
- Clean the lens and exterior regularly
- Check and replace air filters
- Maintain proper ventilation
- Monitor for performance changes
Frequently Asked Questions
Can I Use a Projector During the Day With Ambient Light?
Yes, you can use a projector during the day with ambient light, but you’ll need high projector brightness—at least 3,000 lumens. Managing ambient light with blackout curtains or ALR screens also helps keep images clear and vibrant.
Are Projectors Safe to Use Around Children and Pets?
Think of a projector as a lighthouse—it guides but can blind if misused. For projector safety, you’ll need child pet precautions: secure cords, shield eyes from the beam, ensure ventilation, and always supervise curious little explorers.
What Type of Screen Works Best With Ultra-Short-Throw Projectors?
You’ll want to choose screen types like CLR or ALR for ultra-short-throw projectors. They’re designed to reject ambient light, boost image brightness, and keep contrast sharp, so you’ll get the best viewing experience, even during daytime.
How Do Projectors Compare to TVS for Gaming?
You’re craving epic gaming, but here’s the twist: projectors promise huge screen size, yet TVs deliver superior picture quality and simpler setup. If you want immersive scale, projectors tempt—but TVs win for clarity and convenience.
Do Projectors Emit Any Noticeable Noise During Operation?
You’ll notice some noise levels and fan sounds when a projector’s running. Quieter models operate around 30 dB—like a whisper—while budget projectors can be louder. Eco mode usually lowers noise, making operation less distracting.