As an Amazon Associate, we earn from qualifying purchases. Some links on this site are affiliate links at no extra cost to you. Our recommendations are based on thorough research and editorial judgment.
How to Set Up a Projector for Your Home Theater System
Nearly 30% of homeowners now enjoy cinematic experiences without leaving their living rooms. You’ll find that setting up a projector correctly transforms an ordinary space into a true home theater, delivering immersive entertainment that rivals commercial venues. The process involves strategic decisions about mounting, positioning, and calibration that directly impact your viewing quality. While the task might seem technical at first glance, breaking it down into systematic steps makes it achievable for anyone with basic DIY skills. The following guide will walk you through each critical stage of the setup.
Key Takeaways
- Mount your projector securely to the ceiling with proper weight compatibility, ensuring unobstructed light path to the screen.
- Position the projector at the recommended throw distance with its lens parallel to the screen for optimal image quality.
- Install your screen centered on the wall with proper tensioning, keeping the bottom edge at least 3 feet above the floor.
- Calibrate projector settings including focus, brightness, contrast, and color to match your specific room conditions.
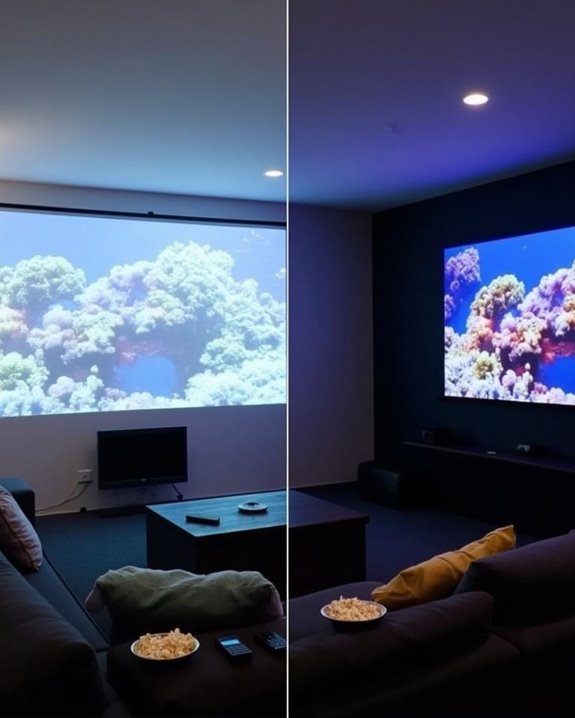
- Minimize ambient light with window treatments and control room lighting to maximize image clarity and vibrancy.
Planning Your Home Theater Space and Layout
Before diving into the technical aspects of projector setup, you’ll need to carefully plan your home theater space, which serves as the foundation for an immersive viewing experience. Aim for a room at least 15 feet wide and 20 feet long, considering basements, spare bedrooms, or garages as ideal locations due to their minimal outside noise interference.
Your seating arrangement requires careful consideration, maintaining at least 14 inches between rows, with 20 inches being perfect for comfort, especially when incorporating reclining seats. Lighting design should allow for complete control, enhancing screen visibility while complementing your decor choices. Position speakers strategically around the room, ensuring proper placement for surround sound effects while leaving adequate space for movement. Remember, the viewing distance should be calculated by multiplying the screen width by 2 for minimum distance and 5 for maximum comfort.
For the best picture quality, consider using a screen material that reduces glare and enhances image sharpness.
Recommended Products

CONVENIENT TO STORAGE AND CARRY : Compact one-piece,lightweight and folding design. You can fold the projector screen in small size and put it in your backpack or suitcase

Movie Screen Fabric: Made from white, soft-touch material, our thickened, smooth projector screen is crease-free and nontransparent, delivering brighter colors. It uses washable materials and can be washed either by hand or in a washing machine. Quality is strictly controlled, making it ideal for outdoor projector use.

Wall Mounted Fixed Frame Projection Screen (Overall Size 63.625" Tall x 109.25" Wide) (Viewing Area 120" Diagonal x 58.875" Tall x 104.5" Wide) No option for Legs or Stands with this product. Recommended for projectors with Native 16:9 Resolution
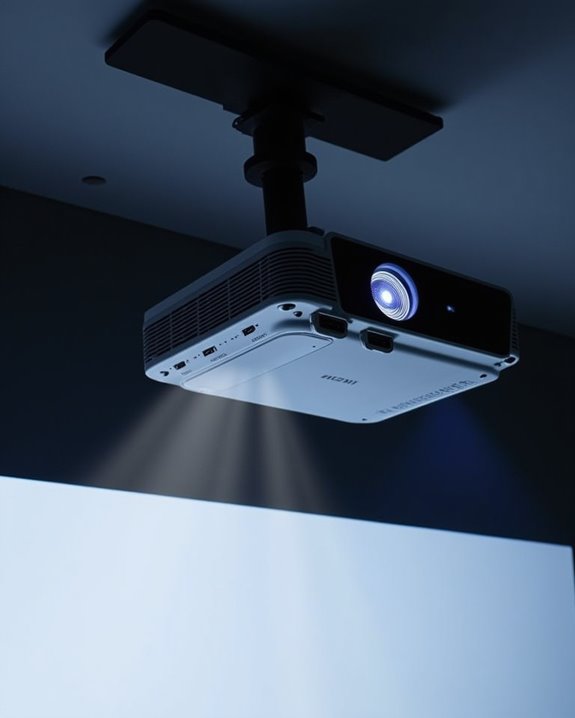
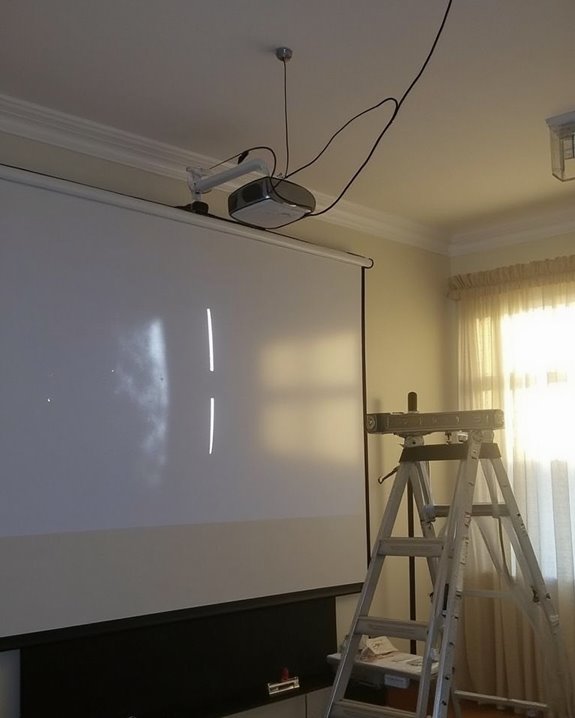
Selecting the Right Projector Mount and Installation
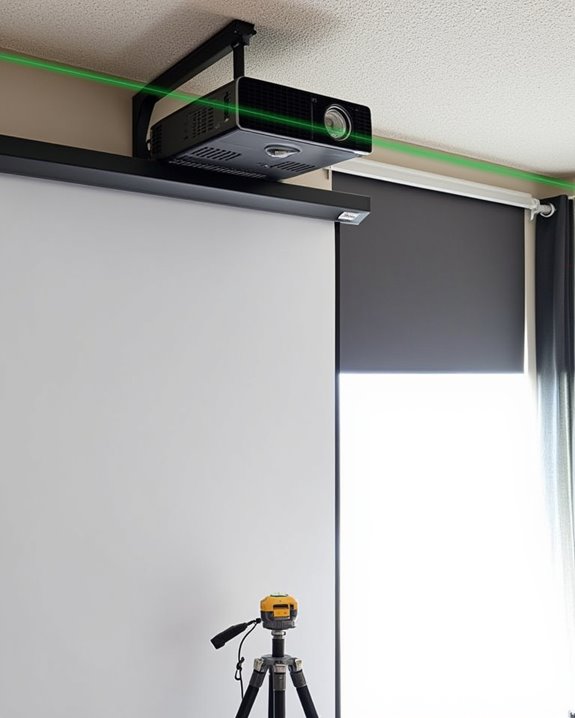
Once you’ve prepared your home theater space, selecting the appropriate projector mount becomes essential for creating an ideal viewing experience. Consider mount compatibility with your projector’s weight and attachment points before purchasing, as this determines both stability and safety during installation. Surface-mounted options attach directly to the ceiling, while pole mounts offer adjustable height and better ventilation for projectors in rooms with elevated ceiling considerations.
For installation, locate ceiling joists using a stud finder to ensure secure anchoring, and verify your projector has an unobstructed light path to the screen. Traditional mounts include a ceiling plate, optional telescoping pole, and projector attachment plate, while alternatives like adhesive mounts or ceiling grid clamps provide non-drilling solutions for renters. Choose mounts with tilt, pan, and roll adjustments to fine-tune your image alignment without repositioning the entire assembly. When selecting a projector, consider one with a 10,000:1 contrast ratio to enhance image quality and viewing experience.
Recommended Products

【Note】The projector mount used in this projector mount should have the following conditions: 1. The wall where the mount is installed should be a hard solid wall, not a hollow and weak wall; 2. The projector has 3-4 screws holes to install screws; 3. The diameter of screw holes is 3 mm or 4 mm.
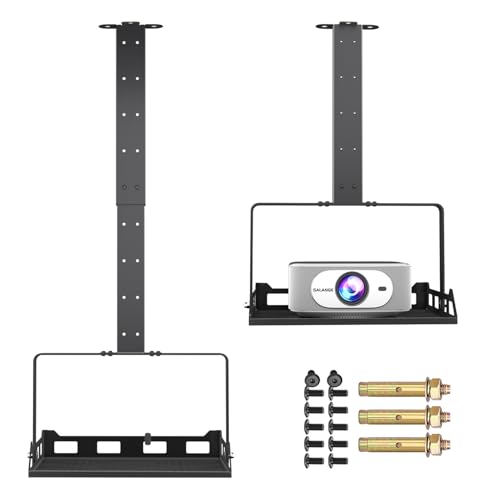
360° Rotatable Tray & 0-90° Tilt for Perfect Projection - This universal projector ceiling mount features a 360° rotatable tray and supports 0-90° tilting. Pair it with your projector’s auto or manual keystone correction, and you can get a perfectly rectangular projection on walls or screens without hanging the mount at a low height. Secure the device by driving screws upward through the multi-row heat dissipation holes on the tray bottom; the all-around side guards prevent slipping even when tilted.

Compatibility: Universal Projector Mount Bracket for Both Ceiling and Wall Installation. Applicable to mounting holes distance between 8.9’’to 12.4’’
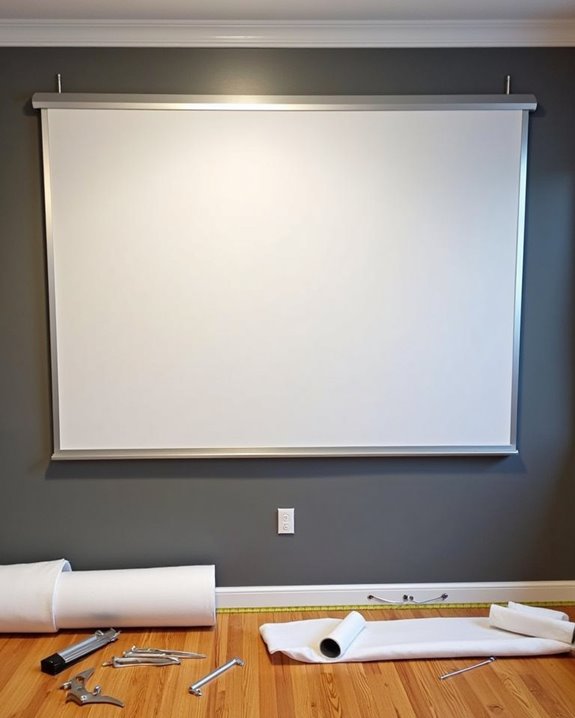
Screen Selection and Proper Positioning
Screen selection represents the foundation of your projector setup, complementing the mount you’ve just installed with a surface that will ultimately determine your viewing experience. Consider your room’s lighting conditions when choosing between white screens for dark rooms or grey screens for spaces with ambient light. Screen materials profoundly impact image quality, with specialized fabrics like da-mat offering enhanced color reproduction and contrast.
For ideal viewing, position your screen centered on the wall with the top edge at or slightly above eye level. Screen tensioning ensures a perfectly flat surface, eliminating wrinkles that could distort your projected image. If you’re creating a complete home theater experience, acoustic transparent screens allow you to place speakers behind the screen, creating a more immersive audio-visual environment while maintaining proper viewing angles for all seats. Choosing a screen with appropriate brightness levels is crucial, especially in rooms with ambient light, to maintain image clarity and contrast through ambient light compatibility.
Recommended Products

Wall Mounted Fixed Frame Projection Screen (Overall Size 65.175" Tall x 110.8" Wide) (Viewing Area 120" Diagonal x 58.875" Tall x 104.5" Wide) No option for Legs or Stands with this product. Recommended for projectors with Native 16:9 Resolution
Wall Mounted Fixed Frame Projection Screen (Overall Size 72.3" Tall x 123.8" Wide) (Viewing Area 135" Diagonal x 66" Tall x 117.5" Wide) No option for Legs or Stands with this product. Recommended for projectors with Native 16:9 Resolution

ENHANCED AUDIO EXPERIENCE – Hear Every Detail: AcousticPro UHD screen fabric allows sound to pass through with minimal attenuation, perfect for setups with speakers placed behind the screen
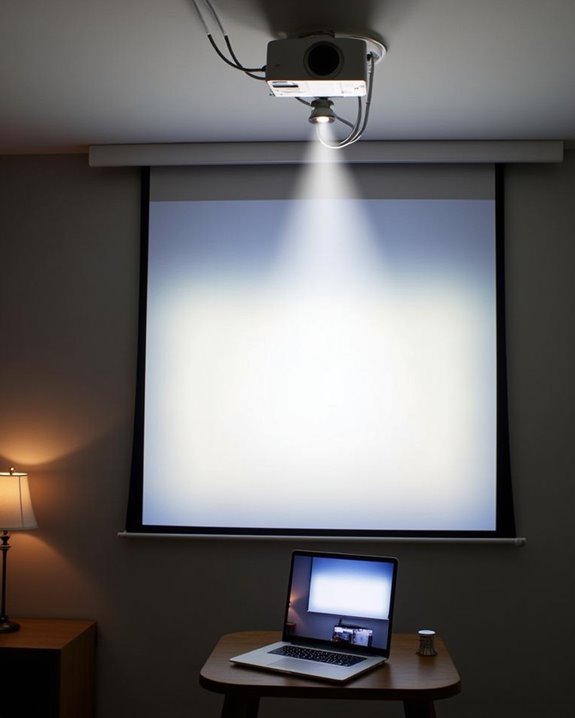
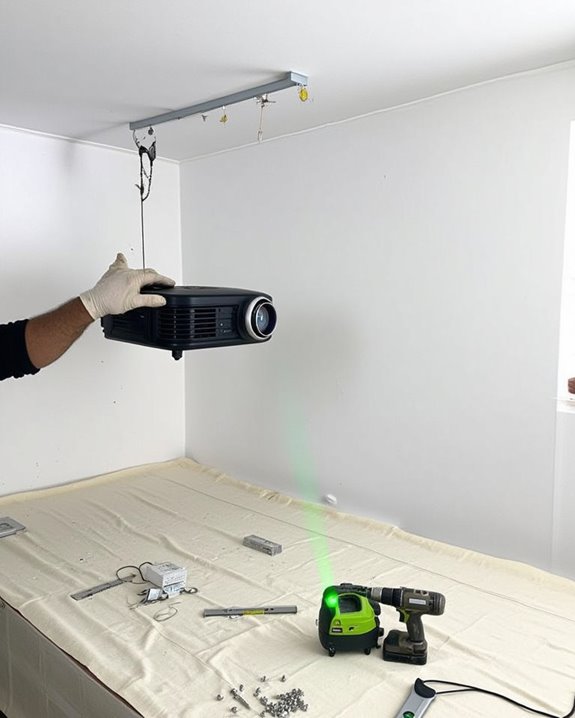
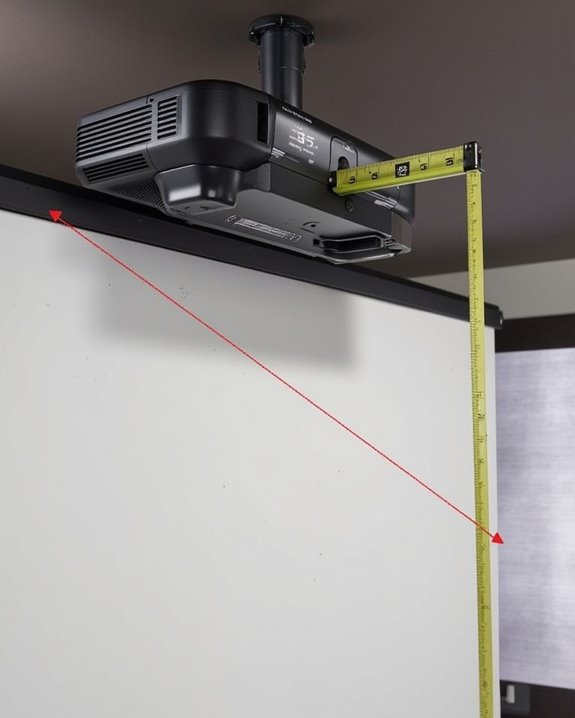
Optimizing Projector Placement and Image Quality
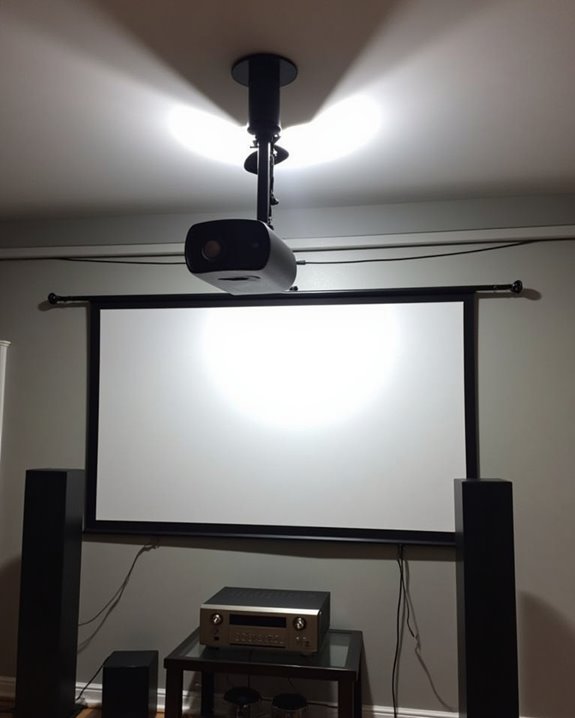
After securing your projector and screen, you’ll need to focus on optimizing the projector’s placement and image quality, which will dramatically affect your viewing experience. Position your projector lens parallel to the screen at the manufacturer’s recommended throw distance, ensuring the lens is centered horizontally with the screen for optimal clarity. The screen bottom should sit at least three feet above the floor to reduce neck strain and create cinema-like viewing angles.
Consider lighting conditions when finalizing placement, as ambient light can wash out your image. Install blackout shades if necessary, and position the projector away from direct light sources. Complete your setup with proper projector calibration, carefully adjusting focus, brightness, contrast, and color settings based on your room’s specific conditions. Regular maintenance of vents will prevent overheating and maintain image quality long-term.
Recommended Products

Universal Compatibility: Fits most projectors (Note: Length <13.7'', Width <8.6'') with standard mounting interfaces. Projector Wall Mount supports a maximum load of 10kg/22LBS, suitable for home, office, cinema and other scenarios, and is compatible with mainstream device sizes, no compatibility concerns

Fits projectors with 1/4 inch thread (or M4 or M6), and weight under 30lbs (13.6kg). Note: Only for single-hole installation. Not suitable for three-hole or four-hole installations.

📽️UNIVERSAL: Compatible with majority of projectors on the market whose mounting holes are from 2.83'' to 11.42" and weight under 30lbs (13.6kg)
Integrating Audio Components for Immersive Sound
Great video requires great sound to create a truly mesmerizing viewing experience. When integrating audio into your projector setup, start by selecting a receiver that supports your desired channel configuration, such as 5.1 or 7.1 surround sound. Position front speakers at ear level on both sides of your screen, with the center speaker directly above or below the projection area, and place your subwoofer on the floor for ideal bass response.
Proper cable management prevents unsightly wire tangles while ensuring consistent signal transmission between components. Once connected, perform speaker calibration to adjust each channel’s output to your specific room acoustics and seating arrangement. Many modern AVRs include automated calibration tools, though manual adjustments may provide finer control for discerning listeners. Remember, room acoustics markedly impact sound quality, so consider adding sound-absorbing materials if needed.
Recommended Products

210 W/Ch THX Certified Select Dynamic Audio Amplification system

Beyond the basics - This 5.2-channel home theater AV receiver delivers standout performance and value with Dolby Atmos, 4K120/8K60 HDMI, Bluetooth Multipoint and effortless setup. Delivers 70W of authoritative power and flexible speaker layouts including 3.1.2-ch. with up-firing or in-ceiling heights.

Cinematic Sound at Home: Enjoy your favorite movies, TV shows and more with theater like sound in the comfort of your home.NOTE: Scroll down the catalog to find installation Manual and User Guide for trouble shooting steps..Frequency band : 2.4 GHz band
Frequently Asked Questions
Should I Upgrade My Home’s Electrical System for a Projector Setup?
Evaluate your home’s power capacity first. If your projector and other components might overload existing circuits, an electrical upgrade is recommended. You’ll need dedicated circuits to prevent issues during operation.
Can Projectors Work Effectively in Rooms With Windows?
Yes, projectors can work effectively in rooms with windows. You’ll need higher lumens (3,000+) to combat ambient lighting. Consider using window treatments like blackout curtains and an ALR screen for ideal viewing quality.
How Do I Manage Cables for a Ceiling-Mounted Projector?
Like taming wild vines in a garden, you’ll need careful cable management for your ceiling mount installation. Use ceiling routing, conduits, or adhesive clips to secure cables neatly, and consider installing a dedicated power outlet nearby.
How Long Do Projector Bulbs Last and Are They Expensive?
Traditional bulb lifespan ranges from 1,500-4,000 hours, while LED/laser lasts 20,000-50,000 hours. You’ll find replacement costs vary—traditional bulbs are expensive ($150-300), but you’ll replace them more frequently than LED/laser options.
Will Smart Home Systems Integrate With My Projector Setup?
A stitch in time saves nine! Yes, your projector can work with smart home integration. Many modern projectors offer voice control compatibility with systems like Alexa or Google Assistant for seamless operation.