As an Amazon Associate, we earn from qualifying purchases. Some links on this site are affiliate links at no extra cost to you. Our recommendations are based on thorough research and editorial judgment.
How to Make a DIY Star Projector for Your Home Theater

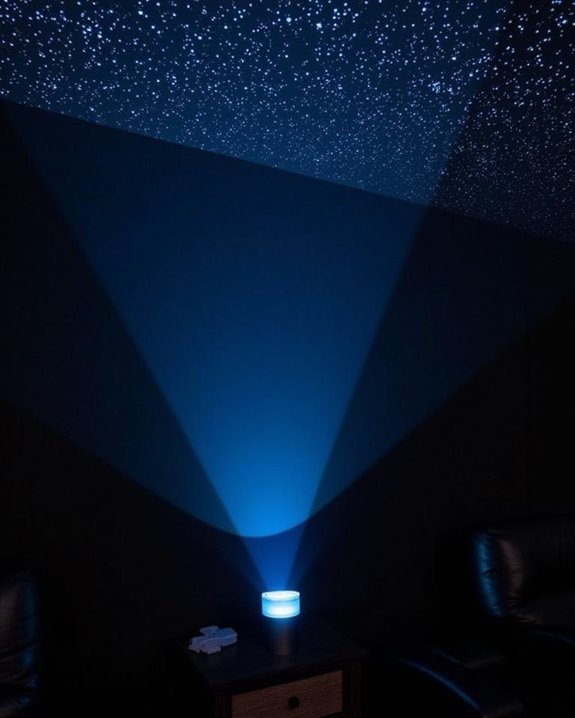
If you want to create a DIY star projector for your home theater, you’ll need to select durable materials such as foamboard or acrylic for the frame, reflective aluminum foil to maximize brightness, and a high-intensity LED or flashlight as the light source, ensuring adequate illumination and long-term stability. By planning a dome-shaped structure and sourcing accurate star maps, you can achieve an even, immersive display. Next, you’ll need to contemplate the precise steps for assembly and alignment.
Key Takeaways
- Gather sturdy materials like cardboard, black paper, aluminum foil, and a strong LED or flashlight as your light source.
- Design and assemble a dome or hemispherical frame, ensuring it fits your home theater and provides even star distribution.
- Create or print an accurate star map using astronomy software, then transfer the pattern onto your projection surface.
- Enhance projection quality by lining the interior with shiny aluminum foil and positioning the light source for maximum brightness.
- Upgrade with features like multi-color LEDs, smartphone controls, and adjustable lenses for a vivid, customizable starry sky experience.
Gathering Essential Materials and Tools
When you’re preparing to build a DIY star projector, assembling the right materials and tools is a critical first step, as each component plays a specific role in the construction and functionality of your device. You’ll need sturdy cardboard or foamcore for the projector’s base, aluminium foil for replicating star patterns, and black paper or cardboard to block stray light. A reliable LED or flashlight serves as your main light source, while scissors and a craft knife are essential for precise cutting. Secure components using tape, glue, or a hot-melt glue gun, and use small clamps for holding structures as adhesive sets. For accuracy, gather a star chart, dressmaking pin, pencil, and ruler. Don’t forget decorative materials, wood offcuts for the base, and a dark room for final projection testing. Many DIY star projectors incorporate adjustable projection size to ensure the stars can be focused clearly on various ceiling surfaces. Additionally, considering brightness levels when selecting your light source can greatly improve the visibility and clarity of your star patterns in different room lighting conditions.
Recommended Products

DIY NIGHT LIGHT: Create your own night sky full of stars with a diamond art painting night light! Fill in the cosmic sky design with colorful, transparent gems to bring your stellar night light to life. Design YOUR way with a creative, gem art activity for kids!

🎨 DIY CREATIVITY AT ITS BEST - Let your child personalize their astronaut projector with badge style stickers and 8 acrylic markers, sparking creativity and helping them stay present and engaged for hours of fun. It’s more than just a lamp. It’s a project that becomes a keepsake for their space adventures.
Designing Your Projector Structure
With your materials and tools prepared, it’s important to focus on designing a projector structure that supports both function and aesthetics while accommodating all technical requirements. Begin by selecting a shape—such as a dome or hemispherical surface—that guarantees even star distribution, and confirm the structure’s dimensions fit your home theater space without blocking sight lines. Prioritize lightweight, heat-resistant materials like acrylic or thin plywood, using opaque finishes to control stray light and enhance contrast. To ensure consistent brightness and color quality, consider incorporating advanced LCD technology within your design. Strategically plan internal space for LEDs or fiber optics, including apertures for accurate star projection and mounts for lenses or diffusers. Integrate a sturdy, balanced base with internal bracing, and consider modular elements for easy upgrades. Ensure exterior surfaces blend with your décor, and design for accessible controls and concealed cable management. For best results, paint the projector surface white with an undercoat before applying a matte black finish, as this process ensures an optimal, professional-looking contrast for your star projections.
Cutting and Assembling the Frame
How do you guarantee your star projector frame is both precise and durable? Start by measuring and marking all frame pieces with a ruler and pencil on your chosen material—cardboard for temporary builds, wood or PVC for lasting strength, or plastic for lightweight, waterproof use. Use a utility knife or scissors for cutting, working on a straightedge or cutting mat for clean, accurate edges. Secure pieces temporarily with masking tape while you cut. For assembly, apply a hot-melt glue gun or strong adhesive for cardboard and plastic, or use screws, nails, or T-joints for wood and PVC. Reinforce stability by adding diagonal supports, crossbars, and vertical legs, ensuring all frame sections are evenly weighted. Since compact design enhances portability and ease of setup, keeping the frame lightweight can be advantageous for mobile use. Inside painted with sawdust and matt black paint will help prevent unwanted light reflections and improve projection clarity. Always wear safety goggles and work on a stable workbench.
Recommended Products

★【Ambient Light Rejection】 The screen effectively suppresses ambient light (70%), significantly improving image contrast. This makes it suitable for viewing during the day or with lights on. ( NOT for UST projectors)

This is a new type of multi-layer composite EPPE ploymer projection screen fabric, which is different from conventional PVC, glass fiber, white plastic and canvas. The material is environmentally friendly and meet EU REACH testing standards

★【BRIGHTNESS BOOST】This screen displays significantly brighter images than a normal white screen when viewed from center seats (up to 2.6x gain), and maintains comparable brightness from other angles. Enjoy a brighter image, or use the brightness for a bigger screen! (NOT for UST projectors.)
Enhancing Reflectivity With Aluminum Foil
Although your star projector’s structural frame is essential for stability, enhancing its internal reflectivity with aluminum foil can greatly boost the brightness and clarity of your projected stars. Aluminum foil is a preferred material due to its high reflectivity, maintaining about 86% reflectivity in the visible spectrum and up to 97% in the near infrared. For ideal results, use the shiny side of the foil to concentrate light, or the matte side if you want to diffuse it more evenly, depending on your projector’s design. The precise placement of foil inside your projector directly affects image quality, so consider these key benefits:
- Amplifies the overall brightness of your star projection
- Improves clarity by minimizing light loss
- Allows for focused or diffused effects
- Utilizes proven scientific principles for reliable results
When selecting your materials, keep in mind that high light transmittance is crucial for achieving a bright and vivid projection, as it directly influences the overall quality and vibrancy of the holographic effect.
Creating and Printing the Star Map
Once you’ve prepared your projector’s reflective interior, the next step is creating and printing the star map, which serves as the template for your projected night sky. Begin by selecting a specific date and location, then use software like Stellarium to generate an accurate star map that reflects real celestial alignments. Employ celestial cartography methods, incorporating data from star catalogs such as the HYG database, and include coordinates, magnitude, and color index for each star. Customize your map’s visual design by labeling major stars and constellations, using high-resolution layouts, and applying thematic colors or categories. Star maps differ month to month or year to year, so be sure to choose your date and time carefully to capture the sky as you wish to remember it. When printing, choose high-quality paper or fabric, set an appropriate print resolution, and calibrate printer colors for accuracy, ensuring your map is clear, durable, and ideal sized for projection.
Recommended Products

STAR ORIGAMI PAPER: These paper star strips are crafted from high-quality thickened log pulp, resulting in a paper that is not only thick a Ind durable but also possesses a unique texture that perfectly complements the intricate folds of star paper. Star paper strips available in 27 vibrant colors, there are 2060 sheets, each measuring 8.5in/21.6cm (L) x 0.4in/1cm (W)

Personalized to You: Each custom star map is uniquely crafted to display the night sky as it appeared on the date and location of your choosing. It’s a meaningful way to commemorate a special occasion, whether it’s the night we met, your first kiss, an anniversary, a birthday or your wedding date

Antique style Map of Texas with the Alamo
Building the Projection Lens and Mount
Before you can bring your star projector to life, building the projection lens and mount is essential, as this stage determines the clarity and stability of your projected night sky. Begin by selecting sturdy materials such as foamcore or thick cardboard for lens support and a base, ensuring your lens, preferably a flat and smooth trapezoidal prism or cylinder, remains distortion-free. Wrap reflective aluminum foil around internal surfaces to amplify light intensity, and use a bright LED or high-intensity flashlight as your light source for ideal image projection. Secure all components with strong adhesives or tape, reinforcing joints for structural integrity. Using a map of constellations for star placement helps ensure that your star projector displays accurate and recognizable patterns, adding educational value and realism to your homemade device. For a professional result, focus on:
- Achieving sharp, distortion-free projections
- Enhancing brightness with reflective materials
- Ensuring stable lens alignment
- Securing all parts tightly
Recommended Products
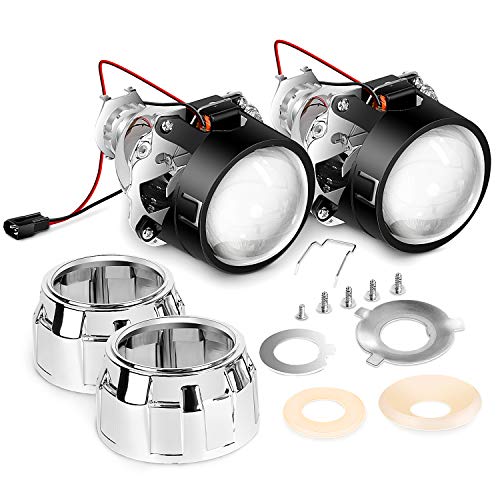
H1 mini projector kits (low/high beams), fit in tight spaces for quad retrofits or fog lamp upgrade

【Advanced Coating for Clear Star Effects】Utilizes an 18-layer coating technology to enhance light transmission, reduce reflections and scatter, ensuring a vivid and clear starlight effect.

Exclusive 12-Piece Mixed Glass & Film Slide Set (Unique On The Market):
Final Assembly and Alignment
When you’re ready for the final assembly and alignment of your DIY star projector, it’s crucial to approach this stage with careful preparation and systematic attention to detail, as the quality of your finished device depends on precise construction and calibration. Begin by verifying all components—such as star panels, LED lights, and mounts—are present, and gather essential tools like screwdrivers and wire cutters in a clean, well-lit workspace. Assemble the frame securely, then carefully align the star panels within it to guarantee accurate projection. If you want to further enhance your projector, remember that using smaller holes for finer star patterns can significantly improve the realism and sharpness of your starfield. Incorporate adjustment mechanisms so the projector can be aimed precisely at your ceiling or wall, ensuring stability to prevent unwanted vibrations. Position the LED light source to maximize brightness, and conduct test runs, adjusting distance, focus, and contrast for ideal projection clarity and operational reliability.
Customizing and Upgrading Your Star Projector
After completing the final assembly and alignment of your DIY star projector, you can substantially expand its capabilities by customizing and upgrading various components to suit your preferences and environment. Upgrades range from integrating smart app controls for remote operation and scheduling to replacing standard LEDs with multi-color RGB types for more vivid, dynamic projections. Enhancing the projection surface with precision-punched constellation templates or reflective films will yield sharper, brighter stars, while adjustable lenses and motorized mechanisms let you fine-tune focus and simulate night sky movement. For a truly immersive experience, synchronize lighting with ambient sound using Bluetooth speakers or sound-activated modes. Star projectors are portable and easy to set up, allowing you to experiment with placement and orientation to maximize the effect in any room. Consider these enhancements:
- Personalize star patterns and automate schedules via smartphone apps.
- Upgrade to high-lumen, multi-color LEDs for vivid displays.
- Sharpen images with precision lenses and dynamic focus controls.
- Synchronize projections with music or ambient sounds for deeper immersion.
Recommended Products

Immersive 7-Zone Stardust with Dynamic Lighting: Experience a breathtaking cosmos at home with 7 star light zones, each customizable to create vivid, layered stardust effects. Ideal for children's rooms and game rooms.

🌌【16 Million Colors Night Light Projector】The northern lights projector has 16 million colors and the led lights is dimmable.galaxy projector with app transform any room into a stunning starry sky with HD nebula clouds and razor-sharp star projections.Night light&star projector equipped with 6 interchangeable film slides (5 space-themed + 1 ocean scene) to switch between cosmic scenes.Ideal galaxy light projector for bedrooms,gaming rooms,home theaters,offices or Birthday decor.

Versatile 3-in-1 LED Floor Lamp for Any Room: This modern LED floor lamp combines a 15W 1400LM main lighting system with a 3W upper RGB star projector lamp, featuring dynamic Aurora lighting and green star projection. Each light source can operate independently or together, delivering layered ambient lighting for reading, relaxing, gaming, and party environments in any room, including living room, bedroom, and office spaces
Frequently Asked Questions
How Long Does It Take to Build a DIY Star Projector?
Wondering how much time you’ll need? You can build a basic DIY star projector in just 1-3 hours, but if you’re aiming for a complex design, don’t be surprised if it takes a few days.
Can I Use a Smartphone Flashlight Instead of an LED?
You might think you can use your smartphone flashlight instead of an LED, but it’s not ideal. It’s too dim, lacks focus, and can overheat. You’ll get much better results with a proper LED.
Is the Projector Safe for Children to Use Unsupervised?
You might think it’s perfectly safe, but don’t leave children unsupervised with projectors—especially laser models. Kids can accidentally damage their eyes or the device, and even LED versions pose risks without your watchful care and guidance.
Will the Projector Work on Textured or Colored Ceilings?
You’ll see different results on textured or colored ceilings—stars might blur or change hue. If your ceiling’s rough or dark, you’ll need to adjust brightness and focus, or consider using a diffuser or projecting onto a screen.
How Do I Store the Projector When Not in Use?
You absolutely, positively don’t want your projector tossed around like forgotten socks! Always unplug it, clean it gently, pack it in its original box or a padded container, and store it somewhere cool, dry, and safe.