As an Amazon Associate, we earn from qualifying purchases. Some links on this site are affiliate links at no extra cost to you. Our recommendations are based on thorough research and editorial judgment.
How to Make a Projector for Your Home Theater
When you’re ready to create your own home theater projector, you’ll need to understand both the technical aspects and practical considerations of the project. Building a custom projector can save you money while providing a tailored viewing experience for your space. While the process requires careful attention to detail, from selecting the right display technology to ensuring proper cooling, the satisfaction of watching movies on a screen you’ve built yourself is unmatched. The journey begins with choosing between LCD or DLP technology, which will determine much of your subsequent decision-making.
Key Takeaways
- Choose appropriate display technology (DLP, LCD, or LCoS) and light source (laser, LED, or lamp) based on image quality needs and budget.
- Build a durable housing with proper ventilation using aluminum or steel, ensuring adequate space for components and cooling systems.
- Install and align the LCD panel with your chosen resolution, then mount the lens system at the correct focal length.
- Implement a cooling system with separate intake/exhaust paths, temperature sensors, and dust filters to prevent overheating.
- Connect multiple input sources via HDMI, mount securely to ceiling joists, and adjust projection alignment for optimal viewing experience.
Gathering the Essential Materials and Components
When starting on a home theater projector setup, you’ll need to familiarize yourself with the fundamental components that make your viewing experience exceptional. First, decide between display technologies—DLP offers crisp images with micro-mirrors, LCD provides cost-effective performance, and LCoS delivers superior contrast for those with higher budget considerations. Next, select your light source based on longevity and brightness needs: laser illumination for premium performance, LED for efficiency, or traditional lamps for affordability.
Don’t overlook aesthetic design when choosing projector screens, which greatly impact image quality. Consider fixed screens for permanent installations or portable options for flexibility. Finally, gather necessary accessories including HDMI cables, adapters, and potentially a projector stand to guarantee proper placement and ideal viewing angles. Additionally, ensure your projector has adequate brightness levels to match your room’s lighting conditions for the best image clarity.
Recommended Products

CONVENIENT TO STORAGE AND CARRY : Compact one-piece,lightweight and folding design. You can fold the projector screen in small size and put it in your backpack or suitcase

Movie Screen Fabric: Made from white, soft-touch material, our thickened, smooth projector screen is crease-free and nontransparent, delivering brighter colors. It uses washable materials and can be washed either by hand or in a washing machine. Quality is strictly controlled, making it ideal for outdoor projector use.

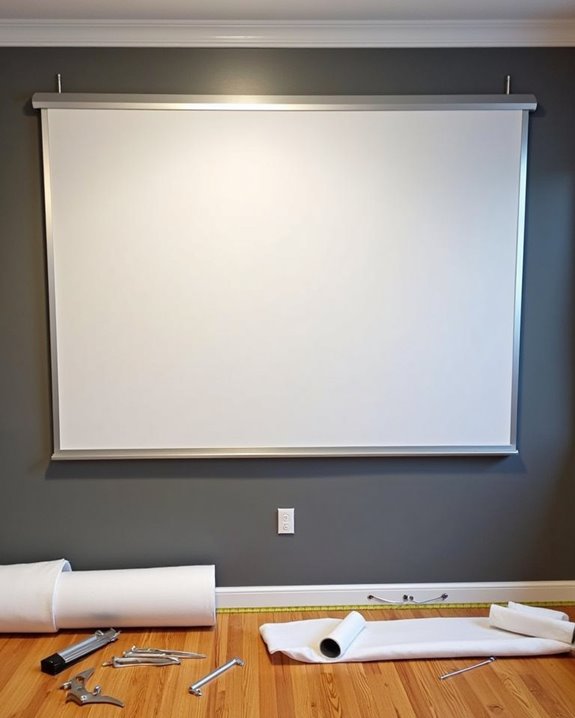
Wall Mounted Fixed Frame Projection Screen (Overall Size 63.625" Tall x 109.25" Wide) (Viewing Area 120" Diagonal x 58.875" Tall x 104.5" Wide) No option for Legs or Stands with this product. Recommended for projectors with Native 16:9 Resolution
Building the Projector Housing and Light Source
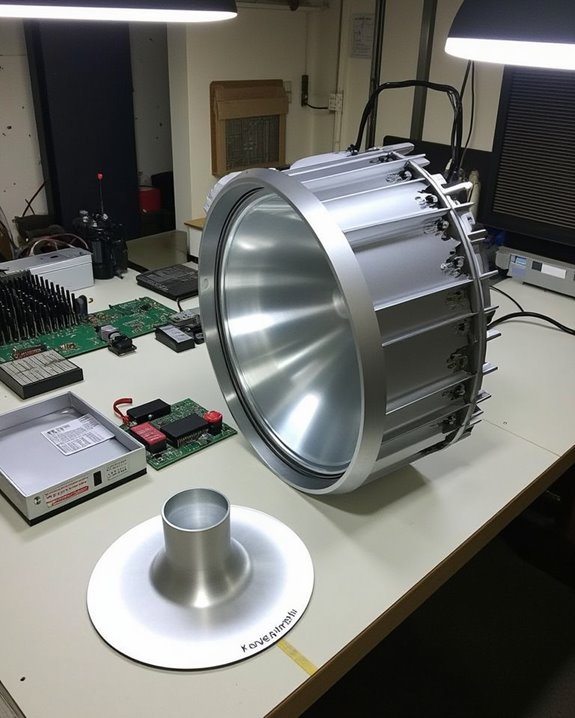
Building a robust projector housing establishes the foundation for your home theater system’s performance and longevity. Select aluminum or steel for ideal material durability, as these metals effectively dissipate heat while providing the necessary structural integrity. Confirm your housing dimensions accommodate all internal components with additional space for maintenance access and proper ventilation.
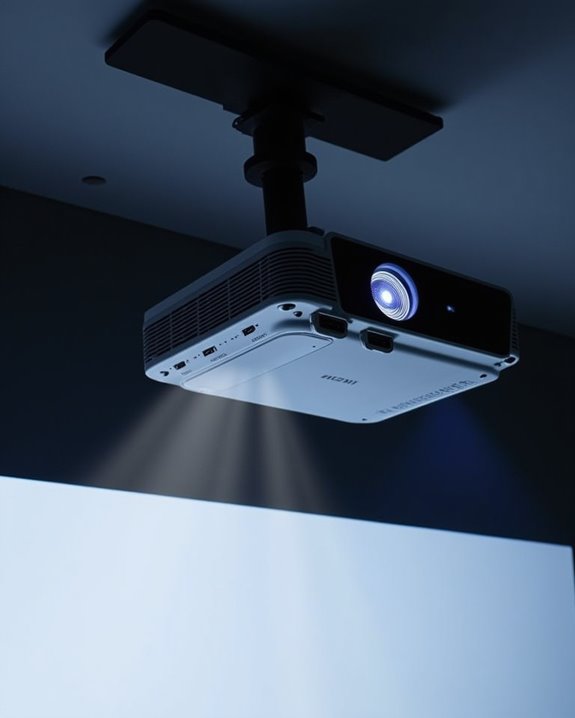
When designing the light source, choose between LED or laser technology based on your brightness requirements and viewing environment. Position the light source carefully within the housing to maximize illumination while minimizing glare, using reflective surfaces to direct light efficiently. The aesthetic design of your housing should complement your home theater décor while maintaining functionality through proper sealing to prevent light leakage. Install cooling systems like fans or heat sinks to maintain ideal operating temperatures and extend your projector’s lifespan. Additionally, incorporating high brightness levels measured in ANSI lumens will ensure optimal performance in various lighting conditions.
Recommended Products

Motion Projectables Night Light - Projects motion image of the northern lights onto the wall or ceiling

【UPGRADED Twinkle + Music Effect】Can make more realistic fiber optic star ceiling sky light with twinkle effect. Upgraded with sound sensor mode (music /voice activated).

🌈【400+ Dynamic Nebula & Star Combos】: Featuring 8 vibrant nebula colors, 5 adjustable brightness levels, and 5 projection speeds, this astronaut galaxy projector for bedroom creates over 400 stunning lighting effects. Watch as green breathing stars twinkle alongside swirling nebulae, effortlessly transforming any room into a dreamy, immersive star projector for bedroom relaxation.
Installing the LCD Panel and Lens System
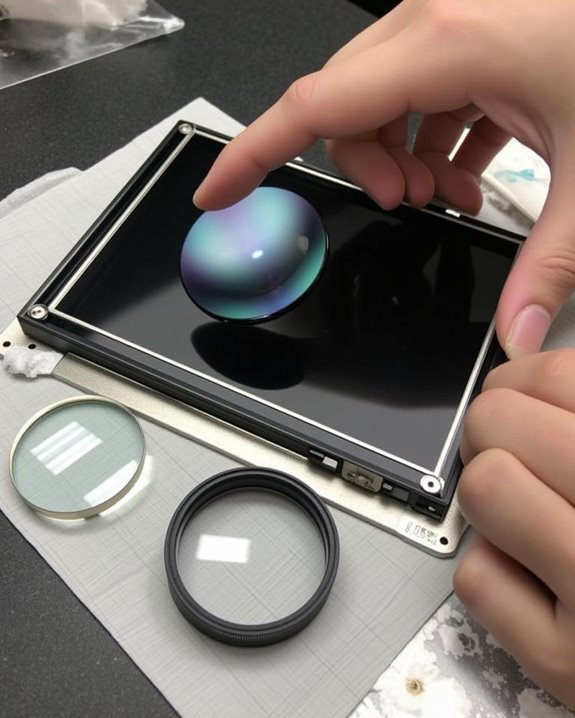
Installing the LCD panel and lens system correctly forms the heart of your DIY projector, as these components directly determine image quality and overall performance. Select an LCD panel based on your desired resolution (HD, Full HD, or 4K) and brightness requirements, then mount it securely using specialized brackets, ensuring proper panel alignment with the light source.
For the lens system, choose between zoom lenses for adjustable image sizes or fixed lenses for specific setups, making sure to mount them at the correct focal length from the panel. After installation, conduct thorough lens calibration by checking focus across the entire image, adjusting lens shift for ideal positioning, and testing for distortion using calibration patterns. Clean both panel and lens carefully before final assembly to prevent dust particles from affecting image quality. Considering ultra-short throw design can optimize placement and screen size in limited spaces for your home theater setup.
Recommended Products

You will get 2 Pcs x Polarized Film Sheets, 3 Set Cleaning Kit, 1 Pcs Scraper, Polarization Angle: 90 Degree; Thickness: 0.27 mm/0.01 inch; Dimension: 158 x 84 mm/6.2 x 3.3 inch

You will get 2 Pcs x Polarized Film Sheets, 3 Set Cleaning Kit, 1 Pcs Scraper, Polarization Angle: 90 Degree; Thickness: 0.27 mm/0.01 inch; Dimension: 155 x 100 mm/6.1 x 3.9 inch

You will get 2 Pcs x Polarized Film Sheets(1 pcs each of the 2 styles), 3 Set Cleaning Kit, 1 Pcs Scraper, Polarization Angle: 0 Degree/90 Degree; Thickness: 0.27 mm/0.01 inch; Dimension: 166 x 218 mm/6.5 x 8.6 inch
Setting Up the Cooling System for Extended Use
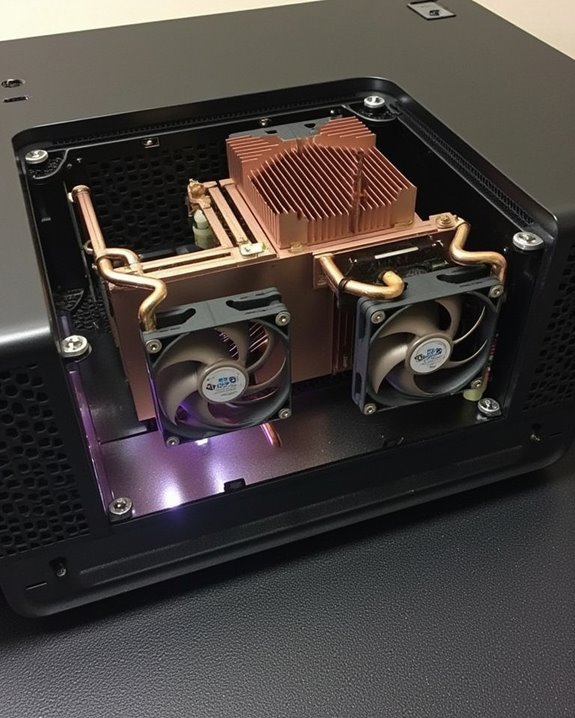
Proper cooling system design represents one of the most critical, yet often overlooked aspects of DIY projector construction, as inadequate heat management will considerably reduce component lifespan and degrade image quality during extended viewing sessions. To maximize cooling efficiency, implement separate intake and exhaust pathways using foam dividers to prevent hot air recirculation, while installing high-quality, quiet fans with temperature-based speed controllers that modulate airflow based on real-time thermal readings.
For ideal airflow management, position fans to create positive pressure inside your enclosure, directing heat away from sensitive components like lamps and LCD panels. Install dust filters on all intake openings to maintain system cleanliness, and integrate temperature sensors near critical components with automatic shutdown protocols should temperatures exceed safe thresholds.
Recommended Products

【2-in-1 Dual Row 80mm USB Cooling Fan】 ELUTENG dual-row 8cm USB fan is USB powered and supports plug and play. It can be placed horizontally or vertically for flexible installation. Equipped with 2 connected fans that run simultaneously, providing stronger and more efficient cooling performance. Ideal for cooling Router, Laptop, TV Box, Receiver, Mobile Phone, PS5, PS4, Projector, Instrument, and Hard Drive Enclosure.

2 IN 1 USB Fan 120mm, 2 fans connect to one USB cable and work at the same time. Perfect for cooling Receiver / AV cabint / Game console / PC / Laptop / TV Box / Projector / Router.

【2 in 1 Dual USB 40mm Fan】With the light and compact design, ELUTENG computer fan USB 40mm is perfect for narrow place. Its square design allows it to be laid flat or stand upright. USB powered, plug and play. 2 fans are connected to run together at the same time for better heat dissipation.
Connecting Input Sources and Wiring Considerations
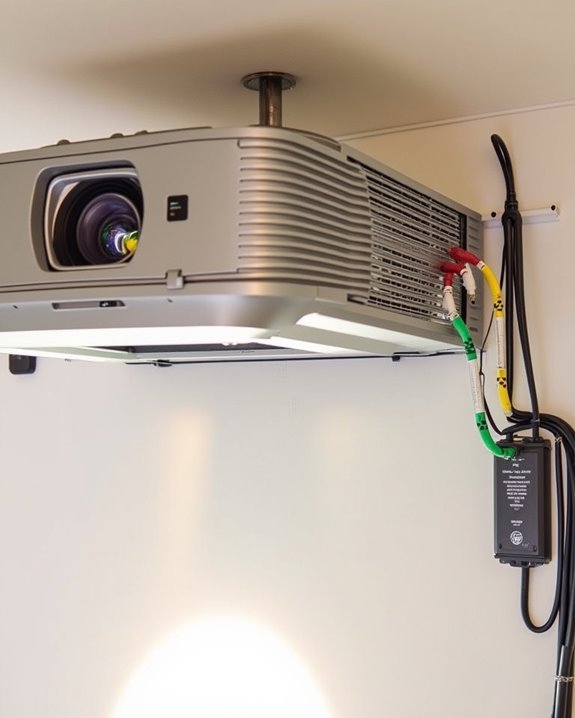
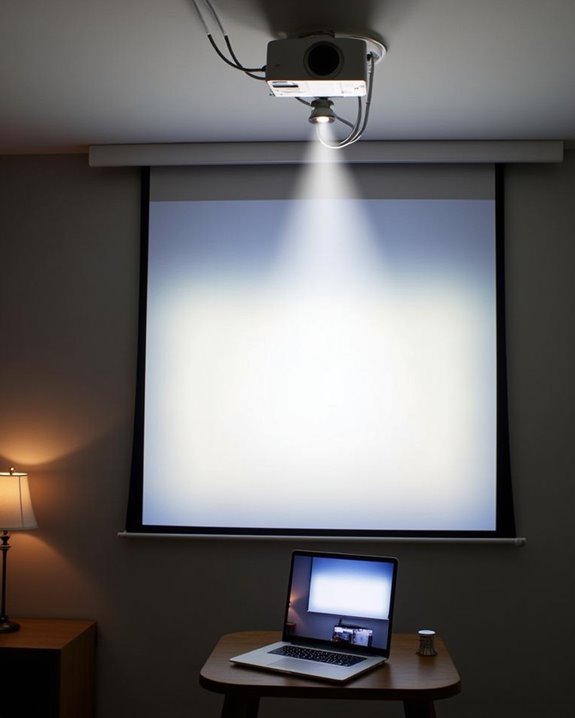
Although many DIY enthusiasts focus primarily on image quality, the connectivity options you choose will ultimately determine how seamlessly your home theater projector integrates with your media devices. Most projectors offer at least two HDMI inputs, but you’ll want to think about using an AV receiver as a central hub for multiple sources, connecting it to your projector with a single HDMI cable.
For ideal performance, make certain all cables are properly secured and organized to prevent signal interference. Wireless streaming adapters can eliminate cable clutter while providing convenient access to digital content. Power supply considerations are equally important; place your projector near an outlet or use appropriate extension cords rated for your device’s power requirements. Remember to use color-coded cables for component connections and consider HDMI switchers if you’re managing numerous input sources.
Recommended Products

8K Bi-Directional HDMI Switch: The HDMI Switcher connects 2 HDMI sources to 1 HDMI display (HDMI Switcher 2 in 1 out) or 1 source to 2 displays (HDMI Splitter 1 in 2 out) (cannot be displayed at the same time).

The HDMI 2.1 2x1 switcher is a high-performance AV signal switching device supporting ultra-wideband transmission up to 48Gbps, specifically engineered for gamers and Ultra HD audiovisual enthusiasts.

Ultra HD 8K: This HDMI Bi-direction Switch is ideal for gamers, supporting resolutions up to 8K@60Hz, 4K@120Hz/144Hz, and is backward compatible with 1080P@240Hz.
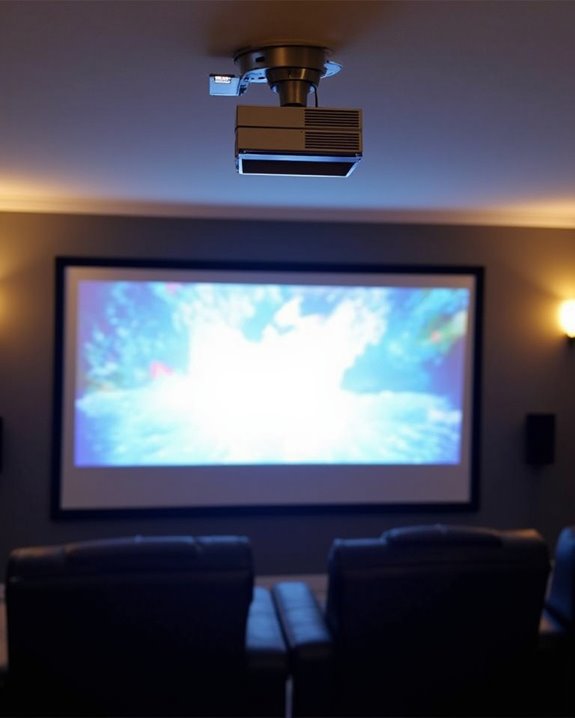
Mounting and Adjusting Your DIY Projector
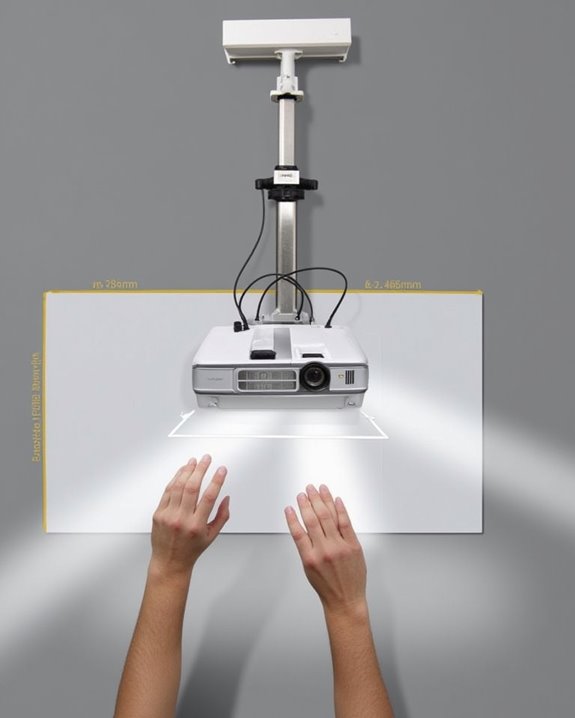
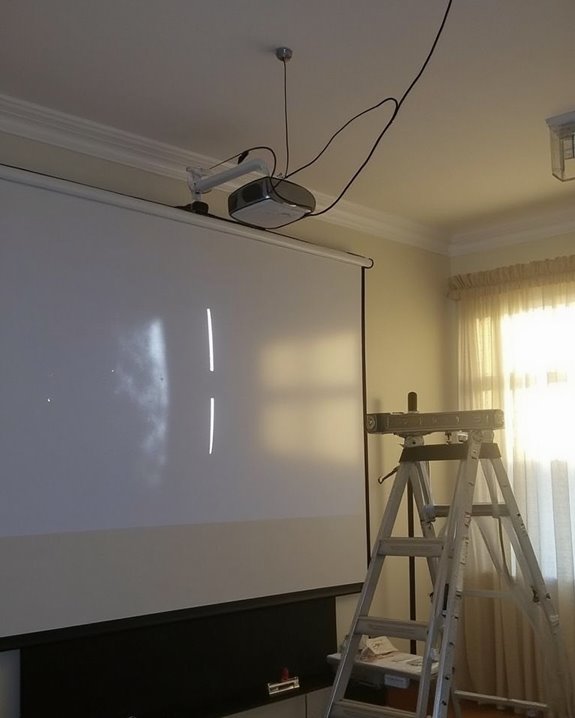
Once you’ve assembled your projector components and prepared your connectivity setup, the physical mounting of your DIY projector becomes a critical step that will determine your viewing experience for years to come. For ideal mount placement, use a stud finder to locate ceiling joists, ensuring your installation can support the projector’s weight. Select a mount that offers adjustment flexibility, allowing you to fine-tune horizontal offset and vertical positioning as needed.
After securing the mount, focus on projector calibration to achieve the perfect image. Adjust the lens alignment to center the projection on your screen, and utilize keystone correction if the image appears trapezoidal. Control ambient light in your viewing area to enhance contrast, and ensure there are no obstructions in the light path between your projector and screen.
Frequently Asked Questions
How Does DIY Projector Brightness Compare to Commercial Models?
Like comparing a flashlight to stadium floodlights, DIY projector brightness typically falls below 500 lumens while commercial models reach 5,000+. You’ll sacrifice brightness for cost effectiveness when building your own system.
Can I Create a 4k-Capable DIY Projector?
Yes, you can build a 4K-capable DIY projector, but it’s challenging. You’ll need to source a 4K resolution panel and guarantee all components have DIY compatibility. Expect significant technical hurdles and higher costs.
What’s the Expected Lifespan of a Homemade Projector?
You’ll face dimming lights, failing parts, and mounting frustrations. Your homemade projector’s lifespan varies—typically 1-3 years depending on projection durability and component longevity. Commercial options outlast DIY solutions for long-term home theater enjoyment.
How Do I Waterproof a DIY Projector for Outdoor Use?
To waterproof your DIY projector, build a weatherproof enclosure using PVC or metal with proper sealing. Apply waterproofing techniques to all components and guarantee outdoor projector enclosures have adequate ventilation while maintaining IP54-rated protection.
Will My DIY Projector Work With Streaming Devices?
Just like you, I’ve wondered this too! Yes, your DIY projector will work with streaming devices if it has HDMI inputs. Check for streaming compatibility and device connectivity options to guarantee seamless integration.