Many people aren’t aware that a projector’s mounting position depends not just on screen size but also on the projector’s unique throw ratio, which determines how far it should be placed from the screen for crisp, undistorted images. You’ll need to align the lens exactly with the screen’s center, account for ceiling height to avoid keystone issues, and secure the mount to structural supports for stability. Understanding these technical factors is essential before you can achieve peak setup.
Key Takeaways
- Mount the projector so the lens is horizontally and vertically centered with the screen, matching the throw distance to your desired image size.
- Secure the projector to a ceiling or wall mount anchored to studs, ensuring the mount is rated for the projector’s weight.
- Position the projector to minimize keystone correction, using lens shift or careful placement for a rectangular, undistorted image.
- Choose a screen size and position based on room dimensions, seating distance, and optimal viewing angles.
- Manage cables neatly and ensure stable, accessible power connections to maintain a clutter-free and reliable setup.
Calculating the Ideal Throw Distance
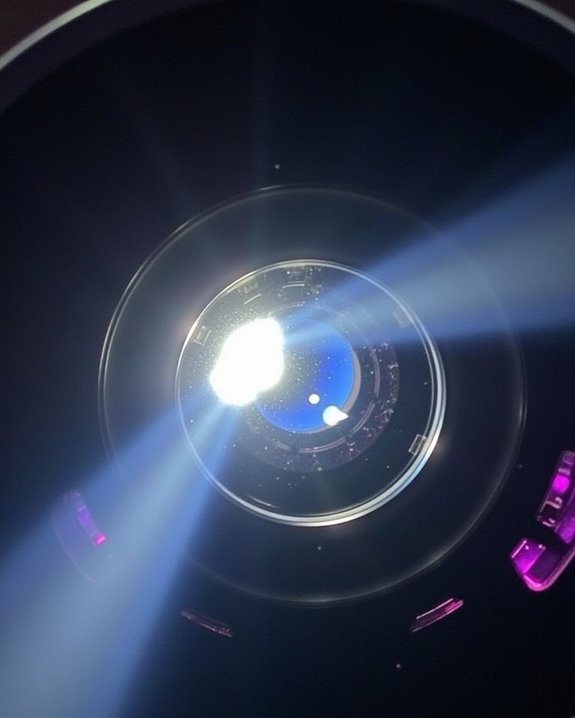
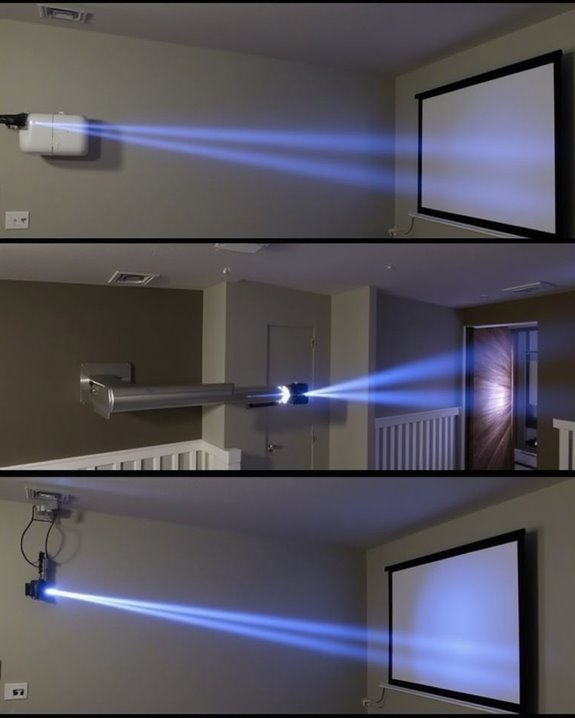
When you’re setting up a projector, calculating the ideal throw distance is a critical first step, since it determines how far the projector needs to be from the screen to create a sharp, properly sized image. To start, you’ll need to check the projector’s throw ratio, found in the manufacturer’s specifications, because different models offer various throw ratios and flexibility. The throw distance is calculated by multiplying the throw ratio by your desired image width, using the formula ( D = text{Throw Ratio} times text{Image Width} ). For example, with a throw ratio of 1.5 and a target width of 100 inches, place the projector 150 inches away. Many modern projectors also include auto-focus and keystone correction features that help maintain image clarity and alignment regardless of placement. Throw distance and image size are interdependent, so adjusting either the projector’s position or the zoom can help you fine-tune your setup. When choosing projector models, always consider room size, screen dimensions, and zoom features to optimize image quality.
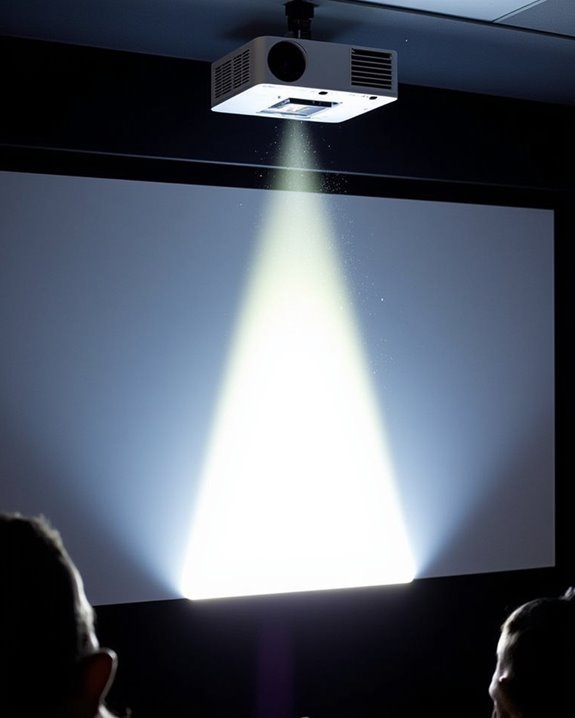
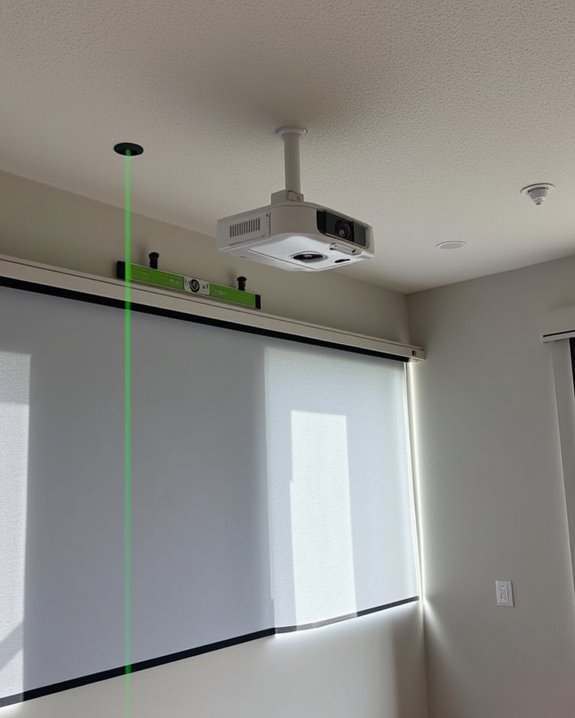
Aligning the Projector With the Screen
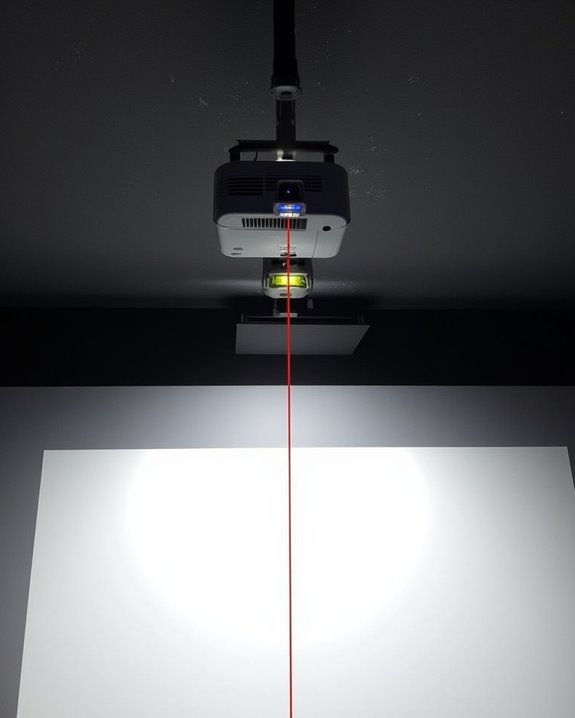
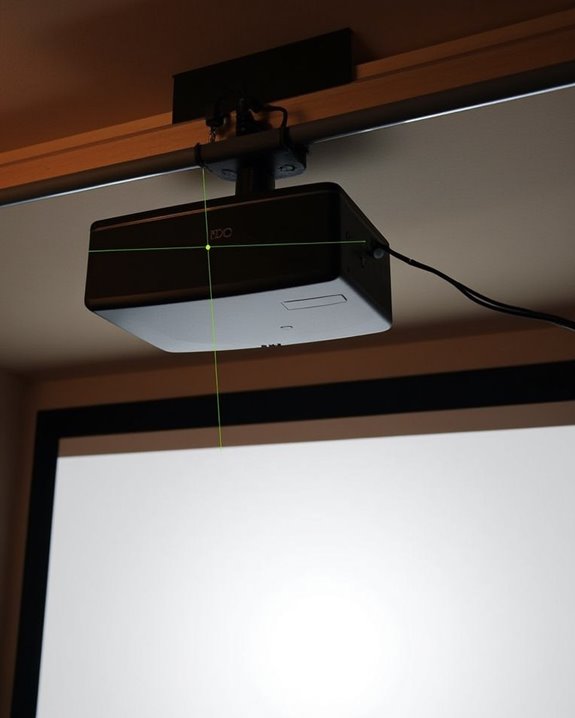
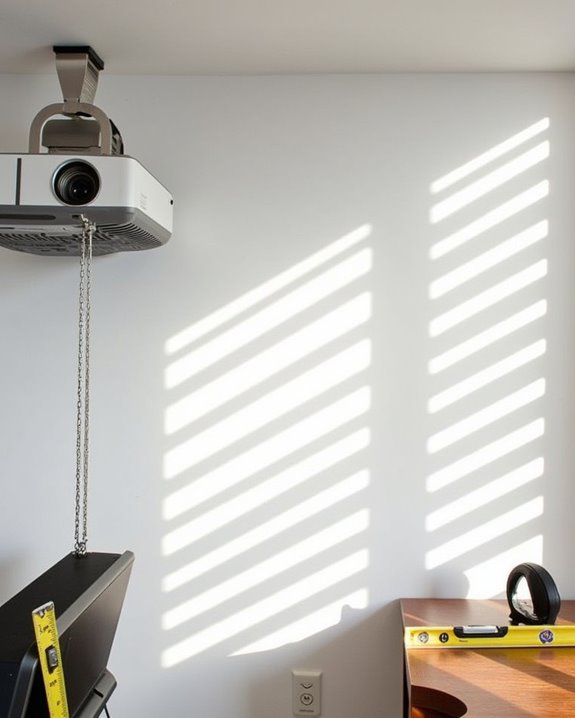
Although you’ve already calculated the ideal throw distance, aligning the projector with the screen is just as essential to achieving a sharp, distortion-free image, and it involves more than simply pointing the projector at the screen. Start by positioning the projector so its lens is centered both horizontally and vertically with the screen, using an alignment image or test pattern to check that the image fits precisely within the screen borders. If you notice trapezoidal distortion, use keystone correction—vertical or horizontal—but keep adjustments minimal, as overuse can degrade image quality. Preferably, rely on lens shift if your projector offers it, since this allows for precise vertical and horizontal image movement without distortion. Modern projectors often include advanced auto keystone correction features to simplify this process and maintain image clarity. After alignment, carefully adjust zoom and focus to ensure the image is sharp and completely fills the screen. If the image fills the width but not the height of the screen (or vice versa), it likely means there is an aspect ratio mismatch between your projector and your screen.
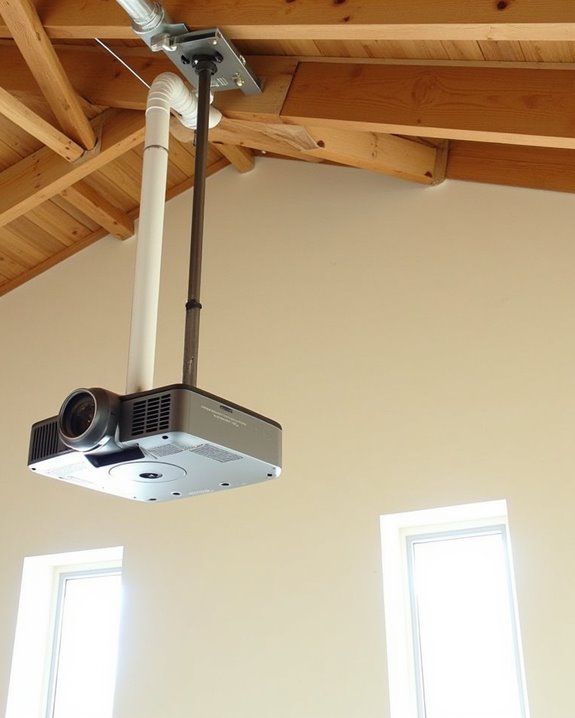
Factoring in Ceiling Height for Placement
Properly aligning the projector with your screen guarantees a crisp, undistorted image, but your ceiling height directly influences how and where the projector can be mounted. Standard rooms typically feature an 8-foot ceiling, though an ideal ceiling height for *best* projector positioning falls between 9 and 10 feet, offering more flexibility in placement. Adjustable ceiling mounts allow you to set the projector at the correct vertical offset recommended by the manufacturer, ensuring the lens sits at the right height relative to the screen’s top edge. When dealing with larger screens or longer throw distances, a higher ceiling height can accommodate these requirements without obstructing the viewing path. Most modern lamp-free projectors also benefit from short-throw capabilities that provide greater installation flexibility in varied ceiling heights. Always select mounting hardware—fixed, tilt, or pivot—that matches your ceiling’s material and supports safe, secure installation. For ceiling mounting compatibility, make sure your chosen projector model and mount are rated to support the weight and installation method suitable for your specific ceiling type.
Managing Power and Cable Connections
Installing a projector involves more than just mounting the hardware, as you’ll also need to manage both power supply and cable connections to guarantee reliable performance and a tidy setup. Prioritize power saving modes to minimize electricity usage—many projectors offer eco-friendly settings that reduce brightness and automatically power down when not in use. Pay attention to cable management by selecting cables of appropriate length and type, routing them discreetly, and using organizers to prevent clutter and damage. Ensure the power source meets the projector’s wattage requirements, typically between 150 and 400 watts, and consider backup solutions for uninterrupted operation. For ideal results, focus on these essentials:
- Enable power saving modes and automatic shutdown.
- Use proper cable management tools.
- Choose energy-efficient lamp technology.
- Ensure stable, accessible power connections.
When selecting your projector, keep in mind that LED projectors are typically the most energy-efficient, offering lower power consumption and a longer lifespan than many traditional models.
Planning Around Room Layout and Seating
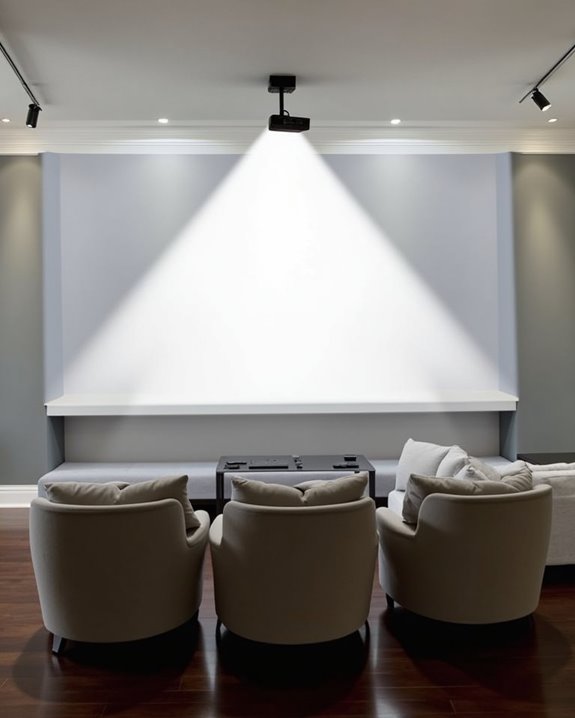
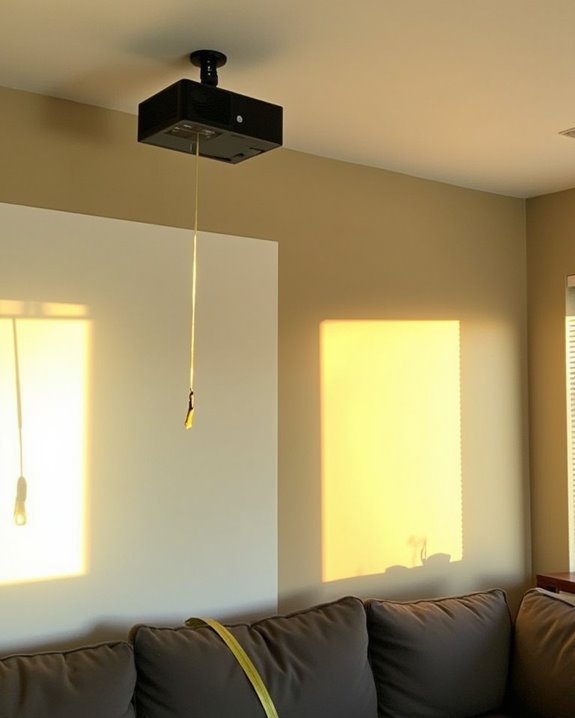
When planning around room layout and seating for your projector setup, it’s essential to carefully evaluate the placement of both the screen and seating to achieve ideal viewing angles and image clarity. Position your screen where it avoids direct ambient light, aligning seating with the screen’s center line to ensure unobstructed views for every viewer. For perfect comfort, set the seated eye level about one-third of the way up from the screen’s base, and calculate the projector’s throw distance according to the screen size and projector specifications. Assess ceiling height and available wall space, ensuring power access and clear pathways for the projector beam. Integrate decorative lighting that is dimmable to enhance ambiance and reduce glare, while considering room acoustics to ensure sound quality complements your visual setup. Before finalizing your arrangement, make sure to verify the mounting surface is sturdy enough to support the projector’s weight, as this is crucial for both safety and long-term stability.
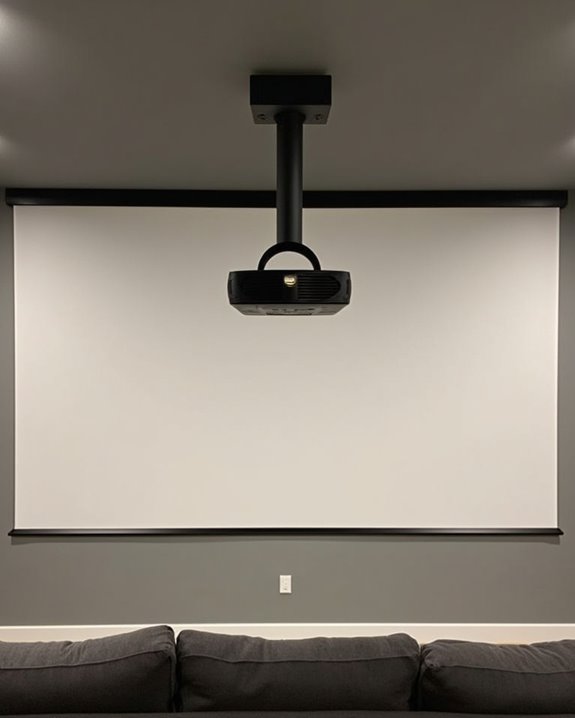
Comparing Ceiling, Wall, and Retractable Mounts
Although projector mounts come in several forms, choosing between ceiling, wall, and retractable options depends on your room’s configuration, desired aesthetics, and technical requirements. Ceiling mounts deliver excellent mounting aesthetics and cable concealment, maximizing space and allowing flexible angle adjustments, which is ideal for larger rooms or when a clean installation is critical. Wall mounts, while generally easier and more cost-effective to install, offer limited positioning flexibility but are accessible for adjustments and suitable for smaller spaces. Retractable mounts, often paired with automated screens, blend convenience with aesthetics by concealing equipment when not in use, making them versatile for multipurpose rooms. Ceiling-mounted projectors are also protected from dust and accidental bumps, which helps maintain long-term performance and reliability. To compare clearly:
- Ceiling mounts: superior cable concealment, flexible positioning
- Wall mounts: easier installation, budget-friendly
- Retractable mounts: maximize aesthetics, automated convenience
- Room size and projector type influence best choice

Heavy Duty Locking Ball Joint provides low-profile mounting(+-25 degrees tilt, 360 swivel) and position adjustment (max weight 25kgs)

UNIVERSAL L-SHAPED PROJECTION SCREEN BRACKETS: Our projector screen wall mount makes setting up for your next movie or presentation a breeze. Most projector screens do not come with mounting hardware. Our screen mounting brackets are what you need to your hang your screen. Universal hooks are compatible with most hanging projector screens on the market.

Fit for projectors below 12.1*7.87 inch. Max Load reach up 10lb.
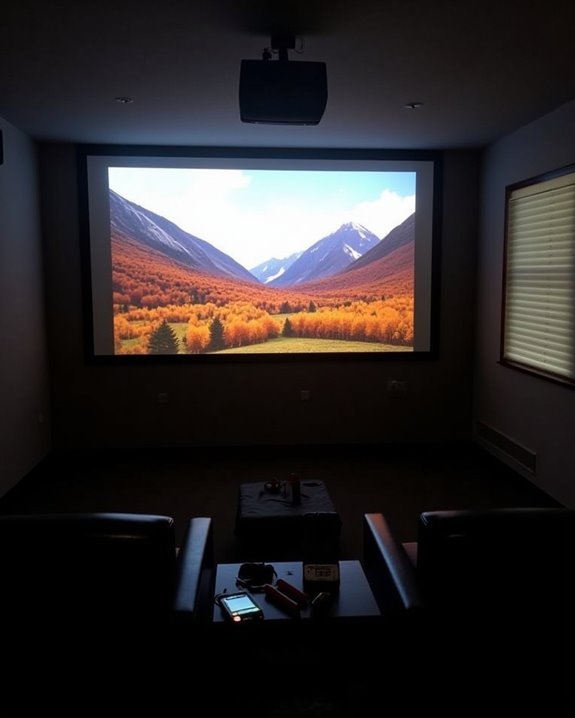
Step-by-Step Guide to Ceiling Mount Installation

Before you start mounting your projector to the ceiling, it’s essential to take into account several key factors that will ensure a secure and effective installation. Begin by aligning the mount directly above your screen’s center line and confirming the projector’s throw distance to achieve the correct image size. Check vertical offset recommendations from the manufacturer, and factor in ceiling height to avoid obstacles like fans or vents. Select a ceiling mount rated for your projector’s weight, gather all necessary tools, and locate ceiling joists for secure fastening. Once the mount is firmly attached, position and secure the projector, using adjustable features for precise projector lens calibration. Lastly, route cables neatly for sound system integration, and verify all connections and image alignment before finalizing your setup. Make sure to conceal wires using decorative trunking or by running them through the ceiling or walls for a clean and professional appearance.
Ultra heavy-duty outdoor performance: Designed for the largest outdoor TVs, this professional-grade wall mount supports screens from 60" to 110" with an exceptional 275 lb weight capacity, delivering rock-solid stability for oversized displays.

Built for ceilings that standard mounts can’t reach – The MI-509XL’s 10-foot pole drops your TV 98 to 118 inches below the ceiling — purpose-built for warehouses, production floors, auditoriums, large event venues, hospitals, and any high-bay space where a standard mount leaves the screen too far from the audience.

MAXIMUM FLEXIBILITY WITH EXTRA LONG 24” EXTENSION ARM - Perfect for corner mounting or hard-to-reach viewing angles, this TV wall mount extends a full 24 inches from the wall—offering a broader range of motion than standard mounts. Easily retracts to 2.75 inches to sit close to the wall for a sleek, modern look.
Exploring Wall Mount Alternatives
While ceiling mounts are a popular choice for projector installation due to their ability to save floor space and provide flexible viewing angles, exploring wall mount alternatives can offer distinct advantages depending on your room layout and technical requirements. Wall mounts are often more straightforward to install, making them a cost-effective solution for high-quality images, though they require a dedicated section of your wall and careful consideration of weight support and electrical availability. If you prefer alternative placement or need a non-permanent solution, portable mounting options like tripod stands or mobile equipment carts provide flexibility for use in different spaces. Wall-mounted fixed projectors also allow for better air circulation, which helps prevent overheating and maintains optimal performance. Custom mounts can meet unique spatial or ergonomic needs.
- Wall mounts require fixed placement and sufficient structural support.
- Portable mounting ensures mobility and quick setup.
- Custom mounts address unique installation challenges.
- Always verify electrical and weight requirements before installing.
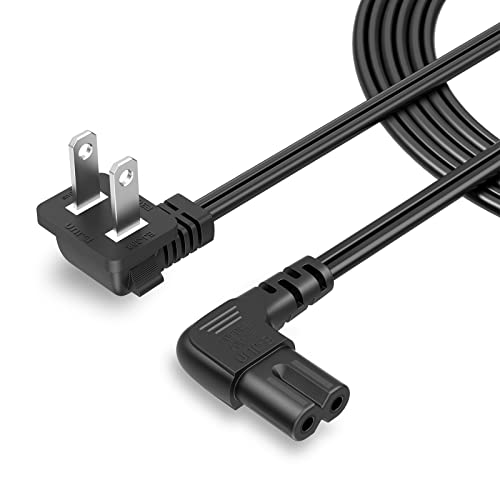
Compatibility: CableCreation power cord with 90-degree angle is a good replacement for most models of Samsung TV, LG/ TCL/ Apple LED TV, scanner, Canon Pixma/ Epson/ HP printer, projector, PC, computer, powered speakers, Sound Bar, Sony PS5/PS4/PS3 Slim, Xbox One S X and more that have a 2 prong figure 8 shotgun power connector.

Wall Mounted Fixed Frame Projection Screen (Overall Size 63.625" Tall x 109.25" Wide) (Viewing Area 120" Diagonal x 58.875" Tall x 104.5" Wide) No option for Legs or Stands with this product. Recommended for projectors with Native 16:9 Resolution

【 15 AMP Heavy Duty 】6 Grounded 3 prong AC outlets; 15A / 120V / 1800W high power; heavy duty power strip surge protector is perfect for entertainment centers, offices, and anywhere multiple devices need power
Assessing Screen Size, Type, and Light Conditions
Selecting the right projector screen involves careful consideration of screen size, material type, and the ambient light conditions in your space, as each factor directly affects image clarity and viewing comfort. Start by choosing a screen size that suits your room and seating distance—80″ to 120″ screens are ideal for small to medium rooms, while larger screens benefit spacious areas. Screen material impacts brightness and color accuracy; materials like vinyl or gray screens can help manage light reflection and preserve contrast, especially in rooms with ambient light. Assess how much natural or artificial light enters your space, as screens designed to minimize glare or with higher gain are better for brighter environments. Fixed frame screens are best suited for rooms with ample space and provide a simple, high-quality projection surface. Use screen calculators to align your dimensions, aspect ratio, and seating arrangement for optimal viewing.
Ensuring Mount Stability and Projector Security
After you’ve decided on the ideal screen size and type for your viewing environment, it’s important to focus on how your projector will be mounted to guarantee both stability and security. Ensuring proper mount security starts with selecting the right mount type—fixed mounts provide permanent stability, while ceiling mounts keep the projector safely out of reach. Stability measures include locating ceiling studs for a solid anchor, choosing mounts made from durable materials like steel or aluminum, and balancing the projector to prevent tilting. Proper projector mounting directly affects the overall viewing quality and experience by ensuring stable and secure projector positioning. Secure all mounting hardware and manage cables to avoid hazards. To reinforce these key points, remember:
- Use a stud finder to locate ceiling studs for safe anchoring.
- Select a mount rated for your projector’s weight.
- Routinely check mounting hardware for wear or looseness.
- Secure cables to prevent accidental disconnections.
Frequently Asked Questions
Can I Mount a Projector in a Room With a Sloped Ceiling?
Yes, you can mount a projector in a room with a sloped ceiling. You’ll need an adjustable ceiling mounting or consider wall placement. Use angle-compensating mounts, manage cables, and guarantee everything’s stable for the best results.
How Do I Hide the Projector When Not in Use?
Think of your projector as a magician—now you see it, now you don’t. You can use a concealed projector in a hidden mount, retractable lift, or decorative cover, letting technology vanish seamlessly into your living space.
Is It Safe to Use a Projector Near HVAC Vents?
You shouldn’t place a projector directly near HVAC vents for HVAC safety and to prevent heat interference. Direct airflow or heat from vents can cause overheating or performance issues. Always allow enough ventilation space and avoid blocking vents.
Can I Use a Projector Outdoors for Temporary Setups?
You’ll feel like you’re building a backyard cinema empire with outdoor projector setups! Yes, you can use a projector for temporary projection solutions—just guarantee stable placement, weather resistance, quick assembly, and power access for a fantastic viewing experience.
What Materials Should I Avoid Mounting a Projector Onto?
You shouldn’t mount a projector onto fragile surfaces, flammable materials, or anything that can’t handle the projector’s weight. Don’t use improper wall anchors or unstable shelves—these can lead to falls, electrical hazards, or overheating issues.