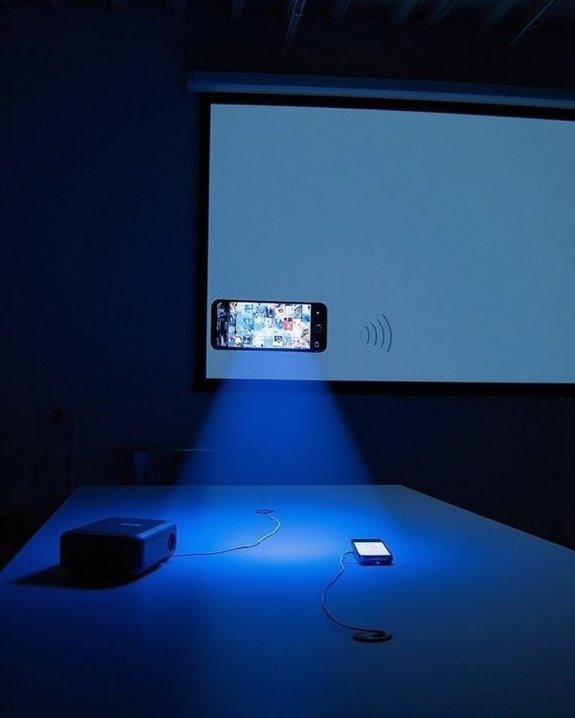
While giant home theater setups dazzle with their capabilities, your smartphone can serve as a surprisingly effective projector alternative for your TV viewing needs. You’ll discover that modern phones offer multiple ways to cast or mirror content onto larger screens, whether through wireless technologies or physical adapters. The process requires minimal technical knowledge but delivers impressive results when properly configured. Understanding the basics of phone-to-TV projection will transform how you share videos, photos, and presentations with friends, family, or colleagues in situations where traditional viewing methods aren’t available.
Key Takeaways
- Connect your phone to TV using HDMI adapters (USB-C/MHL) for wired projection with highest quality display.
- Use wireless options like AirPlay (Apple), Miracast (Android), or Chromecast to mirror your screen without cables.
- Ensure both devices are on the same Wi-Fi network and select the correct input source on your TV.
- Optimize settings by maximizing phone brightness, adjusting TV display settings, and managing power for uninterrupted viewing.
- For audio enhancement, connect external speakers or use the TV’s sound system rather than your phone’s speakers.
Understanding the Phone-to-TV Projection Methods
When you’re looking to display your phone’s content on a larger screen, you’ll need to understand the various projection technologies available to make the right choice for your needs. Different systems offer varying levels of screen resolution and device compatibility, which directly impact your viewing experience.
Apple devices work exclusively with AirPlay, providing stable mirroring with excellent screen resolution when connected to compatible TVs. Android users can leverage Miracast for full-screen mirroring without additional software, though compatibility varies across device manufacturers. Alternatively, Chromecast offers wide device compatibility but only casts specific content rather than mirroring your entire screen. For Windows users, WiDi comes built into newer operating systems, while DLNA serves primarily as a media streaming solution rather than a true mirroring technology. Modern projectors often support WiFi 6 connectivity, enhancing wireless streaming stability and speed when casting from phones.
Required Equipment for Phone Projection
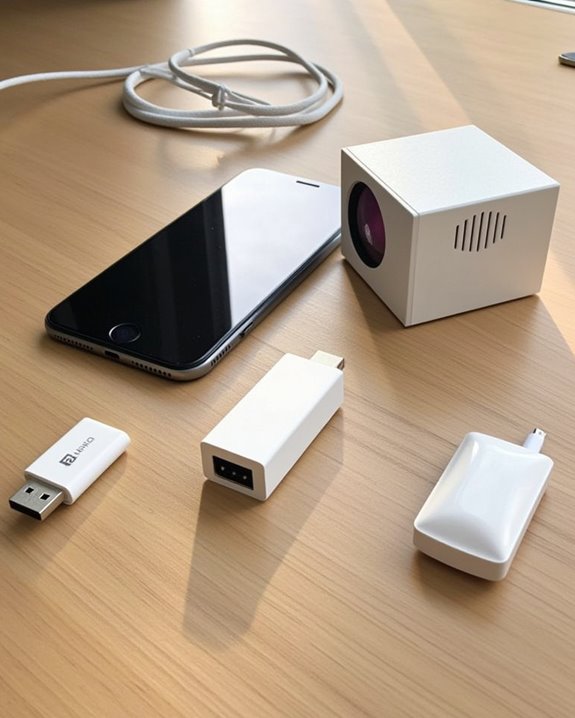
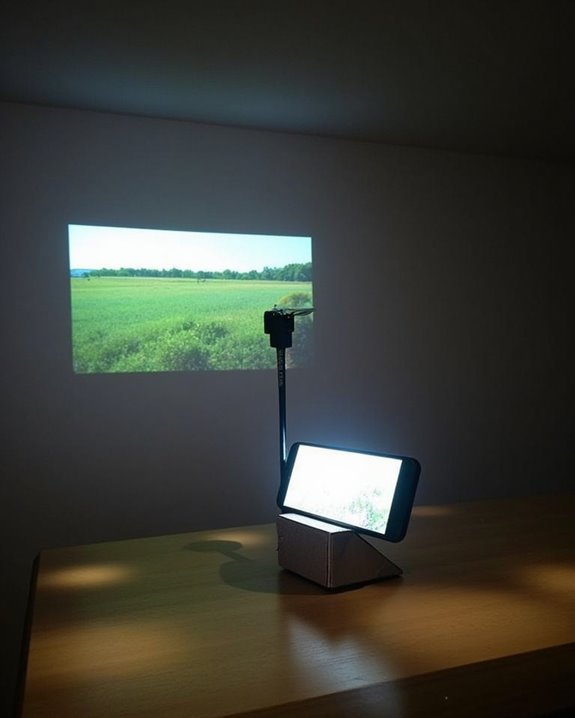
Now that you’ve explored how different phone projection technologies work, you’ll need to gather the right equipment to successfully display your phone’s content on a larger screen. The essential components include a compatible smartphone with adequate battery life, a projector with appropriate input ports (HDMI, VGA, or USB-C), and the correct adapter for your device type.
For excellent viewing, select a projector that supports high screen resolution to match your phone’s display capabilities. You’ll also need the appropriate cables, such as HDMI or USB-C, and a suitable projection surface. If you prefer wireless connectivity, consider adding a Chromecast, utilizing screen mirroring apps, or using Wi-Fi Direct features. Remember that wireless options may drain your phone’s battery life faster, so keep a power supply nearby during extended projection sessions. To ensure smooth streaming and future-proof functionality, prioritize projectors equipped with WiFi 5G and Bluetooth 5.1/5.2 connectivity.
Wired Connection Options for Maximum Quality
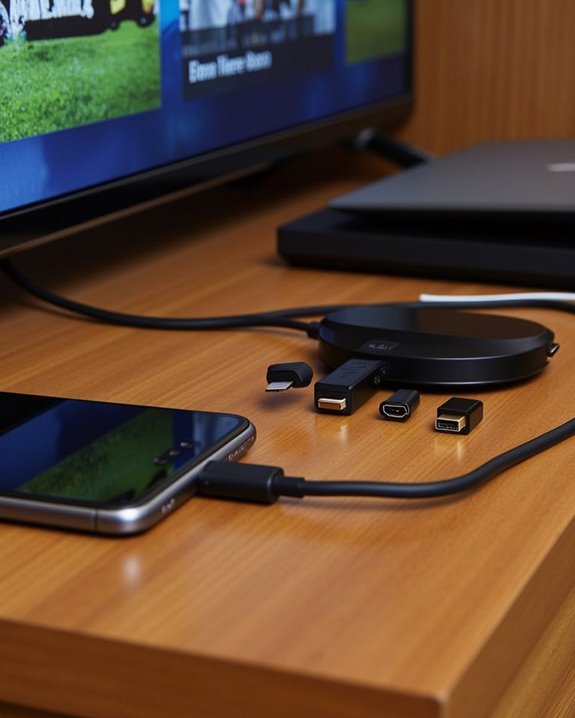
To achieve the highest possible display quality when projecting from your phone, wired connections offer unmatched reliability and visual fidelity compared to their wireless counterparts. The most common setup involves using an HDMI cable with an appropriate adapter for your phone, ensuring cable clarity throughout your viewing experience. Most modern projectors feature HDMI inputs, making this connection method straightforward and effective.
For phones with USB-C ports, a USB-C to HDMI adapter provides excellent results, though adapter compatibility should be verified before purchase. Older devices with Micro-USB ports may require MHL adapters instead. When troubleshooting connection issues, check that cables are securely connected, the projector is set to the correct input source, and your phone’s screen mirroring is enabled. These wired options deliver superior stability and consistently higher image quality for presentations or entertainment. Choosing cables with gold-plated connectors and braided shielding helps reduce interference and maintain signal clarity, especially for high-resolution projection.
Wireless Projection Technologies Explained
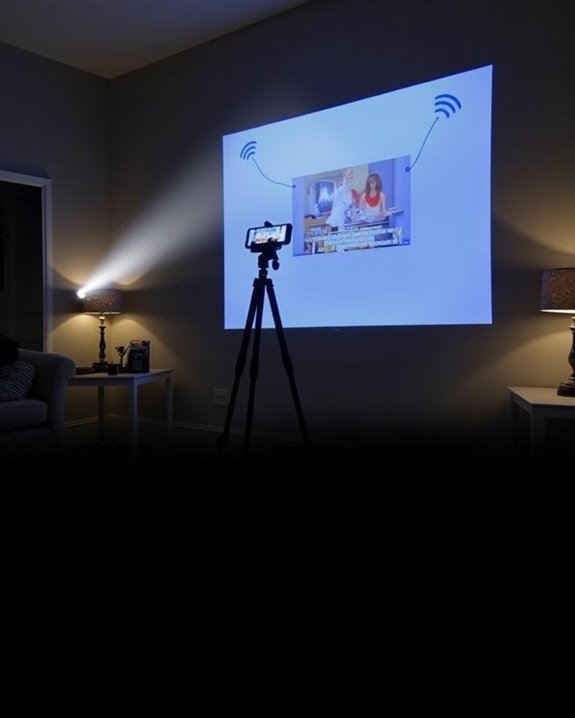
Unlike wired options that tether you to your projector, wireless projection technologies free you from cable constraints while still delivering impressive visual results. Your smartphone can connect to projectors using several methods: Wi-Fi Direct, Bluetooth, or screen mirroring protocols like Chromecast, AirPlay, and Miracast, depending on your projection compatibility requirements.
Each technology offers distinct advantages, with Wi-Fi providing greater range and bandwidth for high-quality video streaming, while Bluetooth works well for simpler content sharing. When setting up these connections, verify wireless security protocols are enabled to protect your data during transmission. Most modern phones support at least one wireless projection method, allowing you to mirror your screen or cast specific content directly to compatible projectors without additional hardware, though some older projectors may require dongles to enable wireless functionality.
Step-by-Step Setup Guide for Different Phone Types
Setting up your phone as a projector requires different approaches depending on whether you’re using an Android or iOS device, though both can be configured through either wired or wireless connections with the right accessories. For Android phones, navigate to Settings, select Display, then enable screen mirroring or cast options, being mindful that intensive projection can drain battery life quickly.
For iPhones, swipe to access Control Center, tap Screen Mirroring, and select your compatible projector or Apple TV. The user interface remains responsive during projection with most phones, but you’ll need device-specific adapters—USB-C to HDMI for newer models or MHL adapters for older Android devices with Micro-USB ports. Remember to select the appropriate input source on your projector after connecting, and consider portable adapters when traveling for presentations.
Optimizing Your Display Settings for Viewing
While your phone’s default display settings work adequately for everyday use, they’ll need substantial adjustments for ideal projection quality. Start by maximizing your phone’s brightness and adjusting contrast settings for better clarity and detail. Proper Screen Calibration involves matching your phone’s resolution with your projector’s capabilities, which considerably enhances image sharpness.
Ambient Lighting plays a vital role in projection quality; ensure your viewing room is as dark as possible to improve image contrast and vibrancy. Minimize peripheral light sources that could create glare on your projection surface. Additionally, consider using dedicated mobile apps for color calibration, which can fine-tune your display for optimal viewing. Remember to adjust your projector’s zoom, focus, and keystone settings to complement your optimized phone display for the best possible viewing experience.
Enhancing Audio Quality During Projection
Because your phone’s built-in speakers aren’t designed for filling large spaces, enhancing audio quality becomes essential for an immersive projection experience. Consider connecting your phone to external Bluetooth speakers or a soundbar for significant audio improvements, making proper audio calibration critical for balanced sound throughout your viewing area.
For wired solutions, use an HDMI cable with audio extraction capabilities or connect directly to a home theater system through optical cables, ensuring all audio settings are configured correctly on both your phone and external devices. When dealing with challenging room acoustics, implement basic soundproofing techniques like adding soft furnishings or positioning speakers strategically to minimize echo. Remember to adjust any audio delay settings to maintain perfect synchronization between video and sound, especially when using wireless connections that might introduce latency.
Troubleshooting Common Connection Issues
Even the best setup can experience technical difficulties, so you’ll need to know how to address common connection problems when using your phone as a projector. First, make certain all cables are properly connected and try alternate adapters if you’re using a wired connection. If casting wirelessly, verify that both your phone and projector are connected to the same network, then restart your router to clear potential network congestion.
Screen resolution mismatches often cause display problems, so adjust your smartphone’s resolution settings to match your projector’s capabilities. Check your phone’s power management settings, as power-saving features might interrupt your connection during projection. If issues persist, try disabling firewall settings temporarily, update both devices’ firmware, and select the correct input source on your projector.
Advanced Tips for a Professional Viewing Experience
To transform your phone-based projection setup into a professional viewing experience, you’ll need to master several key elements beyond basic connectivity. Start with proper projector calibration, adjusting both focus and color settings to ensure sharp, accurate image reproduction. Control ambient lighting by using dark curtains or specialized screen materials that reject external light sources, markedly improving contrast and visibility.
For truly immersive viewing, connect external speakers or a soundbar to compensate for your phone’s limited audio capabilities. Position your projection setup to minimize glare, ideally in a room where you can control light conditions completely. Regular maintenance, including screen cleaning and lens care, will preserve image quality over time. Consider using a dedicated projection screen rather than a wall for ideal color reproduction and brightness levels.
Frequently Asked Questions
Can I Project Netflix/Streaming Services Without Internet Connection?
Ah, you’re dreaming of Netflix without Wi-Fi! Sorry to burst your bubble, but streaming services require internet connection regardless of screen resolution or device compatibility. You can only project pre-downloaded content when offline.
Will Phone Projection Drain My Battery Faster?
Yes, phone projection substantially increases battery consumption due to high screen brightness and data transmission. You’ll notice faster drain, so enable power saving modes and consider using a power bank during longer sessions.
How Long Do Projection Adapters Typically Last?
Did you know 70% of projection adapters last 3-5 years? Your adapter’s lifespan depends on material quality and usage frequency. With proper care, high-quality projection adapters offer excellent durability, potentially lasting up to a decade.
Can I Charge My Phone While Using It as Projector?
Yes, you can charge while projecting, but it depends on your setup. With USB-C DisplayPort Alt Mode, you’ll manage both simultaneously. Wireless projection eliminates charging concerns entirely. Adapters often require separate power management solutions.
Will Constant Projection Cause Overheating Damage to My Phone?
Yes, constant projection can cause phone overheating, potentially harming your device longevity. You’ll need regular breaks, reduced brightness, and proper ventilation to protect your phone from heat-related damage during extended use.