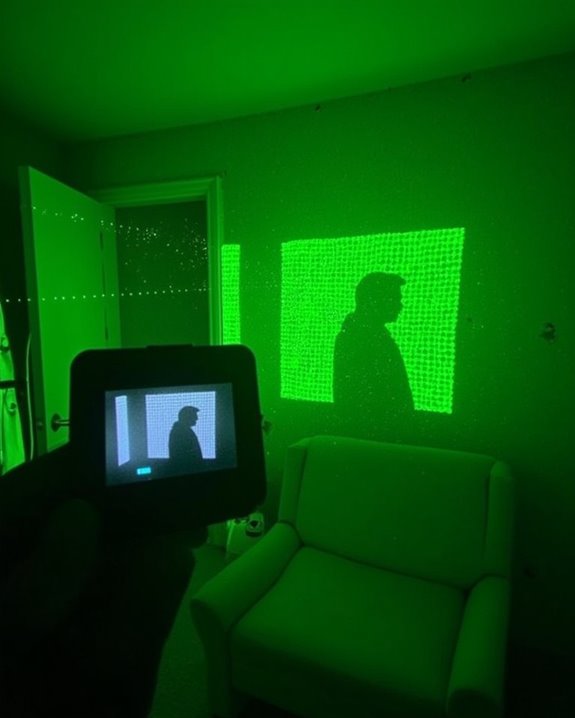
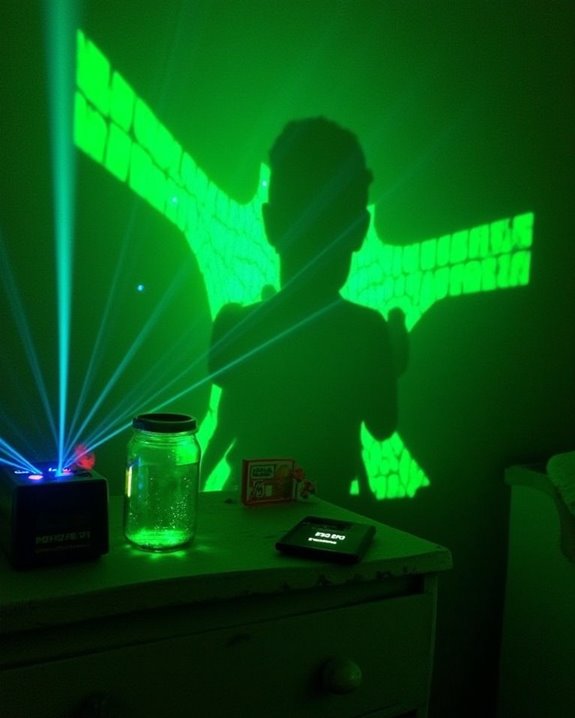
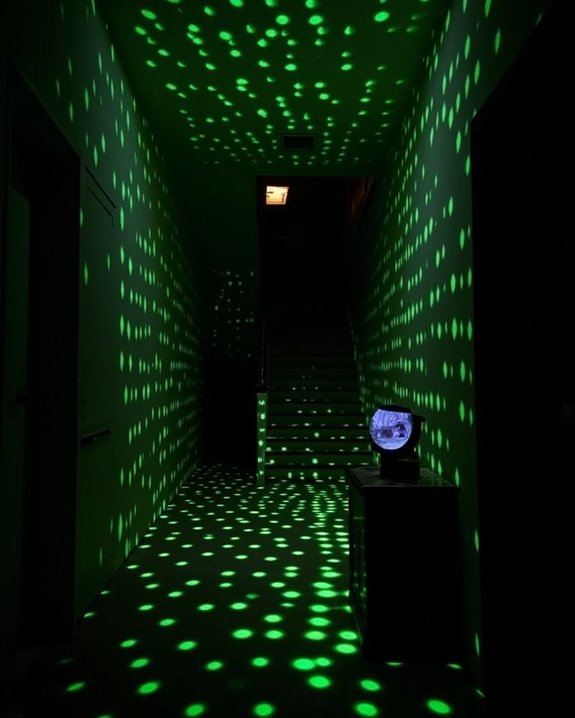
The DOTS Projector ranks among Phasmophobia’s most valuable ghost-hunting tools, providing critical evidence for identifying several spectral entities. You’ll need to master proper placement techniques, angle adjustments, and tier capabilities to maximize its effectiveness during investigations. When set up correctly, the projector casts a grid of green dots that allows you to spot ghost silhouettes passing through the projection field, giving your team visual confirmation of paranormal presence without risking direct contact. Let’s examine how to leverage this tool’s full potential during your next hunt.
Key Takeaways
- Position DOTS projectors in high ghost activity areas, especially the ghost’s favorite room, for maximum detection chances.
- Use the scroll wheel to adjust the angle and place Tier 2/3 projectors on walls or floors with optimal coverage.
- Look for flickering or disappearing dots, which indicate ghost manifestation through the projected light field.
- Combine DOTS with other equipment and turn off lights to improve visibility of ghost interactions.
- Remember that Goryo ghosts can only be seen with DOTS through a video camera, never with the naked eye.
Setting Up Your DOTS Projector for Maximum Ghost Detection
When hunting ghosts in Phasmophobia, you’ll need to strategically position your DOTS Projector to maximize your chances of detection. Place the device in areas with high ghost activity, typically within the entity’s favorite room where EMF compatibility enhances overall evidence collection. Use the scroll wheel to adjust the projector’s angle, ensuring ideal coverage of the space while accounting for Temperature effects that may influence ghost manifestations.
Tier 2 and Tier 3 DOTS Projectors offer greater flexibility, as they can be attached to walls or floors with a detection radius of approximately 2.5 meters. Focus on activity hotspots and press ‘F’ for quick placement, rotating the device to cover the most area. For best results, combine your DOTS Projector with other equipment to create a thorough ghost tracking system. Consider using a projector with auto keystone correction to ensure the projected dots remain clear and sharp for optimal detection accuracy.
Understanding the DOTS Projector Tiers and Upgrades
As you progress through your ghost hunting career in Phasmophobia, you’ll discover that the DOTS Projector comes in three distinct tiers, each offering increasingly sophisticated capabilities for paranormal detection. The basic Tier 1 functions merely as a handheld laser pointer with minimal range, while Tier 2, *accessed* at level 29, provides placeable functionality with a 2.5-meter coverage radius.
When considering upgrade prioritization, moving from Tier 1 to Tier 2 offers the best cost benefit, dramatically improving your evidence collection through wall and ceiling mounting options. Tier 3, available at level 60, features triple lenses with scanning capabilities and extended 7-meter range, though it may be excessive for smaller maps. Strategic placement becomes increasingly important with higher tiers to maximize detection opportunities while adapting to each location’s unique layout.
For enhanced performance in varying environments, understanding how image size and suitable environments affect projector effectiveness can greatly improve your usage strategy.
Optimal Placement Strategies for Different Maps
Successfully deploying your DOTS Projector requires careful consideration of each map’s unique layout, as the effectiveness of your evidence gathering depends considerably on strategic positioning. For linear maps, utilize hallways and doorways where ghost behavior typically follows predictable movement patterns. Position projectors at corners and intersections to maximize coverage area during map navigation.
In maze-like environments, focus on junction points and high-traffic areas where ghosts frequently traverse. For outdoor locations, place projectors along garden paths and near entrance points to monitor perimeter activity. On smaller maps, central locations and corners provide efficient coverage, while larger maps benefit from a divide-and-conquer approach with projectors in stairwells and key rooms. Remember that slight overlapping coverage prevents blind spots, especially in areas with documented paranormal activity. Utilizing projectors with auto-focus and keystone correction features can significantly enhance image clarity and ease of setup in diverse environments.
Identifying Ghost Types Through DOTS Evidence
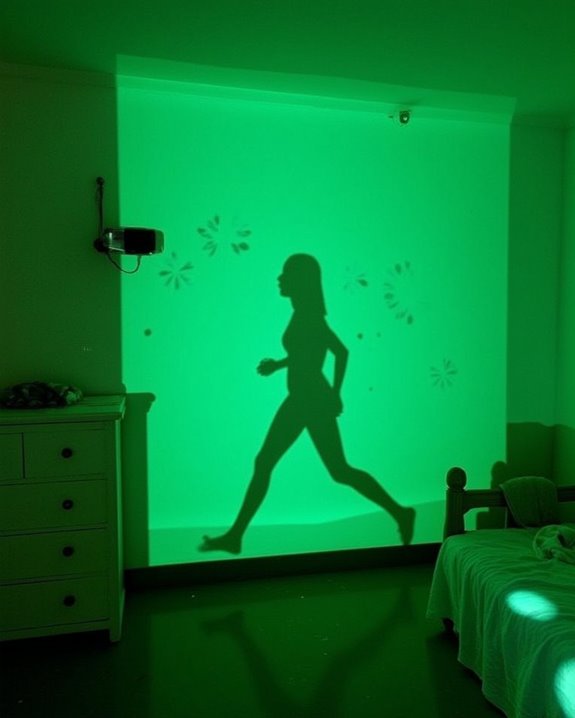
Now that you’ve mastered placement, the true power of the DOTS Projector becomes apparent in its ability to pinpoint specific ghost types. When observing through your camera setup, watch for distinctive ghost interaction patterns where dots flicker or momentarily disappear, signaling a ghost passing through the infrared grid.
Certain ghosts, including Goryo, Thaye, and Myling, will consistently interact with DOTS, making this evidence vital for their identification. The Goryo is particularly notable, as it only reveals DOTS evidence through cameras, never to the naked eye. For the Thaye, which becomes progressively less active, capturing DOTS evidence early is essential. Remember to combine DOTS findings with other evidence types—EMF readings, UV traces, or ghost writing—to conclusively identify your spectral adversary.
Advanced Techniques for Team-Based DOTS Usage
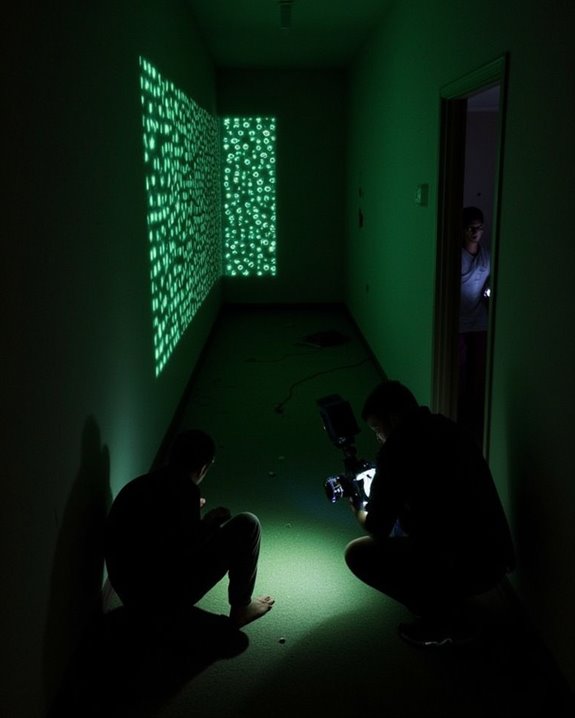
When coordinating with fellow ghost hunters, your team’s effectiveness with DOTS projectors can dramatically increase through proper role division and strategic placement. Assign specific roles to each team member, with one operating the DOTS projector while others monitor different equipment, ensuring maximum evidence collection when a ghost isn’t hiding. Remember to communicate quietly to avoid startling entities, which often retreat when disturbed.
For ideal results, prepare the environment by turning off lights and placing higher-tier projectors in areas of frequent ghost activity. Regular equipment maintenance of your DOTS devices, especially Tier 2 and Tier 3 models, ensures reliable performance during critical moments. Review collected evidence as a team to identify patterns, allowing you to adapt strategies for future investigations based on observed ghost behaviors.
Frequently Asked Questions
Can the DOTS Projector Work During a Ghost Hunt?
No, DOTS projectors won’t provide ghost detection evidence during hunts, though you can safely hold them. The equipment interaction continues as normal, with the ghost attracted to you but not revealing its outline.
How Long Should I Wait Before Assuming DOTS Isn’t Evidence?
You should wait about 3-5 minutes of active ghost activity before assuming DOTS isn’t evidence. If you’ve seen no DOTS after 20 minutes, it’s reasonable to seek evidence confirmation elsewhere.
Does Using DOTS Increase Ghost Activity or Aggression Levels?
No, using DOTS doesn’t increase ghost activity or ghost aggression levels. You can safely deploy it without worrying about provoking the entity. It’s designed to observe, not interact with the ghost directly.
Can Multiple DOTS Projectors Increase Detection Chances in One Room?
Like a savvy ghost hunter using flood lights, you’ll find multiple projectors strategically placed in one room enhance detection efficiency. You’re fundamentally creating a larger web to catch evidence as ghosts traverse the space.
Will Smudge Sticks or Crucifixes Affect Ghost Interactions With DOTS?
Neither smudge sticks nor crucifixes directly affect DOTS functionality. However, the smudge sticks effect temporarily reduces ghost activity, while crucifix influence prevents hunts—both potentially decreasing your chances of capturing DOTS evidence temporarily.