Have you ever wondered how to safely witness a solar eclipse without expensive equipment? You’re about to discover how a simple pinhole projector can protect your eyes while providing a clear view of this celestial phenomenon. With just a piece of cardboard, a pin, and a few minutes of your time, you’ll create a basic scientific tool that demonstrates fascinating optical principles. The proper technique matters considerably, as incorrect viewing methods can cause permanent eye damage, so the following instructions will ensure your solar observations remain both educational and safe.
Key Takeaways
- Cut two viewing holes in a cardboard box, cover one with foil, and make a tiny pinhole in the foil.
- Place white paper inside the box as a projection screen and seal all edges to prevent light leakage.
- Stand with your back to the sun, allowing sunlight to enter through the pinhole and create an image on the screen.
- Never look directly at the sun through the pinhole; only view the projected image on the white surface.
- Test your projector before the eclipse and adjust pinhole size for optimal image clarity and brightness.
Why Solar Viewing Safety Matters
The risks aren’t always immediately apparent, as symptoms of eye damage may develop gradually overhours or days. Approximately 30% of Americans remain unaware of these dangers, highlighting the critical need for public awareness about eye safety. Using uncertified viewing devices, homemade filters, or looking directly at the sun—even briefly—can cause retinal burns from intense UV radiation. These preventable injuries can result in significant healthcare costs and long-term vision problems, which is why proper protection methods like pinhole projectors offer a safe alternative for solar viewing. For enhanced viewing experiences, some also use high-contrast projection techniques to safely observe solar events indirectly.
Materials Needed for Your Pinhole Projector
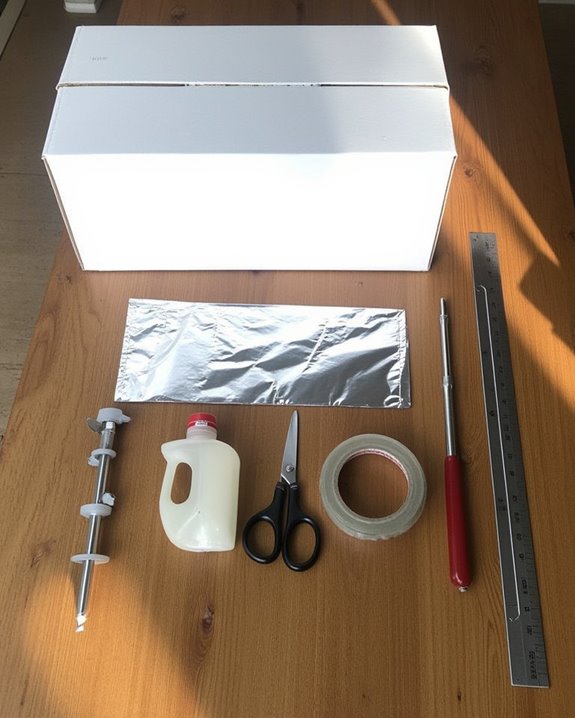
Now that you understand the importance of safe solar viewing, let’s gather everything you’ll need for creating your own pinhole projector, a simple yet effective tool for indirect sun observation. The essential components include a cardboard box (cereal box works well), white paper for the projection surface, aluminum foil for creating the pinhole aperture, and tape to secure everything in place.
You’ll also need basic tools: a pin or thumbtack to create the precise pinhole aperture (approximately 3mm diameter), scissors for cutting, and potentially a ruler for accurate measurements. Consider adding light-blocking materials like black paper or dark tape to prevent unwanted light leakage. For enhanced viewing, choose sturdy cardboard and ensure your aluminum foil remains smooth and wrinkle-free to maintain sharp image projection quality.
For optimal results, consider the projector’s brightness & room suitability to ensure clear image projection in your viewing environment.
Creating a Basic Cardboard Pinhole Projector
Creating a basic cardboard pinhole projector involves a simple yet precise assembly process that you’ll find straightforward to follow. Using stiff white cardboard as your base material, create the Pinhole Design by making a small, round hole with a sharp pin or thumbtack in one piece of cardboard. For enhanced Material Durability, consider taping aluminum foil over the hole, which provides a smoother surface and creates a cleaner pinhole projection.
Hold the pinhole card above your shoulder with your back toward the sun, allowing light to pass through onto your second piece of cardboard serving as a screen. Adjust the distance between the two pieces to change the image size—moving the screen further creates a larger projection. Remember, never look directly at the sun through the pinhole for safety. For clearer viewing results in different lighting conditions, controlling ambient light by using blinds or curtains is recommended to reduce interference from surrounding brightness, a method often used in ambient light control.
The Cereal Box Pinhole Projector Method
For a more durable and practical variation of the cardboard pinhole projector, you’ll find the cereal box method particularly useful. This approach, which shares historical significance with ancient camera obscura techniques, creates a self-contained viewing system that’s both effective and portable.
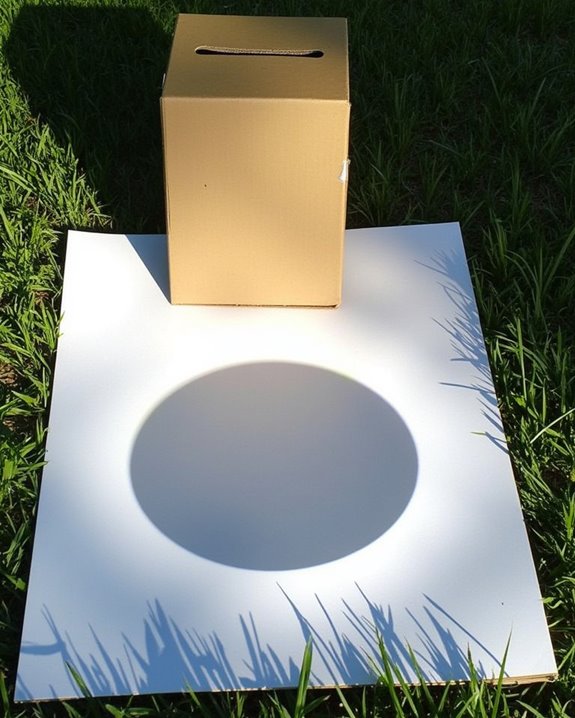
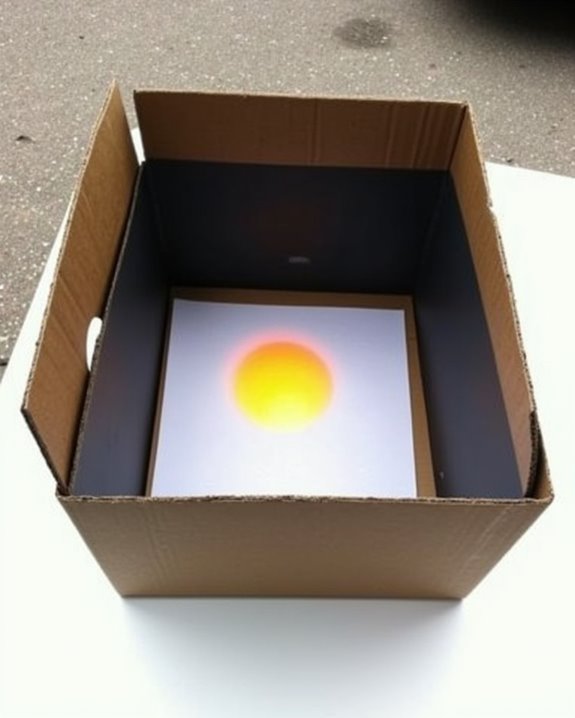
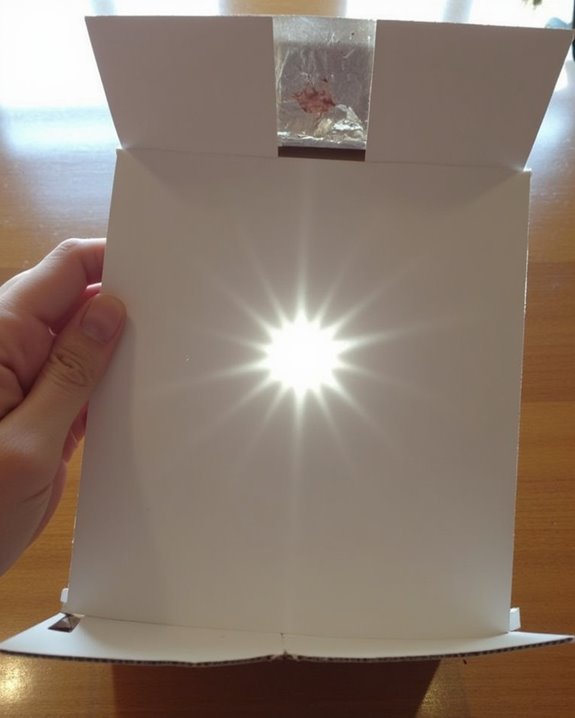
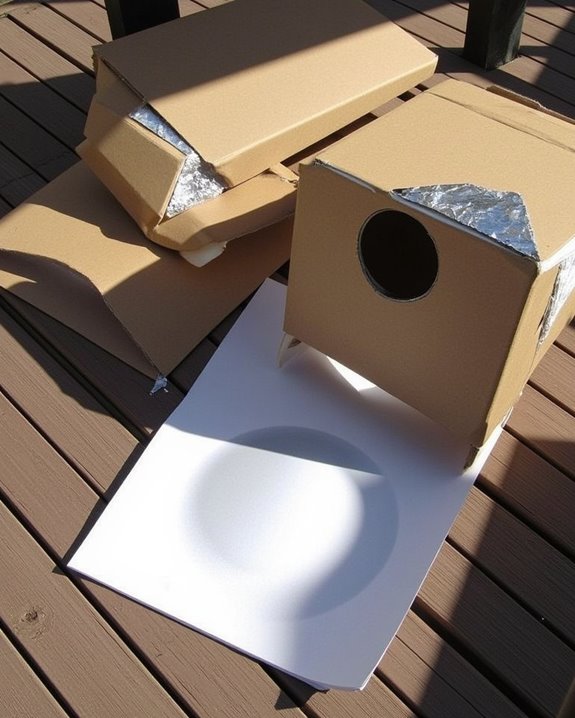
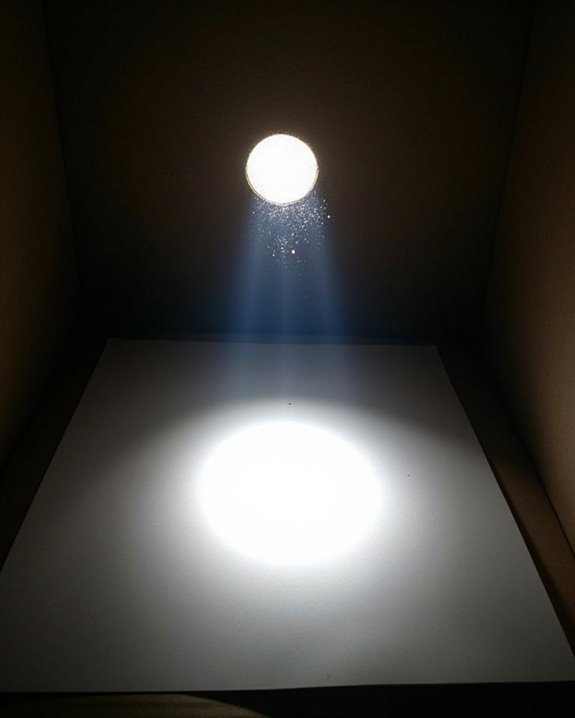
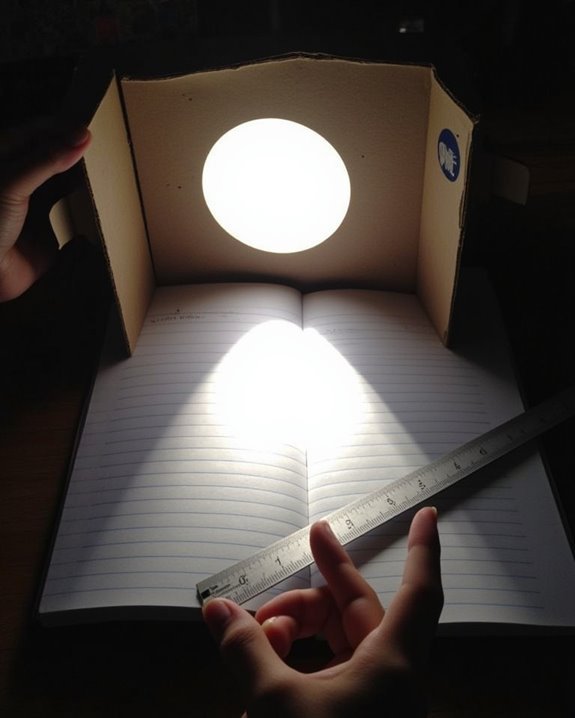
Begin by tracing the box end on white paper to create your screen, then cut two square holes on the opposite end. Cover one hole with aluminum foil and carefully poke a small pinhole in its center, which functions similarly to technological innovations in early photography equipment. Secure the foil with tape, insert your paper screen inside the box, and ensure all parts are tightly sealed to prevent light leakage. When viewing, stand with your back to the sun, positioning the pinhole toward the sunlight while watching the projected image form on your screen.
Alternative Pinhole Projection Techniques
While cardboard and cereal boxes make excellent pinhole projectors, you’ll find that common household items can serve equally well for safe solar viewing. A pasta colander creates multiple solar patterns simultaneously, while straw hats project fascinating eclipse images onto the ground. For simplicity, overlap your fingers at right angles to cast tiny sun crescents without any materials at all.
For better results, use a piece of cardboard with aluminum foil covering a one-inch hole, then pierce the foil with a pin. Hold this pinhole device far from your projection screen to increase image size, keeping the screen in shadow while the pinhole faces the sun. Experiment with multiple holes of varying sizes to create artistic projections that display the eclipse’s progression. Tree leaves naturally create similar effects, projecting multiple eclipse images through tiny gaps between foliage.
Testing Your Projector Before a Solar Event
Testing your pinhole projector before the big day isn’t just helpful—it’s essential for ensuring you’ll capture the eclipse safely and clearly. Find an outdoor location on a sunny day and position the projector with your back to the Sun, allowing light to pass through the pinhole and create an image on your viewing surface. Experiment with different pinhole sizes to determine ideal clarity—typically, a clean, round hole roughly 1-2mm in diameter works best for most viewing conditions.
Adjust the projection distance between your device and the viewing surface, noting that greater distances create larger but potentially dimmer images. Test on both sunlit and shaded surfaces, as shaded areas often provide better contrast. Always verify that your setup prevents any direct viewing of the Sun, maintaining proper safety protocols throughout your testing process.
Using Your Pinhole Projector for Educational Activities
Your pinhole projector isn’t just a tool for viewing solar events—it’s an engaging gateway to hands-on scientific discovery for learners of all ages. Use the device to demonstrate fundamental concepts about our solar system, allowing students to safely observe the relationship between the Earth, Moon, and Sun during eclipses. The projector vividly illustrates celestial mechanics when tracking solar movement across the projection surface.
Challenge students to experiment with different pinhole sizes and box lengths, encouraging them to document how these variables affect image clarity. Connect the activity to multiple disciplines by incorporating mathematical measurements, artistic renderings of observations, and historical context about early optics. Throughout these activities, continually reinforce safe solar viewing practices, emphasizing that the projector enables scientific observation without risk to eyesight.
Frequently Asked Questions
How Far Should the Projector Be From the Viewing Surface?
Like shadows that dance on time’s canvas, you’ll want to hold your projector about 1 meter (3 feet) from the viewing surface. Adjust based on pinhole size—smaller pinholes need greater projection distance for clarity.
Can Pinhole Projectors Show Solar Flares and Prominences?
No, you can’t see solar flares or prominences with a pinhole projector. Solar flare visibility and prominence observation require specialized equipment with higher magnification and filtering capabilities than simple pinhole projection can provide.
What Size Pinhole Produces the Clearest Eclipse Image?
You’ll see, you’ll appreciate, you’ll marvel at the clarity with a 0.5-1.0mm pinhole size. This range offers the best balance between image clarity and brightness for your eclipse viewing experience.
Do Weather Conditions Affect Pinhole Projector Performance?
Yes, weather considerably affects your pinhole projector performance. Clouds dim images, and ambient light reduces contrast. For ideal solar viewing safety, use durable projector materials and seek clear skies with minimal atmospheric interference.
How Long Before an Eclipse Should I Make My Projector?
You can make your projector anytime before the eclipse. Just guarantee it’s ready on the big day. Test it early to practice safety precautions, as pinhole projection is one of several alternative viewing methods.