You can use a projector on a black wall, but you’ll encounter unique challenges compared to projecting on white or gray surfaces, as black walls absorb much more light, often reducing the image’s brightness and overall vibrancy. The texture and finish of the wall, such as whether it’s matte or glossy, also substantially impact image clarity and contrast, making it essential to take into account both projector brightness and room lighting conditions before proceeding further.
Key Takeaways
- Yes, you can use a projector on a black wall, but expect lower image brightness due to high light absorption.
- Black walls can enhance contrast and deepen black levels, making images appear more vivid in well-controlled lighting environments.
- Surface imperfections and texture on black walls may reduce image sharpness and overall clarity.
- Higher brightness projectors (3000+ lumens) and careful calibration are needed to compensate for the dimming effect.
- Optimal results require a smooth, matte black surface, controlled ambient lighting, and precise projector installation.
Functionality and Limitations of Projecting on Black Walls
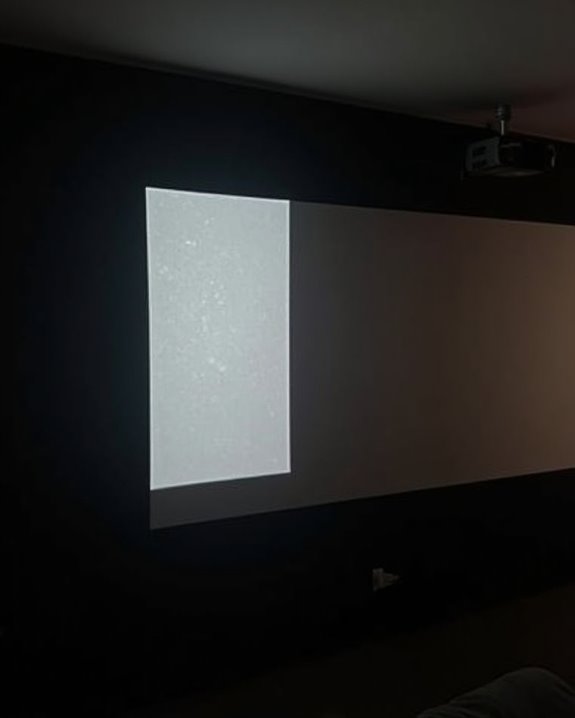
When you’re considering projecting onto a black wall, it’s important to understand both the advantages and constraints that come with this choice, especially compared to traditional projector screens. Projecting on a black wall can enhance perceived image contrast and deepen black levels, offering a vivid viewing experience in controlled lighting environments, such as home theaters. However, you may notice a reduction in image brightness, since black surfaces absorb more light, which impacts color accuracy and overall visibility, especially if ambient light isn’t minimized. Achieving ideal results often requires precise projector calibration to adjust brightness and color balance accordingly. Additionally, black walls may have inconsistent textures, potentially causing irregularities in sharpness and clarity. Unlike dedicated projector screens, black walls can limit viewing angles and are less effective in bright or multi-purpose rooms. Projectors with higher brightness levels help compensate for light absorption by black surfaces. For the best results, proper wall preparation—such as sanding, smoothing, and applying reflective coatings—can help improve image quality when using a projector on a black wall.
Light Absorption vs. Reflection: What Happens on Black Surfaces
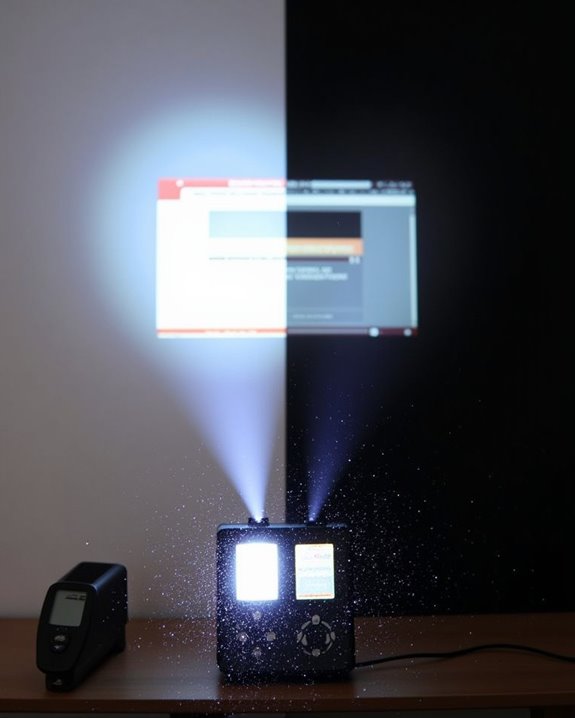
Although projecting an image onto a black wall might seem straightforward, understanding how black surfaces interact with light is key to predicting the results you’ll get. When light from your projector hits a black wall, nearly all visible light wavelengths—from violet to red—are absorbed rather than reflected. This strong atomic absorption occurs because the energy of incoming photons matches the gaps between electron shells in the wall’s material, enabling efficient energy uptake. As a result, very little visible light bounces back toward you, which is why black appears as the absence of color. The surface’s texture also affects reflection: rough, matte black walls scatter minimal light diffusely, while smooth, glossy black surfaces may create small, bright spots due to specular reflection, despite overall low reflectivity. Projectors with high contrast ratios can sometimes compensate for the loss of reflected light on dark surfaces, enhancing image visibility. Because black objects tend to heat up more under light, projecting a bright image onto a black wall can also cause the surface to warm faster than a white wall would.
Impact on Image Quality, Brightness, and Contrast
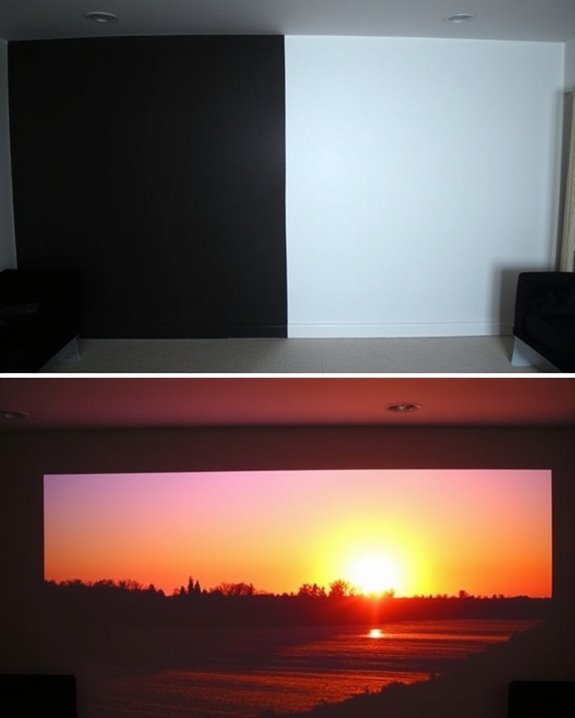
Curiously, projecting onto a black wall can substantially affect image quality, brightness, and contrast, making it important to understand these changes before setting up your projector. You’ll notice that image clarity and sharpness may decrease, especially if the wall has an uneven surface texture, since micro-shadows and distortions can arise. Color accuracy often suffers, as the wall’s dark tone introduces color shifts and reduces the vibrancy of projected images. Brightness is another concern—black walls absorb far more light than they reflect, resulting in a noticeably dimmer picture compared to white or grey surfaces, even if you maximize your projector’s brightness settings. Using projectors with higher brightness levels (such as 3000+ lumens) can help mitigate some of this dimming effect. However, contrast can actually improve, with deeper blacks and enhanced detail in dark scenes, provided the wall is smooth and well-prepared. For the best results, surface smoothness is crucial, as textured walls can further degrade the projected image.
Environmental Factors Affecting Projection Performance
Projector performance on a black wall isn’t just determined by the wall’s color; a range of environmental factors also play a significant role in shaping the quality and longevity of your projection setup. Ambient light in your room can directly affect color contrast, often requiring you to adjust brightness levels, which in turn influences energy consumption and device lifespan. Surface texture matters too, since a smoother wall reduces unwanted glare and helps maintain consistent image quality, while rough or uneven surfaces can scatter light and degrade the projected image. Greener manufacturing choices during the projector’s production process also impact its overall environmental footprint, supporting sustainable office initiatives and reducing waste. Dust and poor air quality may accumulate on both the projector and wall, diminishing clarity and performance over time. Proper ventilation, regular maintenance, and mindful placement are essential, ensuring ideal cooling and preventing heat buildup that could shorten your projector’s operational life.
Alternative Solutions: Paints, Screens, and Materials
When considering alternatives to projecting directly onto a black wall, you’ll find that specialized paints, dedicated screens, and advanced materials can dramatically improve image quality and overall viewing experience. Black wall textures can often cause uneven image reflection, but applying black matte finish paints or specialized projection paints creates a smoother, more controlled surface, enhancing color accuracy and contrast while maintaining paint durability if applied correctly. Dedicated projection screens, available in front or rear varieties, utilize high-quality materials like matte white or high-gain fabric, supporting wider viewing angles and brighter imagery compared to untreated walls. Additionally, alternative surfaces such as grey or white panels, fixed frame screens, and even portable inflatable screens offer superior light reflection and durability, making them practical for both permanent installations and temporary setups in varied environments. Many premium projection screen materials, like those from Rose Brand, are specifically designed to prevent ambient light bounce and are shipped in wide, rollable formats to suit custom installations.
Optimizing Projector Settings for Black Wall Use
While specialized paints and dedicated screens can substantially improve your viewing experience, adjusting your projector’s settings is equally important when using a black wall as your projection surface. First, increase your projector’s brightness and contrast settings to maximize image clarity and detail, since a black wall absorbs more light than a traditional screen. Carefully manage ambient light in your room, as any stray light can markedly reduce contrast and make images appear washed out. To achieve ideal color accuracy, use your projector’s color calibration tools or settings, ensuring that colors remain vibrant against the dark background. Regularly adjust focus and zoom to maintain sharpness, and select cinema or movie modes for improved black level performance. Dark rooms with black or dark gray walls are recommended to enhance HDR effects, as reflective or light-colored surfaces can diminish both contrast and image quality. For HDR content, ensure the room is completely light-controlled to preserve subtle shadow details.
Installation Tips for Achieving the Best Results

Although using a black wall for projection presents unique challenges, careful planning during installation can substantially enhance your viewing experience. Start by selecting a smooth, flat wall, applying specialized black projector paint with semi-reflective properties to balance light absorption and contrast. Ensure the wall is free from dust or blemishes, as imperfections degrade image clarity. For projector positioning, mount your unit on the ceiling or a stable truss, keeping it perpendicular to the wall to avoid keystone distortion, and use level tools to mark mounting points for stability. In rooms with significant ambient light, consider the use of ALR screens or similar treatments to help maintain contrast and image clarity. Maintain the manufacturer’s recommended throw distance and utilize lens shift or zoom features to fine-tune image placement. Minimize ambient lighting, use blackout curtains, and periodically perform color calibration to adjust image brightness and tonal accuracy for an ideal viewing environment.
Frequently Asked Questions
Will Projecting on a Black Wall Damage My Projector Over Time?
Projecting on a black wall won’t directly cause projector damage, but you’ll likely run your projector at higher brightness settings. This can shorten lamp life over time, so regular maintenance and using a proper screen are recommended.
Can You Use 3D Projectors Effectively on Black Walls?
Trying 3D projectors on black walls is like swimming upstream—you’ll struggle with low brightness and weak color contrast. Unless you’ve got specialized black surfaces with the right surface texture, your 3D visuals won’t truly shine.
Are There Health Concerns With Projecting Onto Dark Surfaces?
You might notice more eye strain and potential visual health issues when projecting onto dark surfaces, since images appear dimmer and you may increase brightness. It’s important to adjust settings and take breaks to protect your eyes.
Does Projecting on a Black Wall Affect Projector Lamp Lifespan?
Projecting onto a black wall doesn’t directly shorten your projector lamp’s lifespan. However, due to black wall absorption, you might crank up brightness for better light contrast, which can increase wear. Regular cleaning and eco mode help extend lamp life.
Can Black Wall Projection Support Interactive Whiteboard Features?
Imagine using a black wall as your interactive chalkboard in the digital age—you’ll find that standard black wall projection quality doesn’t support interactive whiteboard features well unless you’ve got special coatings, high-tech projectors, or extra hardware.