As an Amazon Associate, we earn from qualifying purchases. Some links on this site are affiliate links at no extra cost to you. Our recommendations are based on thorough research and editorial judgment.
How to Connect to a Projector: A Step-by-Step Guide
Presenting with confidence requires technical know-how, yet many professionals struggle with projector connections minutes before important meetings. You’ll find that connecting to a projector doesn’t need to be complicated, whether you’re using a laptop, smartphone, or tablet. This guide covers everything from basic cable connections to wireless options, helping you identify the right method for your specific device and projector. By understanding the fundamentals of display technology and following our systematic approach, you’ll be prepared to overcome common obstacles that might otherwise derail your presentation.
Key Takeaways
- Identify connection type needed (HDMI for modern setups, VGA for older devices) and gather appropriate cables or adapters.
- Power on both projector and device, connect them using your selected cable, and set the projector to the correct input source.
- For wireless connection, ensure both devices connect to the same network and enable screen mirroring/casting on your device.
- Adjust display settings (resolution, aspect ratio) on your device for optimal projection quality.
- Troubleshoot common issues by checking power, cables, input selection and restarting devices if necessary.
Understanding Different Projector Connection Types
When you’re setting up a presentation, connecting your device to a projector requires understanding the various connection types available to you. Modern projectors typically offer multiple ports, with HDMI and USB being the most common options you’ll encounter.
HDMI delivers both high-quality digital video and audio through a single cable, making it ideal for presentations with multimedia elements. VGA compatibility remains important for older devices, though it’s limited to video signals only and requires separate audio connections. DVI advantages include excellent digital image quality, often providing better resolution than VGA while maintaining compatibility with many systems through adapters. For wireless flexibility, USB connections enable plug-and-play functionality without complex setup processes, allowing you to quickly connect laptops or even display content directly from thumb drives in supported formats like JPEG and PNG. Many modern projectors also support dual HDMI ports, allowing multiple devices to be connected simultaneously for seamless switching during presentations.
Essential Equipment for Connecting Your Devices
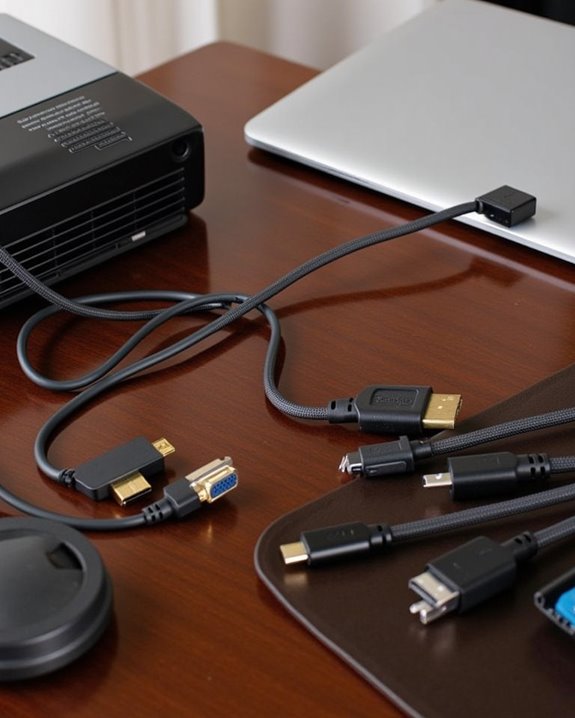
Although connecting to a projector might seem straightforward, having the right equipment on hand guarantees you’ll be prepared for any presentation scenario. Your toolkit should include various cable types such as HDMI for high-definition transmission, DVI for digital video, and VGA for older systems requiring analog signals.
Adapter options are equally important when connecting modern devices to projectors with different inputs. Keep USB-C adapters available for newer laptops, DisplayPort to HDMI adapters for graphics-intensive presentations, and wireless connectivity adapters for cable-free setups. For extended distances between your device and projector, video extenders and HDMI switchers provide necessary flexibility. Don’t forget cable management tools to maintain a professional appearance and prevent tripping hazards during your presentation. Power conditioners can also protect your equipment from unexpected electrical issues. Choosing cables with gold-plated connectors and braided shielding helps maintain signal stability and ensures high image quality during your presentations.
Recommended Products

[Powerful Processor] Mini Gaming PC equipped with Core i9-14900F, 24 Cores 32 Threads, 36M Cache, Max Turbo Frequency: 5.8GHz, Windows 11 pro (64 Bit).64G DDR5-5600 RAM| 4T M.2 NVME PCIE4.0 SSD| 4T SATA SSD. With GeForce RTX 50 Series GPUs. supporting ray tracing and AI cores. Delivering AI-acceleration in top creative apps. Whether you’re rendering complex 3D scenes, editing 4K video, or Gaming livestreaming with the best encoding and image quality.

[Powerful PC] Mini Gaming PC equipped with Core i9-14900F, 24 Cores 32 Threads, 36M Cache, Max Turbo Frequency: 5.8GHz, Windows 11 pro (64 Bit). With GeForce RTX 40 Series GPUs. supporting ray tracing and AI cores. Delivering AI-acceleration in top creative apps. Whether you’re rendering complex 3D scenes, editing 4K video, AI Applications, Multitasking, video server or Gaming livestreaming with the best encoding and image quality, GeForce RTX GPUs give you the performance to create your best.
[Powerful PC] Mini Gaming PC equipped with Core i9-13900F, 24 Cores 32 Threads, 36M Cache, Max Turbo Frequency: 5.6GHz, Windows 11 pro (64 Bit). 64G DDR5-5600 RAM| 4TB M.2 NVME PCIE4.0 SSD. With GeForce RTX 40 Series GPUs. supporting ray tracing and AI cores. Delivering AI-acceleration in top creative apps. Whether you’re rendering complex 3D scenes, editing 4K video, or Gaming livestreaming with the best encoding and image quality, GeForce RTX GPUs give you the performance to create your best.
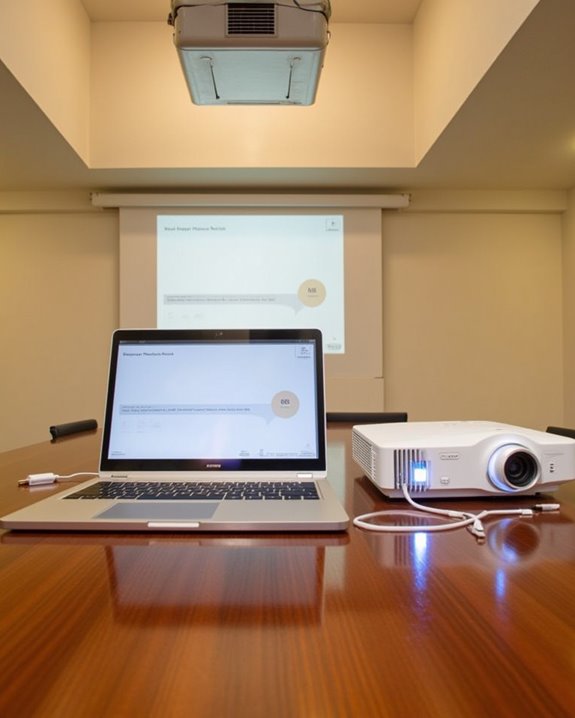
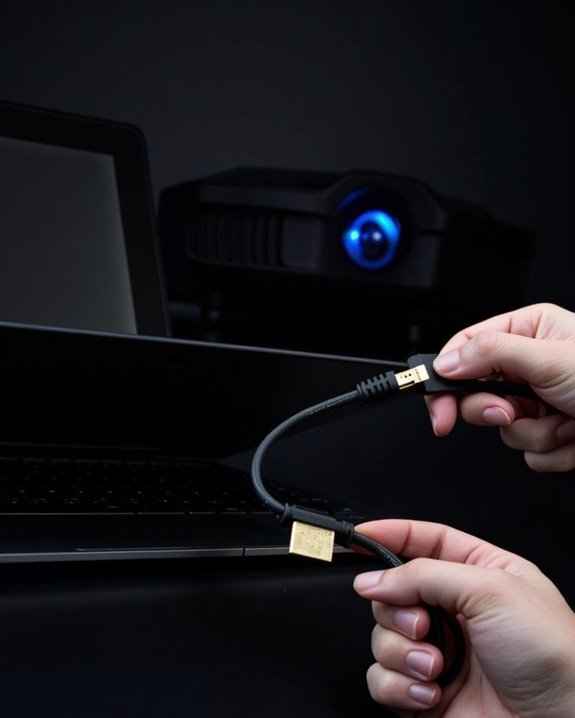
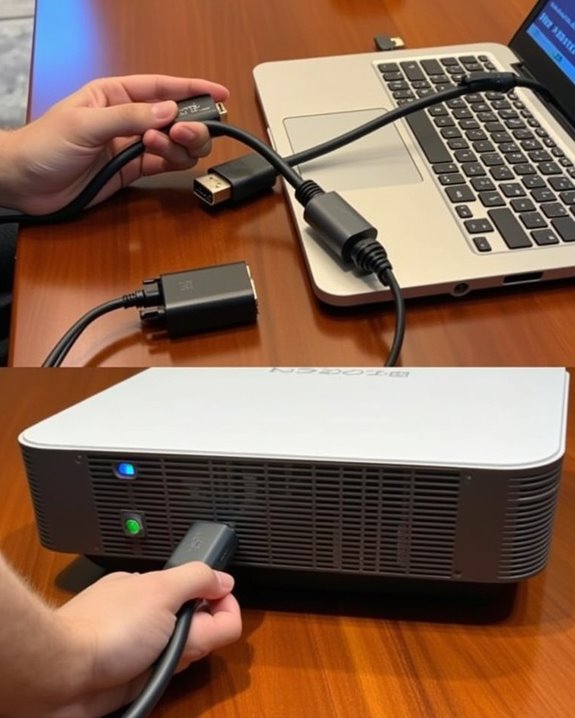
Wired Connection Methods for Various Devices
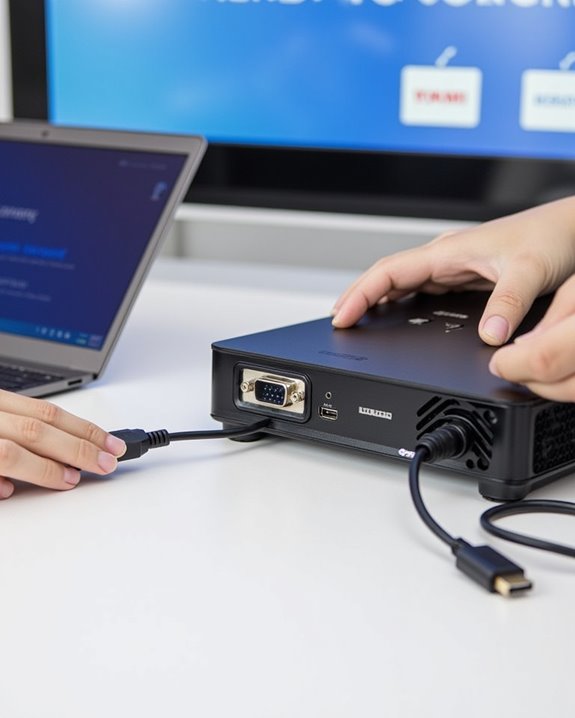
Now that you’ve assembled the necessary equipment, you’ll need to understand the specific wired connection methods for your particular device. For smartphones, use HDMI cables with appropriate adapters based on your port type (USB-C, Lightning, or micro USB), ensuring proper projector mounting for excellent viewing angles. Laptops typically connect directly via HDMI cables, while older computers may require VGA connections with separate audio cables for complete output functionality.
Power management becomes essential when using MHL adapters, which can charge your Android device while transmitting high-definition video. For newer devices, USB-C and Thunderbolt connections offer streamlined solutions, carrying video, audio, and power through a single cable. Always verify compatibility between your device specifications and projector inputs before connecting, then select the corresponding input source on your projector to establish a successful connection. Choosing models with multiple HDMI ports can simplify connecting various devices without needing frequent cable swaps.
Recommended Products

Add up to 16 additional InstaShow Buttons and holder to your existing InstaShow system – enables additional wireless HDMI connections to the InstaShow host that enable presenters to share the screen with a touch of a button

Revolutionary 4.2.2 All-Wireless Immersive Cinema System: Enjoy a 4.2.2 wireless surround system with quad subwoofers, dual surrounds, and 4 AMT tweeters. Supporting Dolby TrueHD and Atmos, it delivers theater-quality sound with no complex wiring—set up in minutes for an immersive experience.

🔥【Faster & Better AMD Processor】The Beelink SER9 Mini PC is powered by AMD Ryzen 7 H 255 (8C/16T, L3 cache 16MB). The base frequency is 3.8GHz / the dynamic frequency can reach 4.9GHz. Features revolutionary 4nm technology, and MAX 54W TDP for a next-generation multi-tasking experience that takes processing speeds. It is widely used for AAA gaming, image editing(CAD, PS, Pr, Ai), office software, creative design, programming, and HTPC/Zoom meetings/Skype, etc.
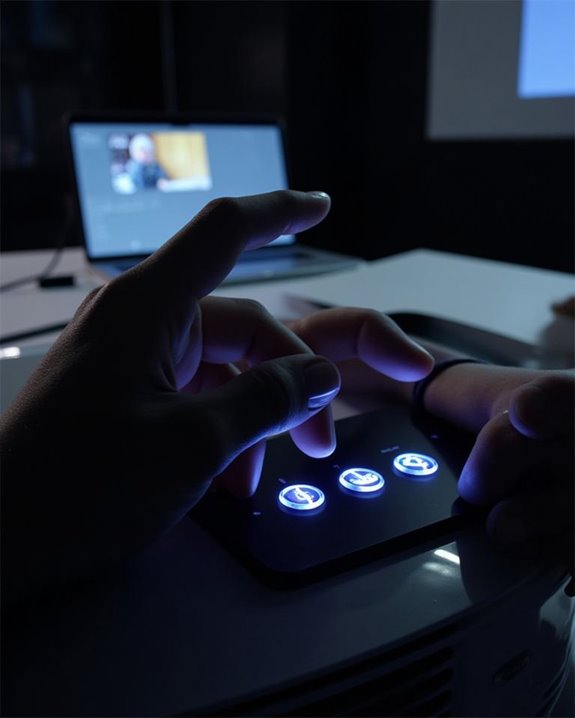
Setting Up Wireless Projector Connectivity
Wireless projection represents a significant advancement over traditional wired methods, offering flexibility and convenience for your presentations. To begin, access your projector’s Wi-Fi settings menu through the remote control, select your network, and enter the password to establish connection. Verify success by checking for a wireless icon on the screen.
For ideal performance, ensure device compatibility between your projector and source device, confirming they support the same wireless technology, such as AirPlay for Apple devices or Miracast for Android. Both devices must connect to the same network, with updated software for seamless operation. Consider network security by using WPA2 encryption for your connection, and position your projector to minimize interference from other devices. If connection issues occur, restart both devices and verify your password is correct.
Recommended Products

Deliver captivating lessons — excellent image quality with 4K video resolution (1) output and 13 mega-pixel camera

192x Zoom (12x Optical + 16x Digital) and multiple auto focus options

Universal Bracket,Easy installation: It is plug and play.This car video player included the universal mounting bracket, Installation can be completed within 3 minutes.And it's compatible with 98% of the cars on the market.Multiple types of UI and colorful ambient lights bring you a different visual experience
Optimizing Your Projector’s Display Settings
Once your projector is successfully connected, you’ll need to optimize its display settings to achieve the best possible image quality for your presentations or viewing experiences. Start by setting the resolution to a supported format like 1080p60Hz, ensuring color depth is at 8-bit for standard performance. Room lighting markedly impacts image quality, so adjust your settings under the same conditions you’ll use for viewing.
For optimal results, use test patterns to properly calibrate brightness and contrast levels, preventing crushed shadows or blown-out highlights. Color calibration is essential for accurate image reproduction; while default settings often work well, specialized tools like the Spears & Munsil UHD HDR Benchmark can help with precise adjustments. Finally, ensure your aspect ratio matches your content and consider your projector’s HDR capabilities when displaying high-dynamic-range material.
Audio Setup Options for the Perfect Viewing Experience
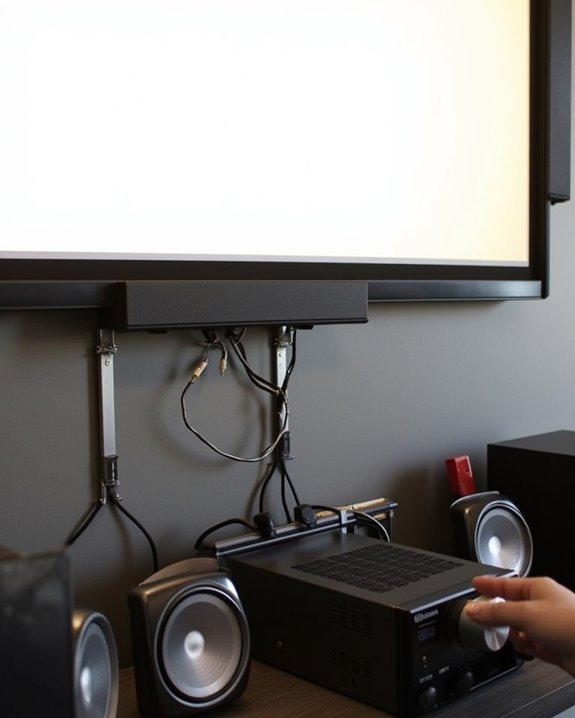
While your projector displays crisp, vibrant images, the audio component is equally essential for creating a truly immersive viewing experience. To achieve ideal audio quality, identify your projector’s available output ports—typically RCA, 3.5mm, HDMI ARC, or S/PDIF—and match them with compatible speaker inputs, using adapters if necessary.
For wired connections, HDMI ARC delivers superior digital sound transmission, supporting Dolby Digital and DTS surround formats, while 3.5mm cables offer simple stereo connectivity. Wireless options include Bluetooth speakers or WiFi-enabled audio systems, though these may introduce sound synchronization issues or latency. For theater-like experiences, connect through an Audio/Video Receiver, positioning speakers strategically around your viewing area. Remember to adjust audio settings on both projector and sound system, balancing volume levels for the perfect audiovisual experience.
Recommended Products

70W per channel Class AB Power Amplifier (the bottom board)

Direct energy amplification at 120W Channel (8 ohms, 20 Hz-20 kHz, THD 0. 08 %, 2Ch Driven, FTC)/ 230 W/Ch. (6 ohms, 1 kHz, THD 10 %, 1Ch Driven)

Performance:The Marantz Sound Master meticulously tuned CINEMA 40 for amazing performance with careful parts selection to create the Most Musical Sound in your home.
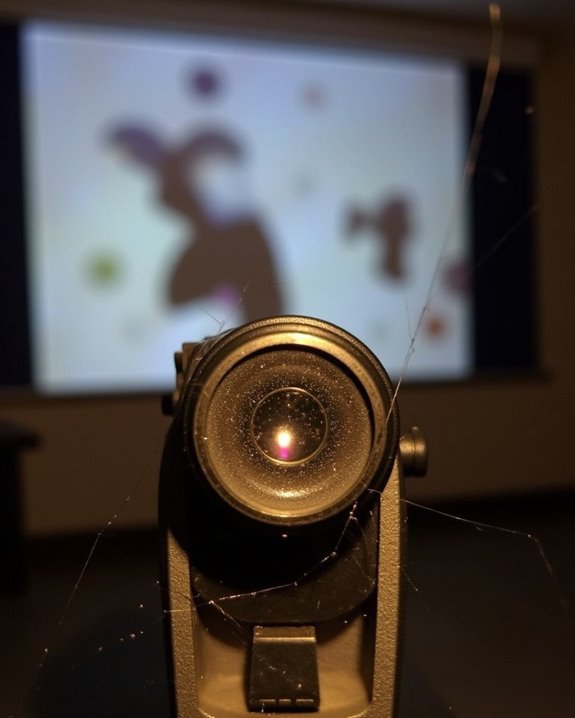
Troubleshooting Common Connection Problems
Even the most advanced projector setup can encounter frustrating technical issues that disrupt your viewing experience. Power management problems often occur first, so check your power source, inspect cables for damage, and verify the power switch is on before considering professional repair for persistent issues.
When there’s no picture displayed, verify connections between devices, select the correct input source, and examine if proper screen calibration settings are configured on both devices. For connectivity troubles, inspect physical connections like HDMI or VGA ports, secure all cables properly, and try alternative cables to identify faulty ones.
Environmental factors can also impact performance, so place your projector in well-ventilated areas, clean air filters regularly, and remove any obstructions blocking vents to prevent overheating, which can affect both image quality and device longevity.
Recommended Products

TRUE 3-CHIP PROJECTOR DESIGN – Advanced 3LCD technology displays 100% of the RGB color signal for every frame. This allows for outstanding color gamut while maintaining excellent brightness, without any “rainbowing” or “color brightness” issues seen with other projection technologies.

【Dual System-Newly UPGRADE】This smartboard with Mini PC adopts a higher hardware performance ahead of others: with dual system Windows 10 Pro Intel 13th Gen i5-13450HX processor( 16GB RAM+256GB SSD, 10 cores 16 threads,) and above Android 13.0 (8GB RAM+128GB ROM), ensures faster operating speeds, lower latency to bring you a superior user experience. The digital smart board is ideal for designing room, exhibition room, large meeting room or classrooms to make collaboration more productive.

4K Ultra HD (3840 x 2160) resolution at up to 2500 lumens brightness
Mobile Device Connection Techniques
Now that you’ve resolved common connection problems, let’s explore how to connect your mobile devices to projectors, which has become increasingly popular for presentations and entertainment.
You can connect wirelessly through Miracast, Wi-Fi Direct, AirPlay, or Chromecast, ensuring your device firmware updates are current for suitable performance. For wired connections, check both your phone and projector ports, then purchase compatible adapters like USB-C to HDMI or MHL adapters for Micro-USB phones. Mobile app compatibility varies across projection systems, so verify your apps work with your chosen connection method. When setting up, enable screen mirroring on your device, select the correct input source on the projector, and begin streaming. Consider display quality, latency issues, and cross-platform compatibility when choosing between wireless convenience or wired reliability.
Frequently Asked Questions
Can Projectors Damage Walls or Surfaces They Project Onto?
Worried about wall damage? Generally, projectors won’t cause surface marking on walls they project onto. However, improper screen mounting or leaning heavy screens against walls can potentially damage your surfaces over time.
How Do Ambient Lighting Conditions Affect Projector Visibility?
Excessive ambient light washes out your projector’s colors and contrast. You’ll need to control light sources, use higher brightness settings, or invest in ALR screens for visibility enhancement in well-lit environments.
Are Projector Bulbs Replaceable and How Long Do They Last?
Yes, projector bulbs are replaceable. You’ll need to follow a specific replacement process for your model. Bulb lifespan typically ranges from 1,500-2,000 hours, though some last up to 5,000 hours with proper maintenance.
Can Projectors Be Permanently Mounted to Ceilings or Walls?
Did you know 70% of classrooms use mounted projectors? Yes, you can permanently secure projectors to ceilings or walls. Various mounting options exist, with ceiling installation being most popular for ideal viewing angles and space efficiency.
Do Projectors Consume More Electricity Than Standard Televisions?
Yes, projectors typically consume more electricity than TVs. While small projectors use around 50W, high-end models can reach 800W. You’ll find better power efficiency with TVs for regular viewing despite projectors’ energy-saving modes.