As an Amazon Associate, we earn from qualifying purchases. Some links on this site are affiliate links at no extra cost to you. Our recommendations are based on thorough research and editorial judgment.
How High Should a Projector Screen Be Mounted?
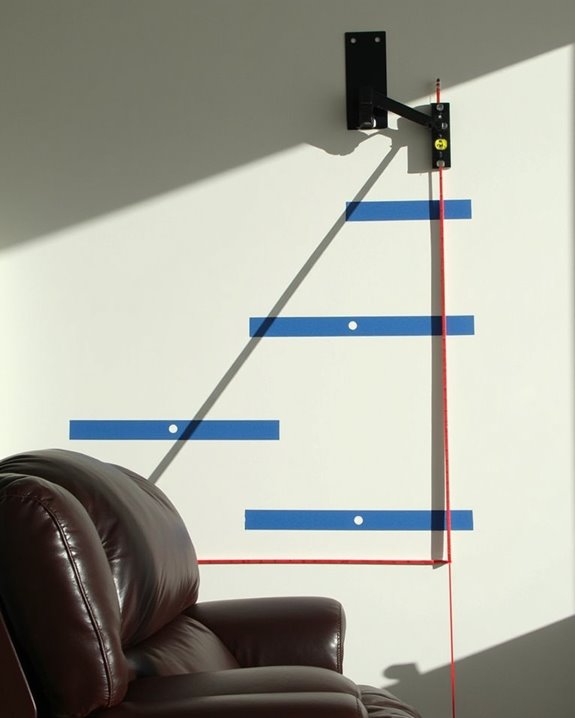
You might wonder if mounting a projector screen at standard eye level is always best, but the ideal height actually depends on several factors, including your room’s ceiling height, seating layout, and the typical viewer’s eye level, which is usually around 40 inches when seated. Precision in measuring the distance from the floor to the screen’s bottom edge, typically between 24 and 36 inches, ensures unobstructed sightlines and minimizes neck strain, yet these measurements can shift based on multi-row setups and room dimensions, prompting further investigation into how ceiling height and projector placement interact.
Key Takeaways
- The center of the projector screen should align close to seated eye level, typically around 40 inches from the floor for most home setups.
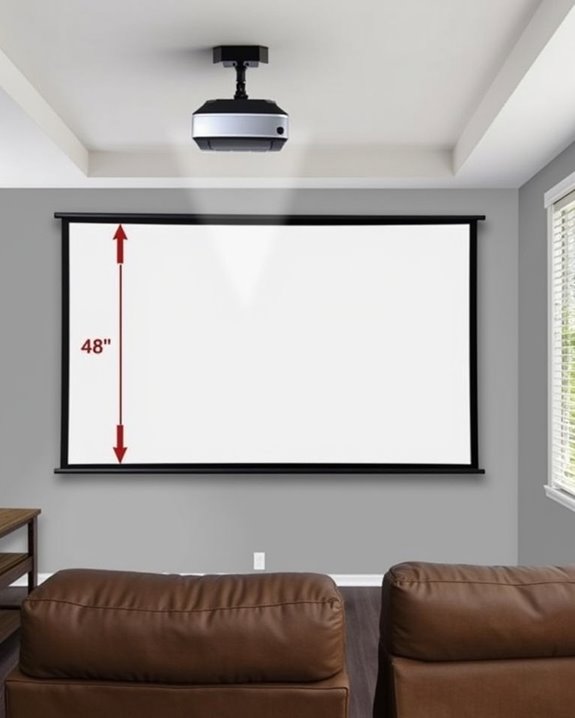
- The bottom edge of the screen is usually 24-36 inches above the floor for single-row seating or 40-48 inches for multiple rows.
- Mount the screen high enough to ensure all viewers have clear sightlines, especially if you have tiered or multiple seating rows.
- For low ceilings, keep the screen lower to maintain comfortable viewing angles and avoid neck strain.
- Use projector and screen calculators to adjust height based on screen size, seating distance, and room layout for optimal image quality.
Understanding Ceiling Height and Its Impact on Screen Placement
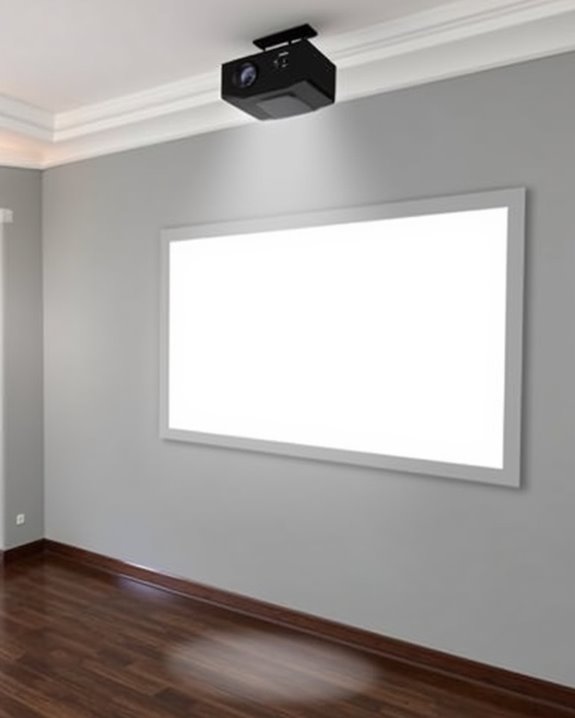
When you’re planning to install a projector screen, ceiling height plays a major role in determining exactly where the screen should be mounted, since both the viewing experience and the room’s overall layout depend on it. In rooms with higher ceilings, you can opt for larger screens and mount them higher, accommodating multiple rows of seating and creating a more immersive atmosphere. Conversely, low ceilings limit your mounting options, requiring the screen to be positioned closer to the floor, typically with the bottom edge 24-36 inches above the ground. Consider the ceiling color, as lighter tones can reflect more light and affect image quality, while acoustic treatments on or near the ceiling can impact sound clarity. Projectors with high contrast ratios can help maintain image clarity even when mounted higher or in challenging lighting conditions. Proper mounting ensures the image appears natural and minimizes neck and eye fatigue, which is especially important when ceiling height influences screen placement. Always account for ceiling obstacles and integrate them into your placement strategy.
Recommended Products

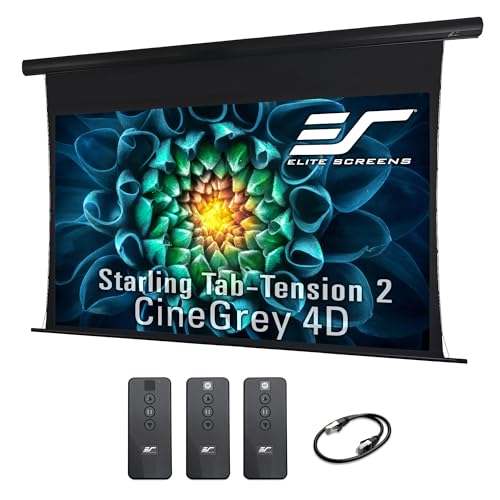
Seamless 150" One-Piece Fresnel Screen: AWOL VISION releases the world’s first seamless one-piece 150" Fresnel daylight ALR screen. The picture stays continuous with no seams, no gaps, and no visible breaks across the viewing area for a cleaner, more immersive large-screen home cinema presentation.

▶【New choice projector screen for Ceiling Mount UST Laser projectors】The rotation screen material with special optical sawtooth structure and the light-rejecting filter to give a stunning performance in Light below the screen.The projected light will be effectively reflected to the viewer, and the floor light will be blocked or absorbed;(Compatible for the projector suspended installed!)

▶【Perforate Acoustically Sound Transparent】The BELOW BLACK BORDER adds a perforated design, which satisfies the customer's pursuit of stereo effects, and achieves a more stereoscopic effect;he Screen size:110-inch Diagonal:16:9 Aspect Ratio;Standard View Area :95.87”Wx53.94”H;G.W.(Ibs):70.55;Screen Material: ULTRA-SHORT THROW AMBIENT LIGHT REJECTING; Projector Throw Type: ONLY compatible for ULTRA-SHORT THROW LASER PROJECTOR;Offer 110V voltage;Anti-light direction: The light above the screen;
Determining the Ideal Viewing Height for Comfort
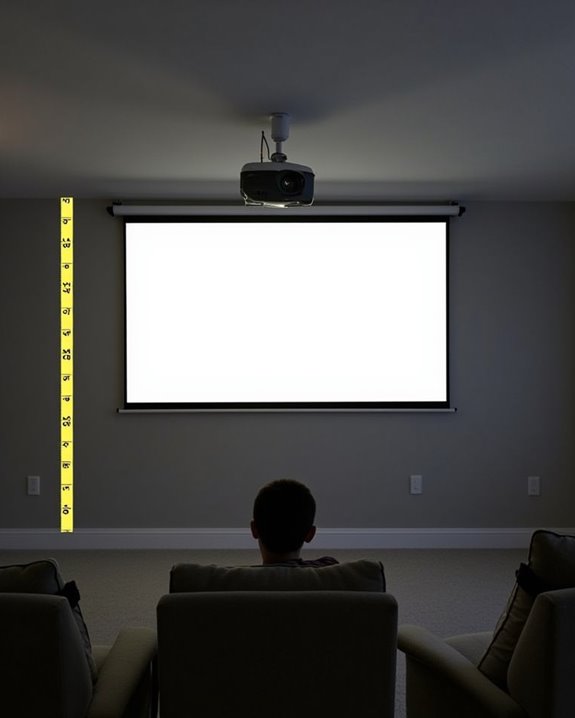
Although it’s tempting to focus solely on screen size or projector type, determining the ideal viewing height is just as critical for ensuring a comfortable and immersive experience. You’ll want the screen’s vertical center close to seated eye level—typically around 40 inches from the floor—to minimize neck strain and keep your gaze within a relaxed 0 to 15-degree vertical angle. For 16:9 content, set the screen height at roughly one-third of the distance to the primary seat. In home theaters, position the bottom edge 24 to 36 inches above the floor, or raise it to 40–48 inches in rooms with multiple rows, ensuring clear sight lines. Consistent screen height helps maintain optimal sound acoustics and reduces glare from ambient lighting, enhancing overall viewing comfort. Selecting a screen with an appropriate contrast ratio can also improve image clarity at these heights. When planning your setup, always consider barriers and sightlines to guarantee that viewers in every row have an unobstructed view of the screen.
Factoring in Room Layout and Seating Arrangements
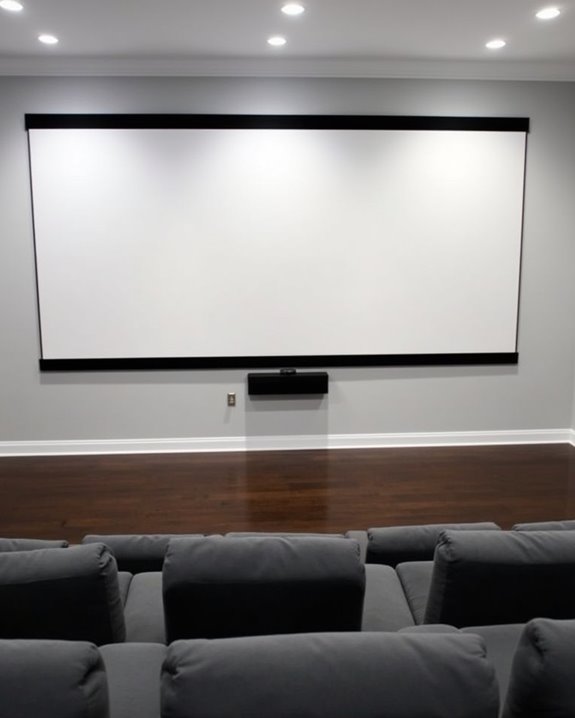
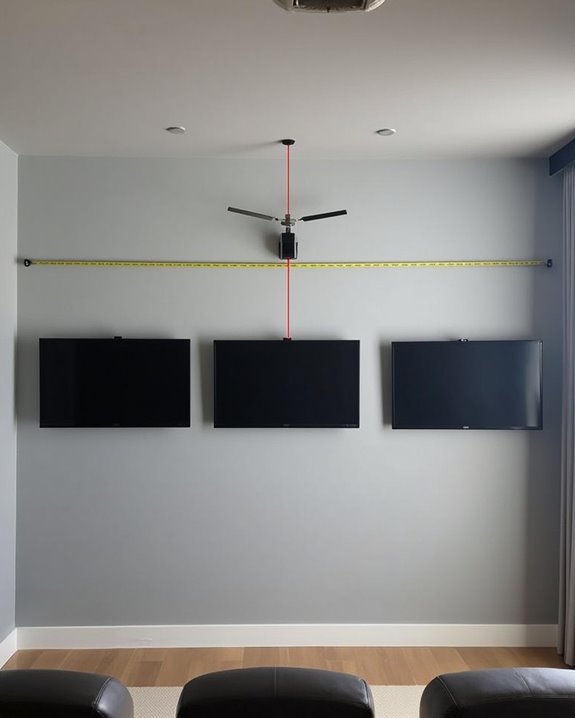
Achieving the right projector screen height isn’t just about individual comfort—it also depends heavily on your room’s layout and how you’ve arranged your seating. Start by considering ceiling height; typically, the screen’s bottom edge should be 24-48 inches above the floor, but this varies with seating rows and room dimensions. For multiple rows, elevate the screen so everyone has a clear view, and avoid obstacles that might block sightlines. Arrange seats so viewers’ eye level is about one-third up from the bottom of the screen, usually 40-50 inches from the floor. Good acoustic treatment and lighting control further enhance the experience, so ensure these don’t interfere with screen placement. Remember that dark environments are essential for front projection, as a darker room will enhance image contrast and make the projected picture look its best. Using an ultra-short throw projector can provide more flexibility in screen placement and reduce shadows caused by viewers. Use adjustable mounts and plan cable management for a clean, flexible installation that adapts to your room’s unique geometry.
Selecting the Right Screen Size for Your Space

Selecting the right projector screen size for your space requires careful consideration of several technical factors, as the dimensions of your room, the distance from seating to the screen, and the projector’s capabilities all play crucial roles in determining what will work best. Start by matching the screen’s aspect ratio—such as 16:9 for movies or 4:3 for classic TV—to your content and projector, as this affects both width and height. Use screen size calculators to input your room’s measurements, seating layout, and projector throw distance, ensuring the recommended diagonal fits your wall without causing image distortion. Evaluate screen material and screen gain, since high-gain surfaces can compensate for lower projector brightness, especially in larger or brighter rooms, directly influencing the ideal screen size for clear, immersive viewing. Room size and layout significantly influence screen choice; ensure your selected screen fits comfortably within the available space, accounting for obstructions and allowing for easy movement.
Recommended Products

DIMESIONS: 150-inch Diagonal, 16:9 Aspect Ratio. View Size: 73.5" H x 130.7" W. Overall Size: 92.8" H x 150.4" W x 4.0" D. Extra 12-inch Drop. Black Aluminum Case.
【Dimension Size】: 140" Motorized Projector Screen (Diagonal) with a 16:9 HD Format Aspect Ratio. Viewing Size: 68.8" H x 122.0" W. Includes a 6" black masking drop housed in a white finished case for a clean, professional installation.

140-inch Diagonal, 68.8-inch H x 166.0-inch W Viewing Size, 16:9 HD Format Aspect Ratio with a 6-inch Black Masking Drop in a White Finish Case/Housing.
Calculating Optimal Screen Height Based on Viewing Distance
Once you’ve chosen the right screen size for your room, it’s just as important to determine how high to mount the projector screen, since this directly affects comfort and viewing quality. Start by considering your screen aspect ratios—common formats like 16:9 and 4:3 each produce different screen heights and widths, so use the appropriate formula (such as H = W / 1.77 for 16:9) to find the exact height. Next, calculate your ideal viewing distance, which should be about 1.5 to 2.5 times the diagonal screen size. Projector throw ratios also factor in, as they determine how far your projector sits from the screen, impacting image size and placement. To guarantee proper positioning, utilize projector screen calculators and mounting guides for precise measurements. For even more accuracy, you can use a Viewing Distance Calculator to find the optimal seating distance based on your chosen screen size, ensuring everyone in the room enjoys both comfort and clarity.
Recommended Products

【GET THE RIGHT SCREEN】: Sizes106-inch Diagonal, 16:9 Aspect Ratio - Installed Measurement: 76.4" x 118.3" with Concealed Installation - White Casing
【140 inch Quality Projector Screen】140" Diag. 68.7" H x 122" W Viewing Size, 16:9 HD Format Aspect Ratio. Overall Dimensions: 87" H x 143.1" W x 5.5" D. Extra 12" Drop. Black Case.

[CERTIFICATION AND DIMENSION SIZE] : ISF Certified for accurate color reproduction – An industry standard for high fidelity video display systems. 135" Diag. 16:9 Aspect Ratio. Viewing Size: 66.1" H x 117.6" W.
Adjusting Screen Mounting for Different Ceiling Heights
Whether you’re working with a low or high ceiling, adjusting the mounting height of your projector screen is vital to guarantee everyone in the room has a clear, comfortable view. In rooms with low ceilings, you’ll likely need to mount the screen closer to the floor—often within the 24-36 inch range above the finished surface—to avoid interference with the ceiling or lighting fixtures. For high ceilings, you have more flexibility, allowing for larger screens and higher mounting positions, but it’s still essential to keep the bottom of the screen within ideal viewing range for seated audiences. Always consider room layout and sightlines, ensuring the screen isn’t blocked by decorative wall finishes or furniture. Ceiling height impacts mounting options and setup flexibility, so ceiling-mounted or retractable screens are excellent solutions for variable ceiling heights.
Recommended Products
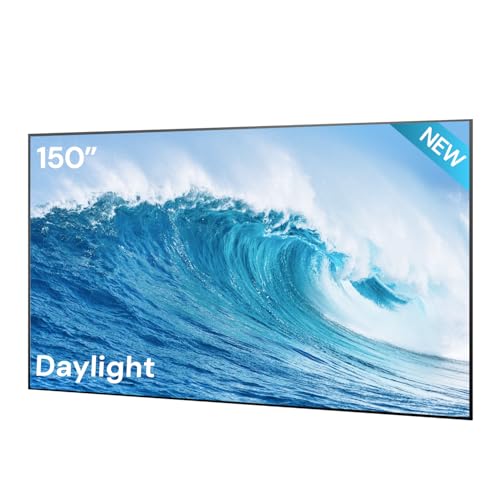
Seamless 150" One-Piece Fresnel Screen: AWOL VISION releases the world’s first seamless one-piece 150" Fresnel daylight ALR screen. The picture stays continuous with no seams, no gaps, and no visible breaks across the viewing area for a cleaner, more immersive large-screen home cinema presentation.

【150" Premium ALR Projector Screen】: 150" Fixed Frame Projection Screen, Diagonal with a 16:9 Aspect Ratio for an Immersive Home Theater Experience. Viewing size: 73.6" H x 130.8" W. Overall size: 74.4" H x 131.6" W. Designed for High-quality Projection and Enhanced Visual Performance in Any Setting.

QUAD TV CEILING MOUNT: Commercial grade ceiling mount for 4 large TVs for convenient viewing of information or broadcasts from anywhere in large spaces
Projector Positioning and Image Geometry Optimization
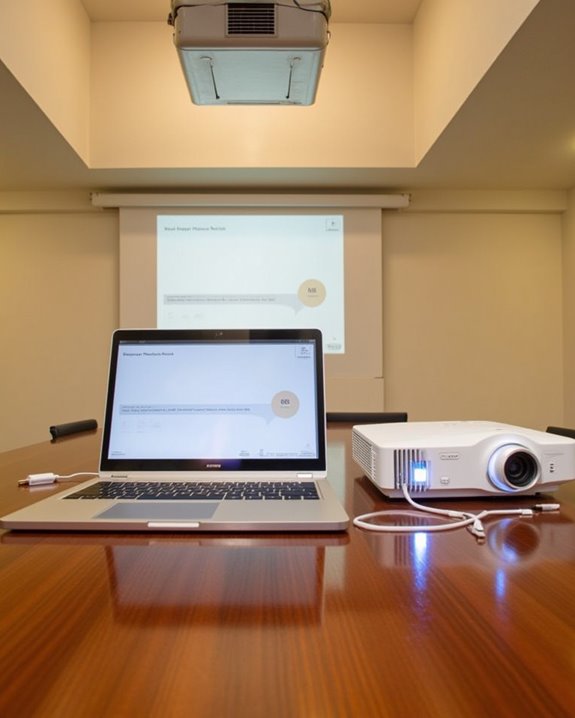
After you’ve determined the correct mounting height for your projector screen based on ceiling height and room layout, it’s time to focus on the projector’s position and the geometry of the projected image. Position your projector so its lens aligns horizontally with the top edge of the screen, ensuring proper rectangular geometry and minimizing distortion. Use manufacturer distance calculators to find the optimal mounting location in relation to your chosen screen aspect ratios, which impact both image width and height. If perfect alignment isn’t possible, many projectors offer keystone correction, a feature that digitally adjusts the image shape to correct minor distortions from off-center placement. For even greater flexibility, look for projectors with lens shift, allowing for precise vertical and horizontal adjustments without sacrificing image quality or geometry. To achieve optimal viewing angles, ensure that the screen height is at least one-sixth of the distance to the furthest viewer, which helps maximize comfort and visibility for everyone in the room.
Recommended Products

【TRIPLE LASER】Experience richer, more lifelike color with Pure Triple Laser. With an ultra-wide color range and smooth, accurate tones, everything you watch looks more realistic and consistently true on screen.

4K PRO-UHD (1) – Advanced pixel-shifting technology works in parallel with three individual high-definition LCD chips without sacrificing picture brightness

Industry-Defining Blacks. NoirScene Mastery: NoirScene Dark Field Engine starts with the EBL black-level algorithm, enhancing shadow detail and contrast for a dynamic range up to 50,000:1. A precision IRIS aperture regulates light intake, while the stray light shield eliminates scatter—delivering crisp, layered blacks and dramatic tension worthy of a true theater.
Frequently Asked Questions
Can I Hide My Projector Screen When Not in Use?
Yes, you can hide your projector screen when it’s not in use. Use a motorized screen with remote control for easy wall concealment, or choose retractable options, decorative panels, or custom DIY solutions for a seamless look.
How Do Ambient Light Conditions Affect Screen Height Choices?
Ever notice how ambient light can wash out your image? That’s why you’ll need to factor in lighting when considering screen placement. Managing glare and choosing the right position helps maintain clarity and comfortable viewing for everyone.
Are There Special Considerations for Motorized Projector Screens?
When you’re choosing a motorized projector screen, make sure the motorized operation is smooth and quiet. You’ll want remote control compatibility for convenience, and don’t forget to check the weight capacity and power requirements for safe installation.
What Wall Types Are Best for Mounting a Projector Screen?
You’ll get the best results mounting a projector screen on solid walls or wooden walls, using sturdy wall anchors and mounting brackets. For drywall, always locate studs. Brick or concrete walls need specialized anchors for secure installation.
Can I Use a Projector Screen Outdoors, and How Does Mounting Height Change?
Outdoors, your projector screen can turn any backyard into a cinematic wonderland! For outdoor installation, you’ll want a higher mounting height than indoors, ensuring everyone sees the screen, compensating for uneven ground and larger viewing areas.