As an Amazon Associate, we earn from qualifying purchases. Some links on this site are affiliate links at no extra cost to you. Our recommendations are based on thorough research and editorial judgment.
Why Is My Projector Not Connecting to My Laptop?
When your projector won’t connect to your laptop, you’ll need to consider several technical factors such as the condition and compatibility of the cables, the correct input source selection on the projector, and the laptop’s display settings, which all play a vital role in establishing a stable connection. Issues can also arise from outdated drivers, mismatched resolutions, or faulty hardware components, so understanding these areas is essential before you can troubleshoot effectively and identify the underlying problem.
Key Takeaways
- Loose, damaged, or incompatible cables and adapters can prevent a stable connection between your laptop and projector.
- The projector input source may be incorrectly set, causing it to not detect the laptop’s signal.
- Laptop display settings or resolution may not match the projector’s requirements, leading to no output or distorted images.
- Outdated or missing display drivers and firmware can cause connectivity or detection issues with the projector.
- Faulty ports, insufficient power supply, or interference from other devices may disrupt the connection between your laptop and projector.
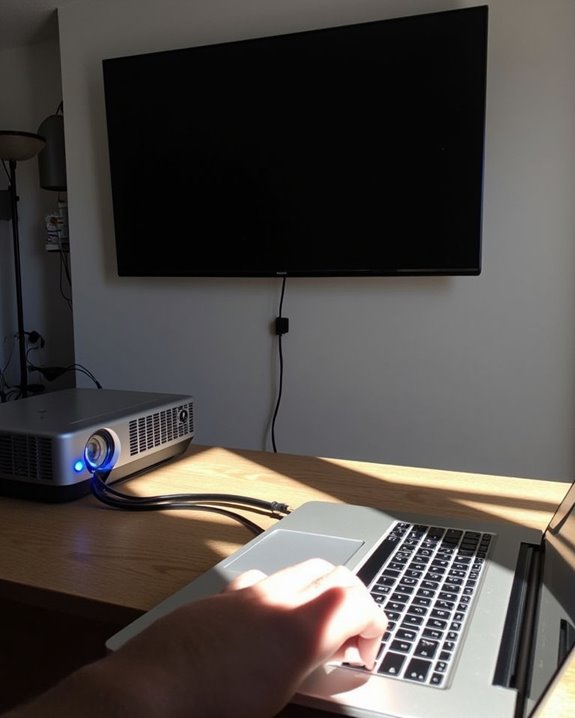
Checking Your Cable Connections
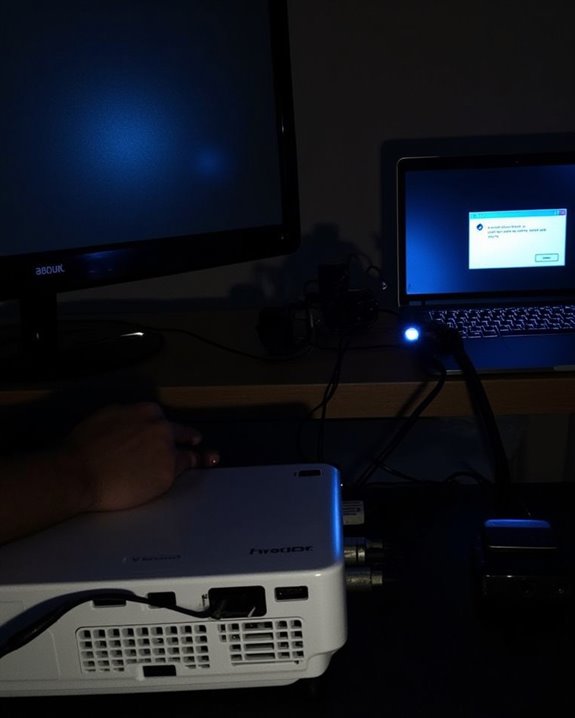
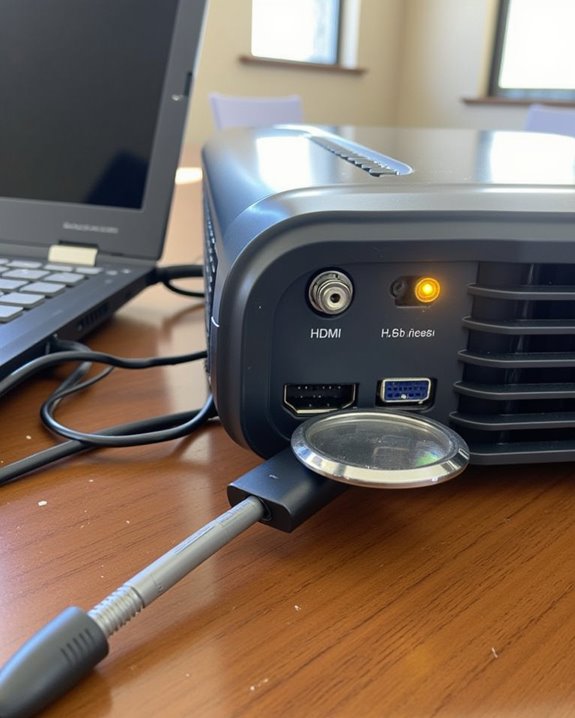
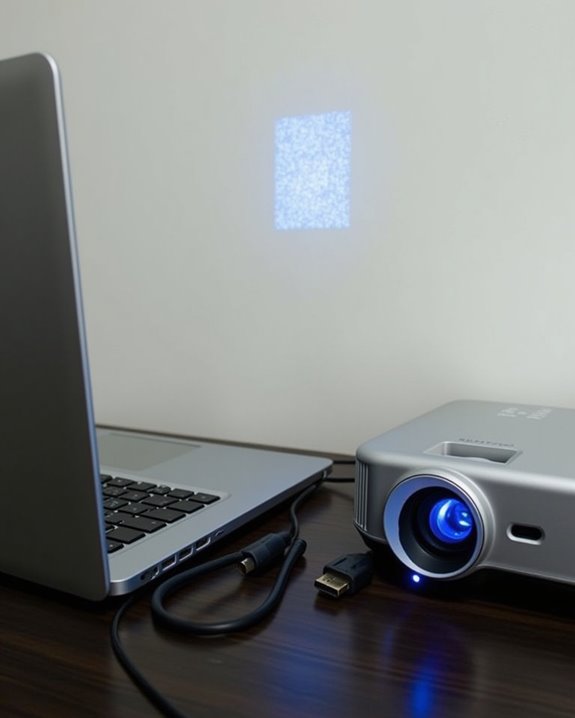
Before you can get your projector working with your laptop, ensuring all cable connections are properly secured is essential, as even a minor issue can prevent the devices from communicating properly. Begin by inspecting your HDMI or VGA cables for visible damage, such as bent pins, worn insulation, or loose connectors; replace any faulty cables immediately. Use the appropriate cable type for your devices, confirming that any adapters or converters are compatible, and verify that the HDMI version matches your projector’s requirements. Maintaining good cable management by keeping wires untangled and free from tension helps prevent signal loss or physical wear. Additionally, understanding the supported input options of your projector can help you choose the correct cable and avoid compatibility issues. If problems persist, consider testing a different cable or exploring wireless alternatives, which may bypass physical connection issues altogether and streamline your setup process. If you are using an HDMI splitter, be aware that a faulty or incompatible splitter can disrupt the signal and prevent the projector from displaying properly.
Recommended Products

Real-Time Collaboration: Ditch passive presentations. This smart board lets teams write, annotate, and brainstorm together in real time on a stunning 4K touchscreen. True multi-user touch turns long discussions into clear, actionable decisions, right in the room

Certified Cinema-Grade Color: Dolby Vision brings the contrast and depth that streaming services encode but most displays discard. Anker NEBULA X1's ISF-calibrated color accuracy faithfully reproduces every frame as the filmmaker intended—whether you're watching in your backyard or living room.
【Powerful Meeting Functionality】 The best digital whiteboard perfectly supplements your existing Zoom, Google Meet, Microsoft Teams, Webex and other popular 3rd party video conferencing meetings with enhanced remote presentation and whiteboarding capabilities. The smart whiteboard supports ideate, brainstorm, and collaborate remotely on the same canvas across the world.
Verifying Projector Input Source
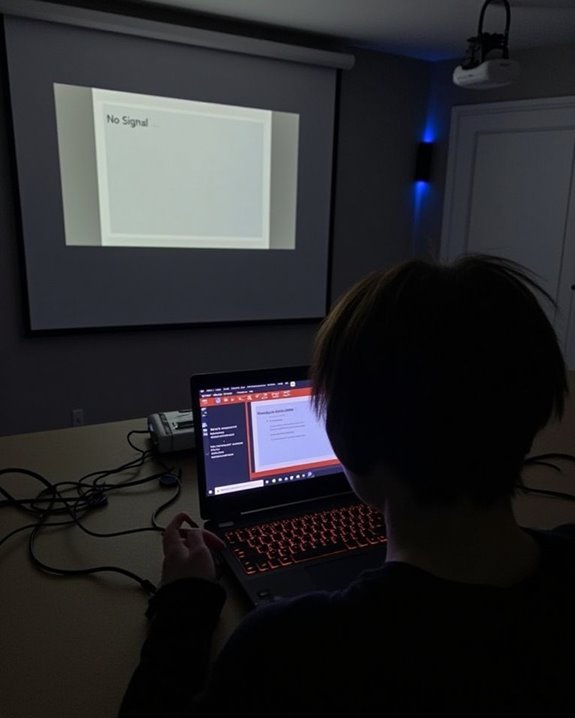
Whether you’re connecting your projector for a presentation or a movie night, it’s critical to make sure the projector is set to the correct input source, as most projectors support multiple inputs like HDMI, VGA, or DVI, and won’t display your laptop’s output unless the right one is selected. To verify this, use the projector’s menu, touchscreen panel, or input button—often found on the projector or remote—to navigate to the input source that matches your laptop connection. If you see a “No Signal” message or a blue screen, recheck the input selection, ensuring an active video source is connected. Selecting the correct input is essential for proper color calibration and ideal image clarity, especially when ambient lighting conditions may affect visibility and perceived color accuracy. Many modern projectors also include digital video connections like HDMI and DisplayPort, which can transmit both high-quality audio and video, so choosing the right input is vital for optimal performance. Additionally, using a projector with a high contrast ratio can help improve image quality and visibility when ambient light is present.
Adjusting Laptop Display Settings
Once you’ve confirmed the projector’s input source is correct, it’s important to adjust your laptop’s display settings to guarantee a successful connection and ideal image quality. Begin by right-clicking on your desktop and selecting “Display Settings” or pressing Windows logo key + P to choose between Duplicate, Extend, or Second Screen Only modes, depending on your presentation needs. Ensure the projector is detected in your display list, and configure the screen resolution and orientation for optimal clarity, matching the projector’s capabilities. Proper screen calibration can also help reduce glare and enhance image sharpness during projection. Adjust screen calibration settings, including brightness and contrast, to achieve accurate colors and clear visuals. Don’t forget to review your audio settings, especially if you need sound output through the projector, ensuring proper device selection. If you’re using a wireless display connection, such as Miracast, make sure both your laptop and projector support this feature and follow on-screen prompts to complete the pairing. Save these settings for efficient future connections and troubleshooting.
Recommended Products

【Unmatched Performance with AMD Ryzen 7 & Radeon 680M Graphics】Power through anything with the AMD Ryzen 7 7735HS CPU and integrated Radeon 680M GPU. This formidable combination, paired with 16GB of high-speed DDR5 RAM, delivers seamless multitasking, smooth 1080p gaming, and fast creative workflows, an outperform gaming laptop
4×4 HDMI Multiviewer & Video Wall Controller – Integrate up to four HDMI sources (Blu-ray player, PC, laptop, gaming console, media player) and drive four displays in a variety of layouts—4×4, 4x3, 3x5, 2×2, 1×2, 2×1, 1×3, 3×1, 1×4, or 4×1 (each window at 1080i)—or switch to 4×16 Matrix Mode to send the same source or four different sources to all four 4K UHD screens; built-in bezel compensation ensures seamless edges, while advanced EDID management guarantees stable handshake and resolution compatibility.

【Powerful AMD 8-Core Processor with Radeon Graphics】Handle demanding workloads with ease using this AMD Ryzen 7 7735HS laptop. Featuring an 8-core, 16-thread processor paired with Radeon 680M integrated graphics, it delivers fast and stable performance for business tasks, content creation, multimedia editing, streaming, and smooth light gaming—ensuring responsive multitasking without slowdowns.
Updating Drivers and Software
Several critical software and driver updates can substantially impact how reliably your laptop connects to a projector, making this step essential for resolving persistent connectivity issues. Ensuring your BIOS is up-to-date enhances system stability and projector compatibility, often using manufacturer-specific tools like EZ Flash. Regularly updating Windows through the built-in Windows Update tool introduces new features, security patches, and optimizations that improve hardware integration. Updating graphics drivers with utilities such as GeForce Experience or Radeon Software supports smooth video output and resolves display errors. For remote troubleshooting, always check the projector’s firmware compatibility by upgrading its firmware via USB or network, using official manufacturer software. These updates provide essential bug fixes and enhance compatibility, ensuring seamless connections between modern laptops and projectors. Verifying that your display settings are correctly configured after every update also helps ensure the laptop recognizes and outputs to the projector as intended.
Recommended Products

【Ultra-Bright Visuals】The APEX PRO Projector GX1000 boasts 2,500 ANSI Lumens for vivid, crystal-clear images, even in bright rooms. Perfect for movies, presentations, and gaming
![[4200 ANSI] 4K Projector with WiFi and Bluetooth,TOF Real-Time Auto Focus Projector, AuKing Outdoor Movie Home Proyector with Omni-Adjustable Stand(silver grey)](https://m.media-amazon.com/images/I/41E+j966MbL._SL500_.jpg)
[4200 ANSI Lumens – Brightness That Rules Its Class. No Competition.] At under $400, no other projector comes close. The AuKing 4K delivers a stunning 4200 ANSI lumens — brightness that crushes washout and keeps every scene vivid, even in challenging light. This isn't a small step up; it's total dominance. With true 4K support, HDR10+, and a 99.8% wide color gamut, you get cinematic color accuracy and jaw-dropping detail. Whether you're building a home theater, upgrading a tired office overhead projector, or need a powerful presentation projector, this is the visual powerhouse that leaves every rival behind.
![[Now with Netflix & 4000 ANSI] 4K Projector with WiFi and Bluetooth,TOF Real-Time Auto Focus Projector, AuKing Outdoor Movie Home Proyector with Omni-Adjustable Stand(silver grey)](https://m.media-amazon.com/images/I/410yp437HyL._SL500_.jpg)
[4000 ANSI Lumens – Unmatched Class-Dominating Brightness. No Rival] AuKing 4K projector redefines performance in its price tier, unleashing an astonishing 4000 ANSI lumens — brightness that dominates its class. This is not just an upgrade; it's a leap. Images stay vivid, crisp, and remarkably resistant to washout or dimming — outperforming every rival at this price point. Backed by full 4K support, HDR10+, and a 99.8% wide color gamut, it delivers cinema-grade color accuracy and breathtaking detail. Whether you need a dedicated home projector or a versatile home theater projector, experience visual excellence that simply eclipses everything else in its class.
Inspecting for Hardware Interference
After confirming your drivers and software are up-to-date, it’s important to inspect for possible hardware interference that might prevent your laptop from connecting to the projector. Start by examining all cables and connectors—loose, damaged, or low-quality HDMI or VGA cables can disrupt signal transmission, while bent pins or worn ports may prevent a proper connection. Consider the impact of electromagnetic interference, which can originate from nearby wireless routers, microwaves, or even high-voltage power lines, especially if you’re using wireless projectors or long, unshielded cables. Also, check for internal hardware malfunctions: faulty projector input ports, malfunctioning laptop video outputs, or loose internal wiring can all cause intermittent connectivity issues. If your projector’s lamp is broken or aging, it may also prevent the display from working properly, so be sure to inspect and replace the lamp as needed. Identifying and addressing these hardware obstacles ensures a stable link between your laptop and projector.
Ensuring Proper Power Supply
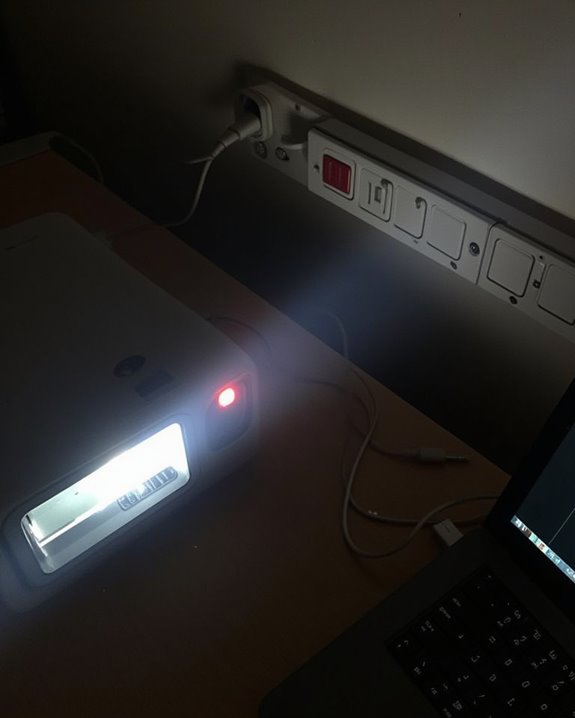
Although it might seem straightforward, ensuring your projector’s power supply is both stable and sufficient is a crucial step in avoiding connectivity issues with your laptop. Power stability matters because projectors require a steady voltage, typically between 100 and 240 V AC at 50/60 Hz, and are designed to handle only minor voltage fluctuations—usually within ±10% of their rated voltage. If you’re using a laser, LCD, DLP, or LED projector, check that your power source meets the wattage requirements, which can range from 30 watts for small LED models to as much as 500 watts for high-brightness lasers. Projectors are designed for compatibility with various electrical standards, meaning they can be used in different countries as long as the supply falls within their rated voltage and frequency. Avoid power strips or poorly rated outlets, as inconsistent supply or significant voltage fluctuations can disrupt performance, reduce lifespan, or even prevent the projector from turning on.
Confirming Cable and Adapter Compatibility
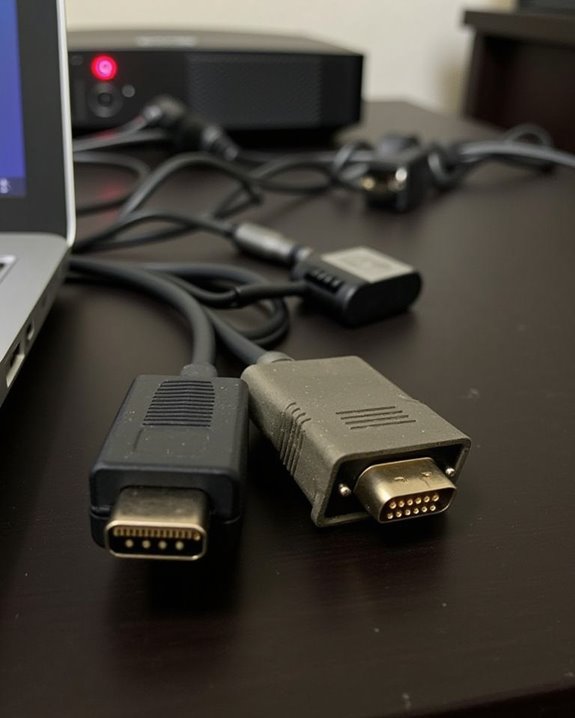
Once you’re certain your projector has a stable power supply, it’s important to confirm that your cables and adapters are both compatible and in good working condition, as mismatched or faulty connections are among the most common reasons a projector won’t connect to a laptop. Carefully identify the cable types required—HDMI, mini HDMI, DisplayPort, USB-C, or VGA—matching the ports on your laptop and projector. If your devices use different ports, you’ll need proper adapter compatibility, such as USB-C to HDMI or DisplayPort to HDMI adapters, ensuring each supports video output. Always inspect cable quality and try using a shorter cable to improve signal reliability, and check for visible damage or wear. Confirm adapters are functional and compatible with both devices, preventing unnecessary connectivity issues. Additionally, regularly update display and graphics drivers for optimal compatibility and to avoid unexpected connection problems between your laptop and projector.
Recommended Products

Processor: 13th Generation Intel Core i9-13980HX Processor (E-cores up to 4.00 GHz P-cores up to 5.60 GHz)
【Evolutionary Core: AMD Ryzen AI Flagship】 Unleash the future with the revolutionary AMD Ryzen AI Max+ 395 APU. Featuring a 16-core/32-thread Zen 5 design with an amazing 64MB L3 cache and a turbo frequency up to 5.1 GHz. This is the industry's most powerful x86 integrated processor, marking a milestone in Mini PC performance.

Bundle Includes: Nikon Z5 II Full-Frame Mirrorless Camera | 24.5MP, EXPEED 7 Processor, 4K UHD Video, 7.5-Stop VR, AI-Powered Autofocus | Ideal for Photography and Videography Enthusiasts, Nikon Z 180-600mm, 64GB SF-G TOUGH Series UHS-II SDXC Memory Card, 3 Piece 95mm Filter Kit, Nikon EN-EL15C Replacement Battery, Large Padded Camera Bag, HDMI Micro Cable, Flexible Tripod, USB-C Cable, USB-C Adapter, External Charger, Deluxe Cleaning Kit, Hand Strap, Memory Card Wallet, Memory Card Reader + M
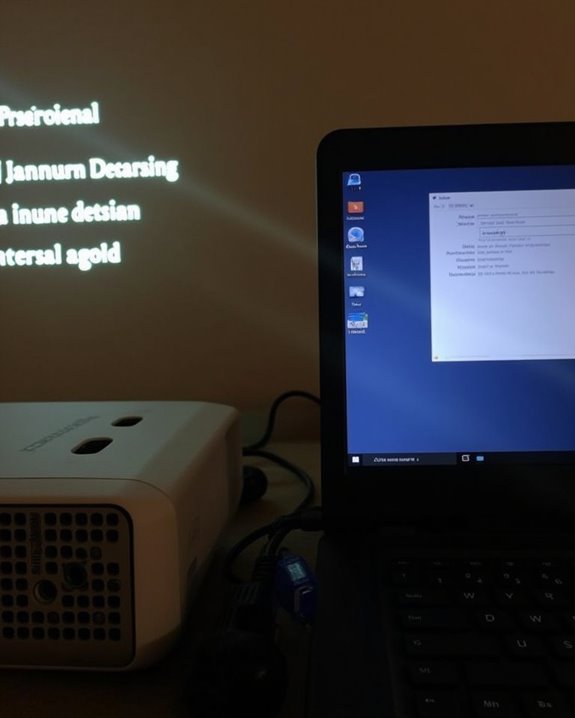
Resolving Resolution and Display Mode Issues
When your projector isn’t displaying your laptop’s screen correctly, it’s often due to mismatches in resolution, display mode, or signal format, so it’s important to adjust these settings for proper compatibility. Set your laptop’s resolution to match the projector’s native resolution, such as 1024×768 (XGA), to avoid display issues or image distortion, and check display scaling or aspect ratio settings to prevent stretching or black borders. Use Windows display settings or graphics driver utilities to select standard resolutions and refresh rates, typically 60Hz, that align with your projector’s specifications. Selecting the appropriate display mode—Duplicate, Extend, or Second screen only—ensures the laptop outputs a compatible signal. Remember, correct settings improve image clarity, extend projector bulb lifespan, and compensate for varying ambient lighting conditions. Resolution compatibility issues are a common cause of unreadable text or poor display quality when connecting a laptop to a projector or smartboard.
Recommended Products

Add up to 16 additional InstaShow Buttons and holder to your existing InstaShow system – enables additional wireless HDMI connections to the InstaShow host that enable presenters to share the screen with a touch of a button
True 4K Integration: This advanced MP1 Max 4K Projector combines a hybrid Triple L@ser + LED engine with 3100 ISO Lumens brightness for ultra-clear daytime viewing. Supporting 110% BT.2020 color gamut and professional color accuracy, it delivers vivid, true-to-life visuals in any environment.

True 4K Integration: This advanced MP1 Max 4K Projector combines a hybrid Triple Laser + LED engine with 3100 ISO Lumens brightness for ultra-clear daytime viewing. Supporting 110% BT.2020 color gamut and ΔE<1 professional color accuracy, it delivers vivid, true-to-life visuals in any environment.
Restarting and Power Cycling Devices
If adjusting your laptop’s resolution and display settings hasn’t resolved the connection issue, restarting and power cycling both devices is a direct way to address lingering hardware or software glitches that may be disrupting the signal between the projector and your laptop. Power cycling is especially important for resetting device states, which is vital for both wired and wireless connectivity scenarios. To maximize effectiveness, ensure you disconnect all accessories—such as adapters, docks, and external peripherals—before shutting down. Wait at least 10–20 seconds after powering off, allowing internal components, including capacitors and firmware, to fully reset. Checking for status or indicator LED lights on the projector can also help you quickly identify if the device is properly powered or if there is a hardware fault. After restarting, verify that the projector’s input source matches your laptop’s output, and consider ambient lighting conditions, which may impact projected image visibility. Follow this process:
- Power off laptop and projector completely
- Remove all accessories and peripherals
- Wait 10–20 seconds before restarting
- Confirm correct input source and full power on
Examining Port and Hardware Integrity
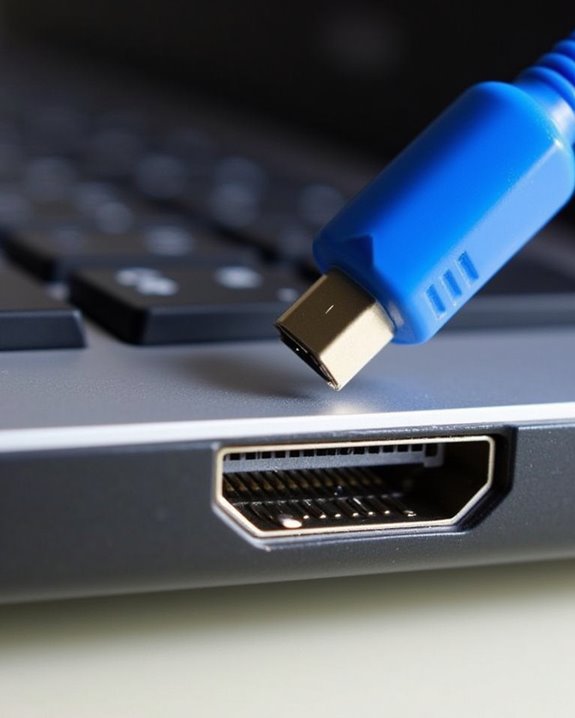
Several key factors can impact the physical connection between your laptop and projector, making it essential to carefully examine both port and hardware integrity before moving on to more advanced troubleshooting steps. First, check the type of cable used—HDMI, VGA, or DisplayPort—and confirm it matches the ports on both devices, ensuring adapters are compatible. Inspect cables for visible damage or excessive length, as poor-quality or damaged cables can interrupt both video and sound system integration. Securely plug in all connections, and re-seat cables if necessary. Examine the ports for security and cleanliness, testing each with different cables if needed. Before proceeding further, try switching the input source on the projector to ensure that it is set to receive the signal from your laptop. While wireless connectivity bypasses these issues, most wired setups require careful hardware compatibility checks, including updated drivers and firmware, to ensure stable operation and seamless integration.
Frequently Asked Questions
Can I Connect My Laptop to a Projector Wirelessly?
You can connect your laptop to a projector wirelessly if both devices support wireless connectivity. Check for Wi-Fi or Bluetooth pairing options, install any required software, and guarantee both devices are on the same network for seamless screen sharing.
Why Does My Projector Show a “No Signal” Message With Some Laptops?
Ever wonder why your projector says “no signal” with certain laptops? It’s usually due to cable compatibility issues or incorrect display settings. Make sure you’ve got the right cable and adjust your display modes or resolution.
Do I Need Special Software to Use a Projector With My Laptop?
You usually don’t need special software—built-in OS support covers most projector connections. However, software compatibility or driver updates might be needed for wireless projection, advanced features, or certain USB connections, depending on your projector and laptop models.
Can Projector Connection Issues Be Caused by Antivirus or Firewall Settings?
Did you know over 60% of wireless display issues are due to antivirus interference or firewall blocking? You’ll often need to adjust security settings or add exceptions to let your projector connect smoothly to your laptop.
How Can I Mirror My Laptop Audio Through the Projector’S Speakers?
To mirror your laptop audio through the projector’s speakers, set the audio output to the projector in Windows sound settings. Double-check your speaker setup on both devices, and make certain HDMI audio is enabled for seamless sound transfer.